The Cost of Email Mistakes: 5 Case Studies You Need to Know

The Cost of Email Mistakes: 5 Case Studies You Need to Know

Email is a crucial communication tool for businesses, even in 2024. It’s simple and effective. But in its simplicity we can find ourselves complacent in how we use it. Or even who we send our emails to.

In this article, we’ll examine five real-life case studies where emails went wrong and caused significant problems for the organization that sent it. From exposing private information to damaging a company’s reputation, these examples highlight the potential risks of email errors. By understanding these incidents, businesses can learn the importance of proper email management and take steps to prevent similar mistakes. These case studies serve as a reminder that attention to detail is essential in all aspects of communication.

Case Study #1 – HBO Max’s “Integration Test Email” Incident

HBO says: "Yes, it was the intern"

In June 2021, HBO Max accidentally sent an “Integration Test Email #1” to a large number of its subscribers. As you can guess, the email was meant for internal testing but mistakenly went out to real customers. The incident caused widespread confusion and snark on social media. Some people pointed out the optics of mistakenly sending out an email to your entire client base, but most took the email fail in jest:

Tweet of someone that reads: "For the #1 Integration Test Email in ur life <3 @hbomax"

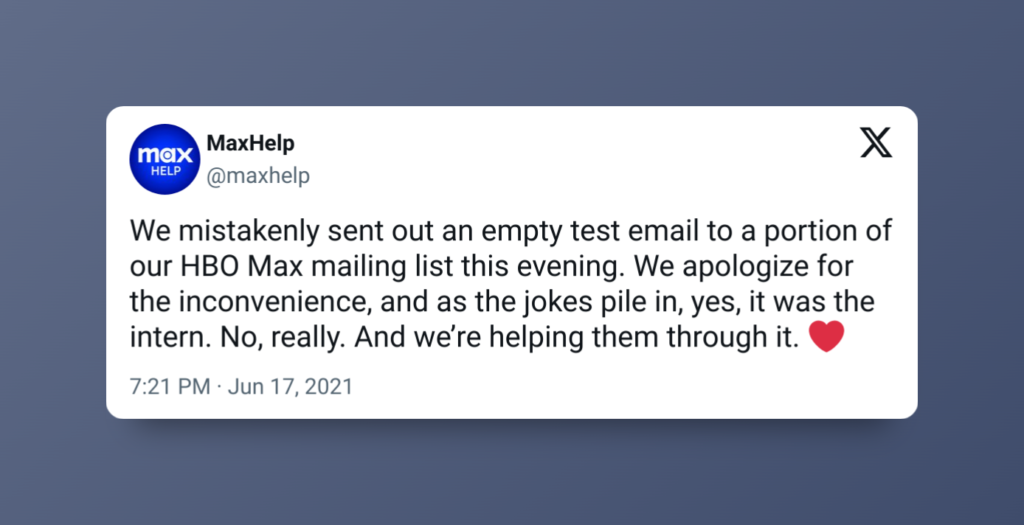
Hilariously, the official HBO Max twitter account had this explanation:

Tweet that reads: "We mistakenly sent out an empty test email to a portion of our HBO Max mailing list this evening. We apologize for the inconvenience, and as the jokes pile in, yes, it was the intern. No, really. And we’re helping them through it. ❤️"

We don’t blame the intern, but we do cast some judgment on their complete lack of email service testing! Using disposable email addresses for internal testing could have prevented this. But hey, we did at least get some genuine entertainment.  

Case Study 2 – Running Warehouse CC vs BCC

Header that reads "Running Warehouse vs BCC and CC"

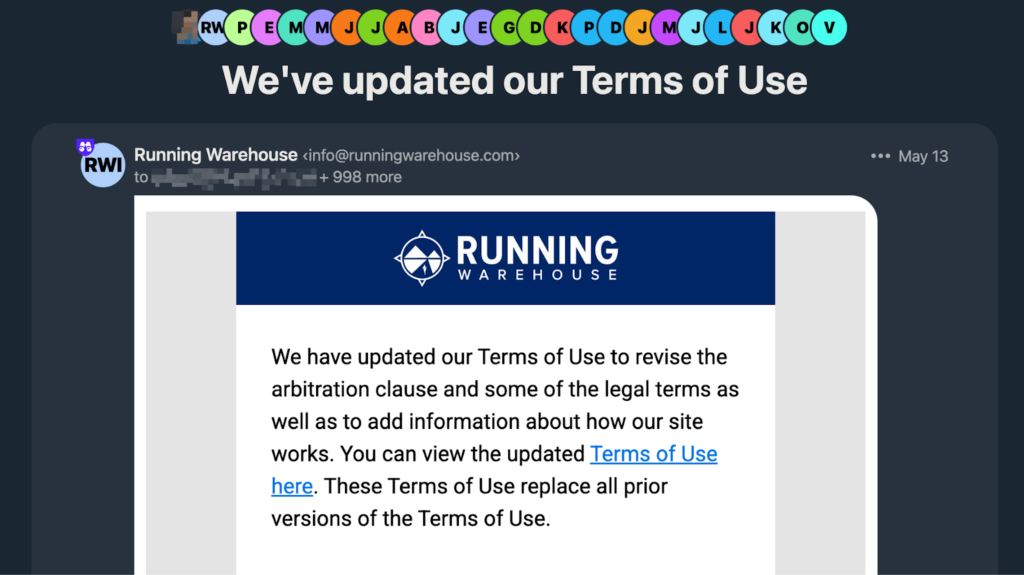
Sadly this case is not as harmless. On May 2024 RunningWarehouse, a discount shoe seller, sent out what should have been a routine email about updating their terms of service.

As you can see, this wasn’t just sent to a single customer. While not the entire customer list, approximately 999 customers is pretty indicative of an email testing batching failure. And it didn’t go unnoticed either, as there was at least one 30 post thread on arguably the internet’s largest running forum. 

The issue is still relatively fresh as of this writing, but it’s safe to assume that Running Warehouse did not intend to leak 1000 of its customer’s email addresses to each other due to someone mistaking CC vs BCC. And even more seriously, it could even be a violation of GDPR under “Sharing Email Addresses Without Consent” according to GDPR’s Data Breach Guidelines.

Case Study 3 – University Backtracks Acceptance Letters

Banner image that reads "Sorry, Wrong Recipient"

In January 2019, the University of South Florida St. Petersburg mistakenly sent acceptance emails to nearly 680 applicants, although only 250 had been accepted. As you can imagine this caused confusion, disappointment, and reputational damage to the university. The affected students and their families were left feeling misled, and the university had to invest considerable time and resources to address the fallout from the erroneous communication. 

You may not be shocked to hear that this isn’t the first time this has happened, as Columbia University also accidentally sent 270 emails to students who had not been officially accepted. 

These cases are a clear cut impact of email errors on institutional credibility and the importance of systematic verification before sending mass emails. Systems sending out emails absolutely need to ensure that the emails they intend to send are 100% accurate.

Case Study 4 – Australian Leaks Citizen Emails

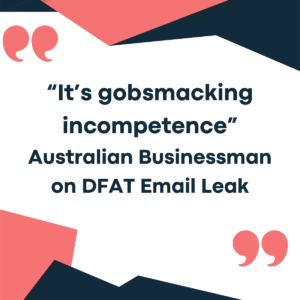
Banner text that reads "Australia vs BCC and CC"

In September 2020, an employee at Australia’s Department of Foreign Affairs and Trade (DFAT) accidentally exposed the personal details of almost 3,000 citizens by not using the BCC field in an email. This revealed the email addresses of Australians stranded abroad due to COVID-19 travel restrictions. The mishandling of this sensitive information led to major privacy concerns and required immediate action, such as attempting to recall the email and asking recipients to delete it. 

While not directly tied to a system, temporary email accounts could be used in place to ensure the intended audience and message gets to its audience intact. 

Case Study 5 – Serco Accidentally Shares Contract Tracers

Banner text that reads: "Serco vs BCC and CC"

In May 2020, Serco, a business services and outsourcing company, accidentally exposed the email addresses of nearly 300 newly recruited COVID-19 contact tracers by using the CC field instead of BCC. This breach of privacy led to concerns about the security of personal data and put the company’s data protection practices under scrutiny. Serco apologized and announced that they would review and update their procedures to prevent similar incidents in the future. 

Yet another case of manual implementations of email lists without temporary email addresses, email outbound trapping services, or message integrity verification (ie, only 1 person in the to field, nothing in the cc field).

Stop Customer Data Leaks & Company Reputation Hits With Mailsac

We offer several benefits that can help prevent incidents like the ones described above:

  • Enhanced Security: Temporary emails protect more than just attacks and spam. By using a disposable email address, you can send test emails either manually or via your system to ensure the message arrives exactly as intended.
  • Privacy Protection: Mailsac helps keep personal and sensitive email addresses private. This is especially useful for companies conducting internal tests or handling sensitive information. 
  • Minimized Clutter: Using temporary emails for one-time use reduces inbox clutter around testing. It’s beneficial for both individuals and teams, as it keeps testing cycles organized. You can even split your testing into campaigns by using unique email addresses you control with every testing cycle with our Zero-Setup subdomains feature.
  • Testing and Development: Mailsac is ideal for testing campaigns, systems, and internal communications. Temporary emails can be used during development phases to catch errors and ensure that only verified emails are sent to real users. We have fully featured APIs to integrate between any systems.

Disposable email services are an essential tool for modern communication. They can help prevent costly mistakes and ensure that PR issues around email remain in the past. For those looking to enhance their email security and efficiency, we’re an excellent choice. Give Mailsac a try today and see how it can benefit your email needs.

Streamline Email Testing in Healthcare with Mailsac

In healthcare, email communication intersects with patient care and data security. The margin for error is virtually nonexistent. Mailsac’s SaaS platform offers a robust email delivery suite, tailored to meet the rigorous demands of healthcare IT security, compliance, and operational efficiency. Mailsac has been integrated into systems at many enterprises in the healthcare industry, and has been relied on 24/7 for email testing for over a decade.

Enhanced Security and Compliance

Security Audits: Mailsac is built to pass IT department security audits, aligning with healthcare standards like HIPAA. Its infrastructure ensures patient data is safeguarded during email testing.

Data Privacy: With disposable email addresses, Mailsac supports testing that avoids exposing real patient information, maintaining privacy and compliance.

Collaborative Testing Environment

Unified Inbox: Devs and QAs can collaborate effectively using Mailsac’s unified inbox feature, which consolidates test emails from both persistent and temporary email accounts into a single view.

SSO Integration: Simplify access while enhancing security with Single Sign-On (SSO), allowing seamless integration into existing healthcare IT ecosystems.

Automated and Efficient Testing

CI/CD Integration: Mailsac’s API automates email tests within CI/CD pipelines, reducing manual effort and accelerating development cycles in fast-paced healthcare settings.

Scalable Solutions: Whether scaling up operations or integrating new services, Mailsac’s scalable platform adapts to the evolving needs of healthcare enterprises, ensuring email testing is never a bottleneck. There’s no need to manage server resources, deployments or upgrades.

Comprehensive Compatibility Testing

Device and Platform Coverage: Guarantee that critical communications are accessible across all devices and platforms used by healthcare professionals and patients alike.

Deliverability Assurance

Inbox Placement: Rigorous testing with Mailsac ensures healthcare emails achieve high deliverability, crucial for appointment reminders, test results, and other sensitive communications.

Optimizing Patient Communication

Email Optimization: Test and refine email content for clarity and engagement, ensuring messages to patients are both accessible and actionable.

Conclusion

For healthcare organizations, Mailsac offers a precision toolset for email testing — ensuring security, efficiency, and compliance while enhancing collaborative efforts between QA and development teams. Since 2012, Mailsac has practiced technical excellence and has helped hundreds of customers in healthcare manage their unique challenges.

10 Common Email Testing Pitfalls and How to Avoid Them

Email testing is an essential step in the QA process, ensuring that communications reach their intended recipients accurately and efficiently. However, even experienced QA teams can fall into common traps that undermine their efforts. Here are ten frequent email testing pitfalls and strategic ways to avoid them, streamlining your workflow and enhancing email reliability.

1. Ignoring Mobile Responsiveness

Pitfall:

Not testing how emails render on mobile devices, leading to formatting issues or poor user experiences.

Solution:

Use email testing tools that simulate various mobile devices and screen sizes to ensure your emails look great everywhere.

2. Overlooking Email Client Diversity

Pitfall:

Focusing on a single email client, ignoring the fact that your audience uses a wide range of email services with different rendering engines.

Solution:

Test emails across multiple clients (like Gmail, Outlook, Yahoo) to identify and fix client-specific issues.

3. Neglecting Deliverability Tests

Pitfall:

Assuming emails reach the inbox without verifying, risking them being flagged as spam.

Solution:

Conduct deliverability tests with tools that provide insights into spam scores and help optimize for better inbox placement.

4. Underestimating the Importance of Content Clarity

Pitfall:

Creating content that’s confusing or misleading, leading to poor user engagement.

Solution:

Ensure your messages are clear, concise, and actionable. Test variations to see which performs best in terms of user engagement.

5. Skipping Accessibility Checks

Pitfall:

Forgetting to make emails accessible to all users, including those with disabilities.

Solution:

Include text alternatives for images, use sufficient contrast ratios, and test with screen readers to ensure accessibility.

6. Failing to Test Links and Attachments

Pitfall:

Assuming all links and attachments work without thoroughly testing them, which could lead to a frustrating user experience.

Solution:

Manually check each link and attachment in different environments to ensure functionality and security.

7. Ignoring Email Load Times

Pitfall:

Overloading emails with high-resolution images or complex HTML, leading to slow loading times.

Solution:

Optimize images and streamline code to improve load times, ensuring a smooth user experience.

8. Forgetting to Validate Email Lists

Pitfall:

Sending tests to outdated or incorrect email addresses, skewing testing results.

Solution:

Regularly cleanse and validate your email lists to ensure accuracy and relevance.

9. Overlooking Privacy and Compliance

Pitfall:

Neglecting privacy laws and email regulations, risking legal issues and damaged reputation.

Solution:

Stay informed about regulations like GDPR and CAN-SPAM, ensuring your email practices are compliant.

10. Not Leveraging Automation

Pitfall:

Performing repetitive tests manually, which is time-consuming and prone to human error.

Solution:

Incorporate automated testing workflows to save time, reduce errors, and increase efficiency.

In Conclusion

By being mindful of these common pitfalls and implementing the suggested solutions, QA teams can significantly improve their email testing processes. Tools like Mailsac offer zero-configuration custom private domains, comprehensive Swagger REST APIs, and a generous free tier, making it easier for teams to test emails effectively and efficiently. Remember, the goal is not just to send emails but to ensure they are delivered, readable, and engaging across all devices and clients.

Have Playwright Automatically Write Tests For You with Codegen

Testing signup or password-reset emails? See Playwright email testing with Mailsac: a tested helper that waits for the right email, reads its code or link, and runs in parallel workers and GitHub Actions.

These days, we have better options than writing our test specs by hand.

The open source community has released a variety of frameworks to relieve us from that particular tedium: Cypress, Selenium and Pupeteer. And in this video companion guide, I’ll focus on Playwright. Specifically, how playwright can help automate a lot of the boilerplate involved in writing test specs with CodePen.

The video will do a quick walk you through playwright in itself. This article will provide the core login.spec.ts file I used and where to go from next.

But before we do that, it’s worth mentioning that efficient testing isn’t just about the right tools; it’s also about the seamless integration of these tools into your existing systems. That’s where Mailsac comes in. Our platform offers unique capabilities for email testing within your automated workflows, making it an excellent complement to Playwright for end-to-end testing solutions.

With Mailsac, you can ensure not just the functionality but also the integrity of email interactions in your applications, all within the automation framework you’ll establish with Playwright.

So, What Is Playwright?

Playwright is an open-source automation library created by Microsoft. It’s designed to enable developers and testers to write reliable and efficient tests for web applications.

It’s cross platform and officially compatible with the major browsers.

Diving Into Codegen

Start by installing playwright inside your project

npm init playwright@latest

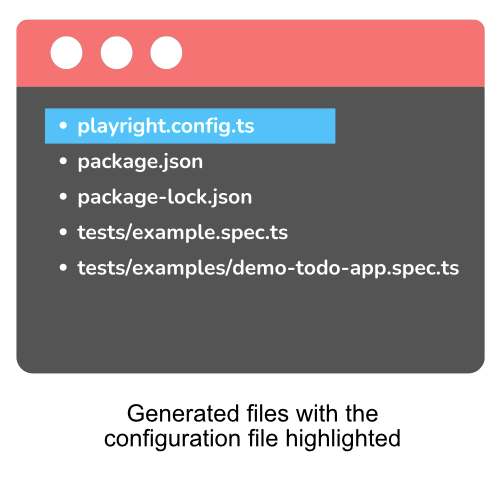
I’ll be using the defaults for this guide. After installation you’ll have these files generated in your project:

Files generated
playwright.config.ts
package.json
package-lock.json
tests/
example.spec.ts
tests-examples/
demo-todo-app.spec.ts
For more: https://playwright.dev/docs/test-configuration

Putting Codegen Through Its Paces

First Run

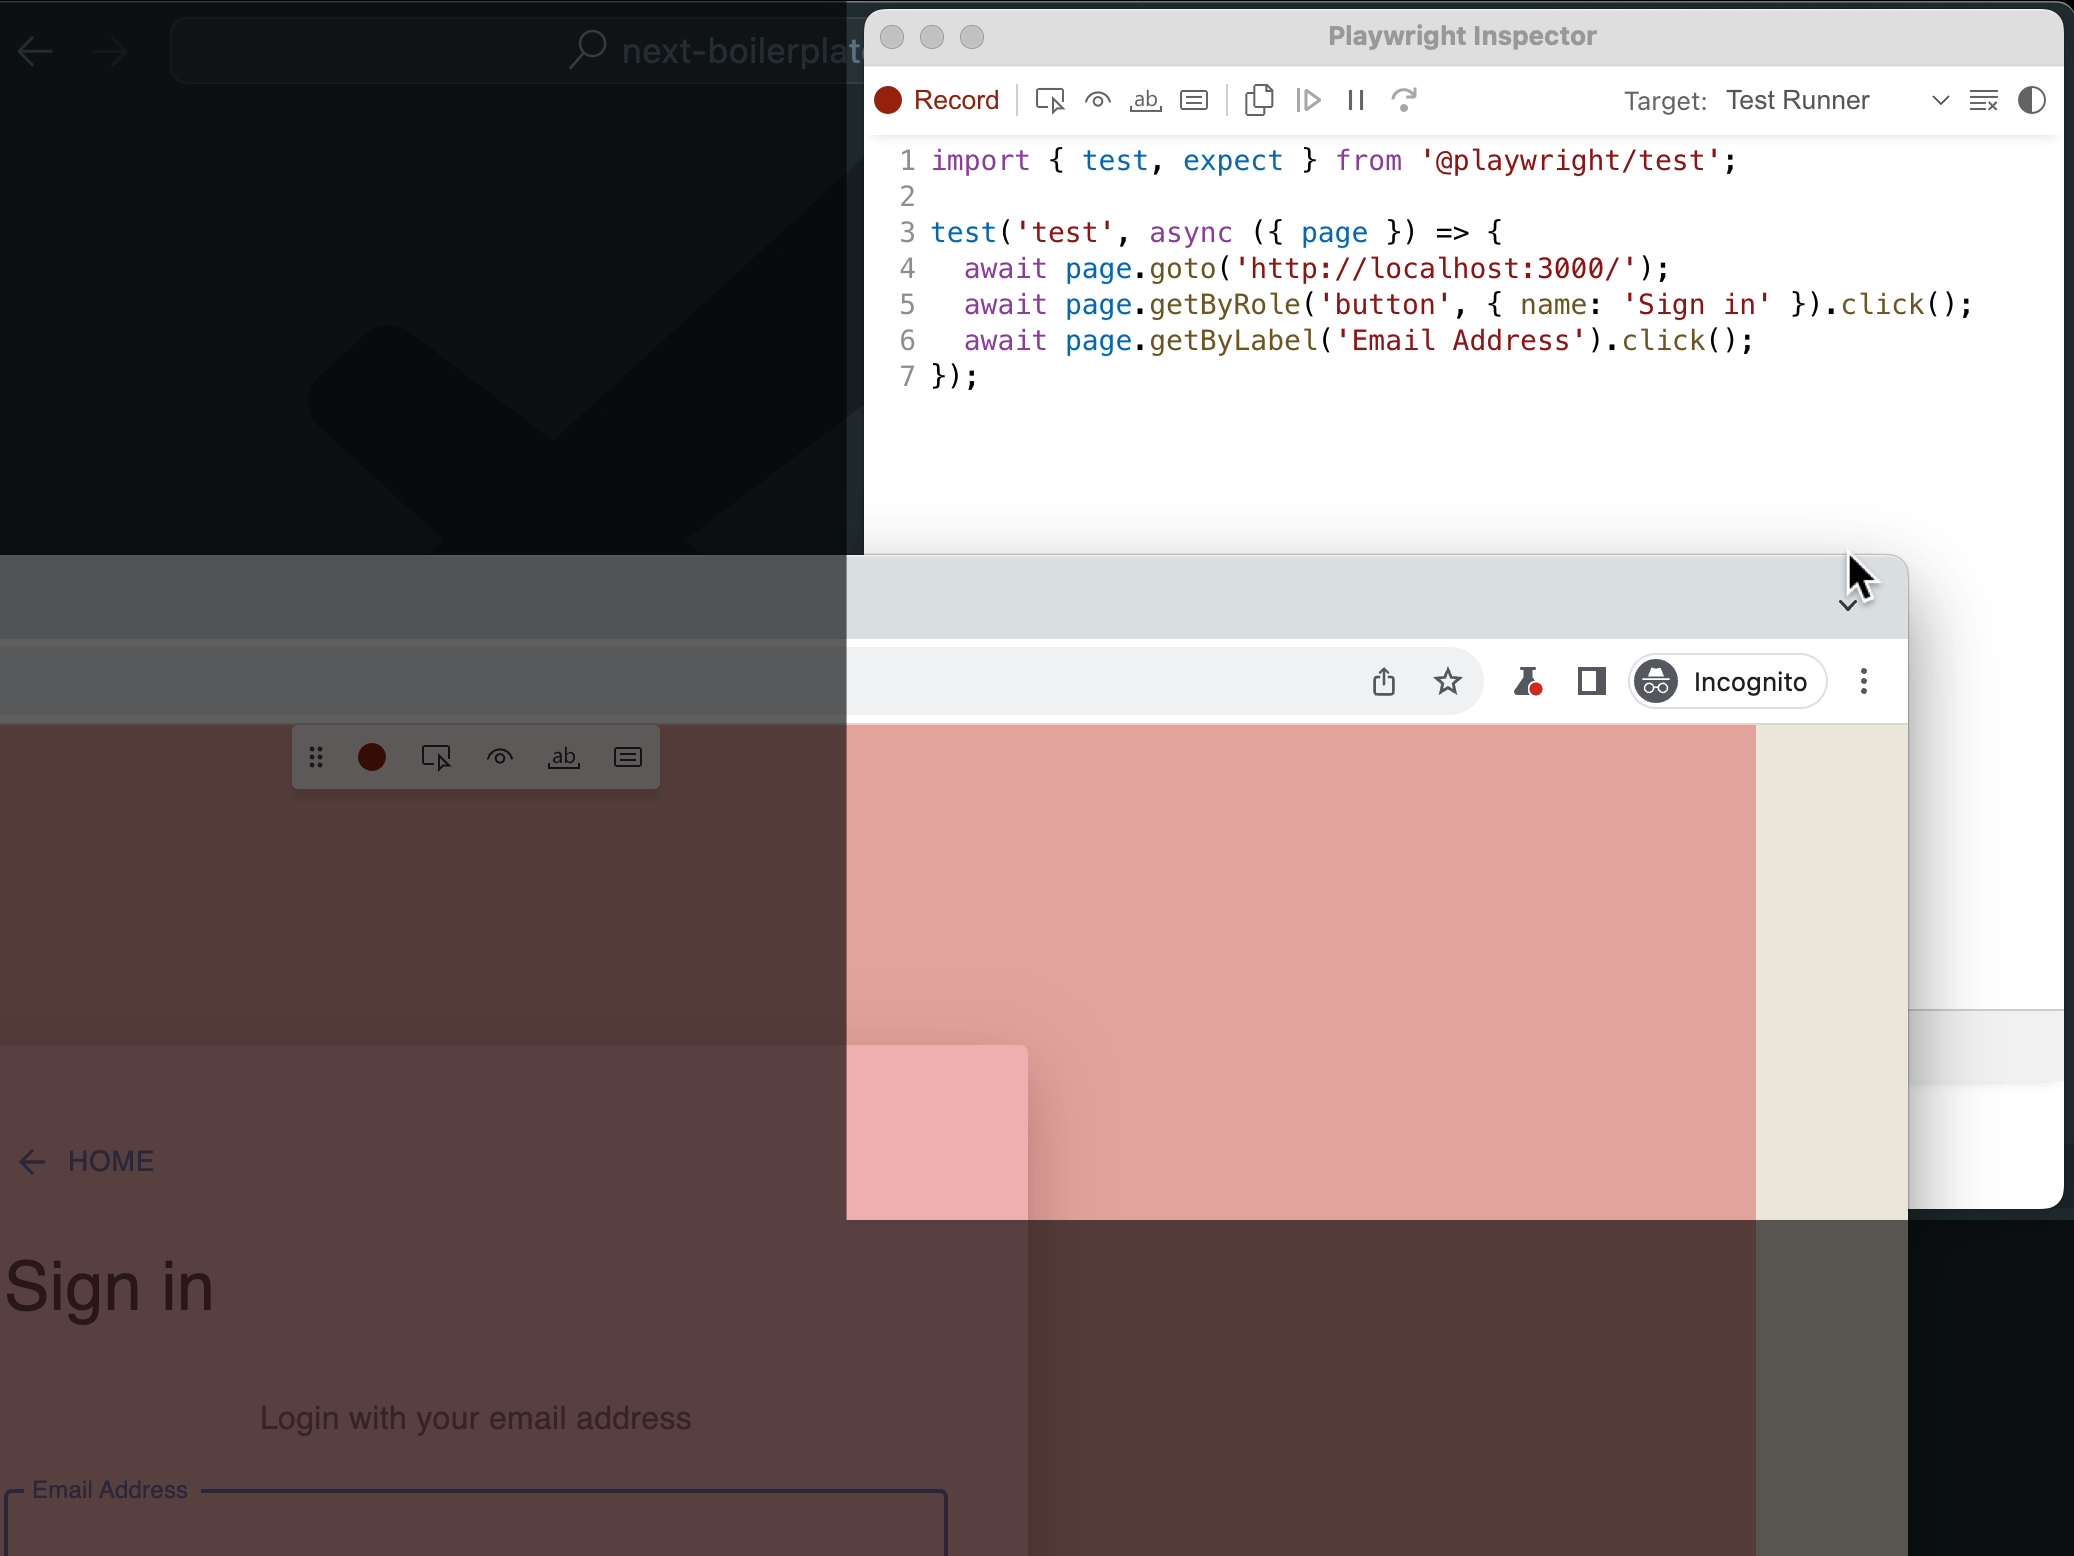
Fire up codegen via the built in console

npx playwright codegen

As you click around your application you’ll see codegen record each click based on its css class.

It will build each line as you go about your test. In our video, we perform a login with an incorrect set of credentials and a correct set.

Our login.spec.ts file

Before our manual edits, this is what codegen generated for us:

import { test, expect } from '@playwright/test';

test('test', async ({ page }) => {
  await page.goto('http://localhost:3000/');
  await page.getByRole('button', { name: 'Sign in' }).click();
  await page.getByLabel('Email Address').click();
  await page.locator('form div').filter({ hasText: 'Email AddressEmail Address' }).getByRole('paragraph').click();
  await page.getByLabel('Email Address').click();
  await page.getByLabel('Email Address').fill('wrongemail@gmail.com');
  await page.getByLabel('Email Address').press('Tab');
  await page.getByLabel('Password').fill('password');
  await page.getByLabel('Password').press('Enter');
  await page.getByLabel('Email Address').click();
  await page.getByLabel('Email Address').fill('mailsac.demo@gmail.com');
  await page.getByLabel('Email Address').press('Tab');
  await page.getByLabel('Password').fill('password123');
  await page.getByLabel('Password').press('Enter');
  await page.getByRole('button', { name: 'Settings' }).click();
  await page.getByText('Note: Your email mailsac.demo').click({
    button: 'middle'
  });
  await page.getByRole('button', { name: 'Next boilerplate' }).click();
});

All we had to do was manually add was the highlighted lines (13 and 19) to turn it into a real test:

import { test, expect } from '@playwright/test';

test('test', async ({ page }) => {
  await page.goto('http://localhost:3000/');
  await page.getByRole('button', { name: 'Sign in' }).click();
  await page.getByLabel('Email Address').click();
  await page.locator('form div').filter({ hasText: 'Email AddressEmail Address' }).getByRole('paragraph').click();
  await page.getByLabel('Email Address').click();
  await page.getByLabel('Email Address').fill('wrongemail@gmail.com');
  await page.getByLabel('Email Address').press('Tab');
  await page.getByLabel('Password').fill('password');
  await page.getByLabel('Password').press('Enter');
  await expect(page).toHaveURL('http://localhost:3000/login');
  await page.getByLabel('Email Address').click();
  await page.getByLabel('Email Address').fill('mailsac.demo@gmail.com');
  await page.getByLabel('Email Address').press('Tab');
  await page.getByLabel('Password').fill('password123');
  await page.getByLabel('Password').press('Enter');
  await expect(page).toHaveURL('http://localhost:3000/home');
  await page.getByRole('button', { name: 'Settings' }).click();
  await page.getByText('Note: Your email mailsac.demo').click({
    button: 'middle'
  });
  await page.getByRole('button', { name: 'Next boilerplate' }).click();
});

Running the Test

Running the test by default shows no visual progress. But if you’d like to see the browser run through your steps visually, you’ll need to issue the command:

npx playwright test --headed

Where to go next

The most natural next step is integrating playwright tests with a continuous integration platform like Travis or Github Actions. Plugging playwright into a CI system like Github Actions is fully supprted by playwright natively.

Another possible progression is using playwright to test critical paths in your application like user registration or password reset flows. We have a full guide on how to do that with another framework, Cypress.

If you want us to explore how you can integrate playwright with email testing and Github Actions or any other potential playwright integrations, let us know on our forums. We’ve only scratched the very surface of what playwright can do.

Until next time.

Email testing in CI/CD pipelines: a step-by-step guide with GitHub Actions and GitLab CI

Every signup, password reset and invite flow ends in an email, and that email is the step most end-to-end suites skip. This guide adds it to your pipeline. You will test four things about the email your app sends, run those tests in two layers (a local SMTP catcher on every pull request, and hosted Mailsac inboxes for capture and real-delivery checks), and wire both into GitHub Actions and GitLab CI.

The complete project is the playwright-signup-ci example in Mailsac’s integration-test examples repository: a small Express app that sends a verification link and code, one Playwright test, and both CI configurations. Every code block below is copied from it. Clone it, or copy the pieces into your own repository.

What to test in an email

Four things break, roughly in this order:

  1. The link. The URL in the email must open the right page with a valid token. The classic bug is an email that says http://localhost:3000/verify?... because the deployed environment inherited a development APP_URL.
  2. The code. The 6-digit code in the email must be the one the app accepts, and it must still be accepted after the email has been rendered, wrapped and copied.
  3. The content. The subject, sender and recipient are right, there is a plain-text part, and no {{firstName}} placeholders leak through.
  4. Delivery. The email actually leaves the app through your email provider, with the credentials, sending domain and DNS records (SPF and DKIM) you ship with, and lands in a real mailbox.

The first three can be tested without any mail leaving CI. The fourth cannot. That is why this guide uses two layers.

Two layers, three CI jobs

Layer CI job Runs Mail goes to Proves
Local SMTP catcher mailpit every pull request a Mailpit service container beside the app, port 1025 the app sends the right email with a working link and code
Hosted test inbox mailsac-capture every run where MAILSAC_API_KEY is set Mailsac Email Capture: the app’s SMTP points at capture.mailsac.com:5587; the test reads the message over the Mailsac API the same, with inboxes that any runner or person can read from anywhere
Hosted test inbox real-delivery pushes to main, a daily schedule, manual runs your deployed staging app sends through its real provider to a Mailsac inbox delivery works: provider credentials, sending domain, SPF and DKIM

The local layer is fast and never leaves CI. The hosted layer catches what a local catcher cannot: expired provider credentials, DNS mistakes, a throttled or blocked sending domain, and templates that only break in production. The test code is identical in all three jobs; only environment variables change.

The example app and the test

The app under test is app/server.js: an Express form at / that takes an email address, then sends a message containing a confirmation link (/verify?token=...) and a 6-digit code with Nodemailer. It reads SMTP_HOST, SMTP_PORT, SMTP_SECURE, SMTP_USER and SMTP_PASS from the environment, plus APP_URL for the link and MAIL_FROM for the sender, so the same code sends to Mailpit, to Mailsac Email Capture, or to your real provider without changes.

The test reaches inboxes through one small interface in tests/inbox.ts. Excerpt from tests/inbox.ts (the interface, the address generator and the backend switch):

export interface TestInbox {
  /** A new, unique address for one test. */
  newAddress(prefix?: string): string;
  /** Poll until an email for `address` arrives (optionally matching the subject). */
  waitForEmail(address: string, opts?: { subject?: string | RegExp; timeoutMs?: number }): Promise<ReceivedEmail>;
  /** Remove the message after the test, so private inboxes stay tidy. */
  cleanup(address: string, id: string): Promise<void>;
}

const unique = (prefix: string) =>
  `${prefix}-${Date.now().toString(36)}-${randomBytes(4).toString('hex')}`.toLowerCase();

// ...

export const testInbox = (): TestInbox => (process.env.INBOX === 'mailpit' ? new MailpitInbox() : new MailsacInbox());

MailsacInbox builds addresses on MAILSAC_DOMAIN (default mailsac.com) and uses three REST calls, each with your key in the Mailsac-Key header:

  • GET https://mailsac.com/api/addresses/{email}/messages lists the inbox, newest first, with a links array per message that Mailsac extracted from the text and HTML. Nothing has to be created before your app sends to the address.
  • GET https://mailsac.com/api/text/{email}/{messageId} returns the plain text, which is where the code is matched.
  • DELETE https://mailsac.com/api/addresses/{email}/messages/{messageId} removes the message when the test is done.

The wait is a plain polling loop. Excerpt from tests/inbox.ts (MailsacInbox.waitForEmail):

  async waitForEmail(address: string, { subject, timeoutMs = 60_000 }: { subject?: string | RegExp; timeoutMs?: number } = {}) {
    const inbox = encodeURIComponent(address);
    const deadline = Date.now() + timeoutMs;
    while (Date.now() < deadline) {
      const messages: Array<{ _id: string; subject: string; links?: string[] }> =
        await (await this.api(`/addresses/${inbox}/messages`)).json();
      const message = messages.find((m) => matches(m.subject || '', subject));
      if (message) {
        const text = await (await this.api(`/text/${inbox}/${encodeURIComponent(message._id)}`)).text();
        return { id: message._id, subject: message.subject, text, links: message.links?.length ? message.links : extractLinks(text) };
      }
      await sleep(2_000);
    }
    throw new Error(`No email for ${address} within ${timeoutMs / 1000}s`);
  }

MailpitInbox does the same against a local Mailpit at MAILPIT_URL (default http://localhost:8025): GET /api/v1/search?query=to:"{address}", GET /api/v1/message/{ID} and DELETE /api/v1/messages, polling every 500 ms for up to 30 seconds. The whole file is about 110 lines and needs nothing beyond Node’s built-in fetch.

The test itself is tests/signup.spec.ts, complete:

// End-to-end signup verification: sign up with a fresh address, wait for the
// verification email, then confirm the account with the link and with the code.
import { test, expect } from '@playwright/test';
import { testInbox } from './inbox';

const inbox = testInbox();

test.describe('signup verification email', () => {
  test('arrives and its link verifies the account', async ({ page }) => {
    const address = inbox.newAddress('signup-link');

    await page.goto('/');
    await page.getByLabel('Email').fill(address);
    await page.getByRole('button', { name: 'Sign up' }).click();
    await expect(page.getByRole('heading', { name: 'Check your email' })).toBeVisible();

    const email = await inbox.waitForEmail(address, { subject: 'Confirm your email address' });
    // assert on content, not only on arrival
    expect(email.text).toContain('Confirm your email address');
    const link = email.links.find((l) => l.includes('/verify?token='));
    expect(link, 'verification link in the email').toBeTruthy();

    await page.goto(link!);
    await expect(page.getByRole('heading', { name: 'Email verified' })).toBeVisible();
    await expect(page.getByText(address)).toBeVisible();

    await inbox.cleanup(address, email.id);
  });

  test('arrives with a 6-digit code that verifies the account', async ({ page }) => {
    const address = inbox.newAddress('signup-code');

    await page.goto('/');
    await page.getByLabel('Email').fill(address);
    await page.getByRole('button', { name: 'Sign up' }).click();

    const email = await inbox.waitForEmail(address, { subject: 'Confirm your email address' });
    const code = email.text.match(/\b(\d{6})\b/)?.[1];
    expect(code, '6-digit code in the email').toMatch(/^\d{6}$/);

    await page.getByLabel('6-digit code').fill(code!);
    await page.getByRole('button', { name: 'Verify' }).click();
    await expect(page.getByRole('heading', { name: 'Email verified' })).toBeVisible();

    await inbox.cleanup(address, email.id);
  });
});

playwright.config.ts starts the example app unless APP_URL points at a deployed one, allows one retry on CI, writes an HTML report on CI, and sets the test timeout above the 60-second email wait so a missing email fails with the helper’s clear message rather than a generic timeout:

import { defineConfig } from '@playwright/test';

const PORT = Number(process.env.PORT || 3000);

export default defineConfig({
  testDir: './tests',
  timeout: 90_000,
  retries: process.env.CI ? 1 : 0,
  reporter: process.env.CI ? [['list'], ['html', { open: 'never' }]] : 'list',
  use: { baseURL: process.env.APP_URL || `http://localhost:${PORT}` },
  // Starts the example app. In your project, point baseURL at your own app or staging URL
  // and remove webServer if the app is already running.
  webServer: process.env.APP_URL
    ? undefined
    : { command: 'node app/server.js', url: `http://localhost:${PORT}`, reuseExistingServer: !process.env.CI },
});

Run it locally

After cd playwright-signup-ci, npm ci and npx playwright install chromium, the three ways to run it are, from the example’s README:

With Mailpit, no account needed:

docker run -d -p 1025:1025 -p 8025:8025 axllent/mailpit
INBOX=mailpit SMTP_HOST=localhost SMTP_PORT=1025 npx playwright test

With Mailsac, sending through Email Capture, which keeps every message in Mailsac instead of delivering it:

export MAILSAC_API_KEY=...            # your API key
export SMTP_HOST=capture.mailsac.com SMTP_PORT=5587 SMTP_USER=your-mailsac-username SMTP_PASS=$MAILSAC_API_KEY
npx playwright test

Against your deployed app, which sends through your real provider to a Mailsac inbox:

APP_URL=https://staging.example.com MAILSAC_API_KEY=... npx playwright test

The example’s .env.example lists the same variables for a local .env; the only secret among them is the API key, which Email Capture also uses as the SMTP password.

GitHub Actions

Add the repository secret MAILSAC_API_KEY and the repository variables MAILSAC_USERNAME (for Email Capture), MAILSAC_DOMAIN (your private domain, optional) and STAGING_URL (for the real-delivery job) under Settings, Secrets and variables, Actions. Save this as .github/workflows/email-tests.yml. It is the example’s workflow file without the paths filters, the defaults.run.working-directory block, the cache-dependency-path lines, the two working-directory: . lines and the folder prefix on the report path, which exist there only because the example sits in the playwright-signup-ci/ subfolder of a larger repository:

name: Playwright signup email tests (playwright-signup-ci)

on:
  pull_request:
  push:
    branches: [main]
  schedule:
    - cron: "17 6 * * *" # daily real-delivery check
  workflow_dispatch:

jobs:
  # 1. Every pull request: a local SMTP catcher. Fast, free, nothing leaves CI.
  #    Proves the app sends the right email with a working link and code.
  mailpit:
    runs-on: ubuntu-latest
    services:
      mailpit:
        image: axllent/mailpit:latest
        ports:
          - 1025:1025
          - 8025:8025
    env:
      INBOX: mailpit
      SMTP_HOST: localhost
      SMTP_PORT: "1025"
    steps:
      - uses: actions/checkout@v4
      - uses: actions/setup-node@v4
        with:
          node-version: 22
          cache: npm
      - run: npm ci
      - run: npx playwright install --with-deps chromium
      - run: npx playwright test
      - uses: actions/upload-artifact@v4
        if: failure()
        with:
          name: playwright-report-mailpit
          path: playwright-report

  # 2. Hosted inboxes with Mailsac Email Capture: the app sends to capture.mailsac.com
  #    and the test reads the message over the Mailsac API from any runner.
  #    Needs the repository secret MAILSAC_API_KEY and variable MAILSAC_USERNAME.
  mailsac-capture:
    runs-on: ubuntu-latest
    env:
      MAILSAC_API_KEY: ${{ secrets.MAILSAC_API_KEY }}
      MAILSAC_DOMAIN: ${{ vars.MAILSAC_DOMAIN }}
      SMTP_HOST: capture.mailsac.com
      SMTP_PORT: "5587"
      SMTP_USER: ${{ vars.MAILSAC_USERNAME }}
      SMTP_PASS: ${{ secrets.MAILSAC_API_KEY }}
    steps:
      - name: Skip when Mailsac is not configured
        id: configured
        run: echo "ok=${{ env.MAILSAC_API_KEY != '' }}" >> "$GITHUB_OUTPUT"
      - uses: actions/checkout@v4
        if: steps.configured.outputs.ok == 'true'
      - uses: actions/setup-node@v4
        if: steps.configured.outputs.ok == 'true'
        with:
          node-version: 22
          cache: npm
      - run: npm ci
        if: steps.configured.outputs.ok == 'true'
      - run: npx playwright install --with-deps chromium
        if: steps.configured.outputs.ok == 'true'
      - run: npx playwright test
        if: steps.configured.outputs.ok == 'true'

  # 3. Real delivery, daily and on main: sign up on your deployed staging app, which sends
  #    through your real email provider (SES, SendGrid, Postmark...) to a Mailsac inbox.
  #    Catches expired provider credentials, DNS/SPF/DKIM problems and blocked sending domains.
  #    Needs MAILSAC_API_KEY and the variable STAGING_URL. A private Mailsac domain
  #    (MAILSAC_DOMAIN) keeps the mail from real signups out of public inboxes.
  real-delivery:
    if: github.event_name != 'pull_request'
    runs-on: ubuntu-latest
    env:
      MAILSAC_API_KEY: ${{ secrets.MAILSAC_API_KEY }}
      MAILSAC_DOMAIN: ${{ vars.MAILSAC_DOMAIN }}
      APP_URL: ${{ vars.STAGING_URL }}
    steps:
      - name: Skip when staging is not configured
        id: configured
        run: echo "ok=${{ env.MAILSAC_API_KEY != '' && env.APP_URL != '' }}" >> "$GITHUB_OUTPUT"
      - uses: actions/checkout@v4
        if: steps.configured.outputs.ok == 'true'
      - uses: actions/setup-node@v4
        if: steps.configured.outputs.ok == 'true'
        with:
          node-version: 22
          cache: npm
      - run: npm ci
        if: steps.configured.outputs.ok == 'true'
      - run: npx playwright install --with-deps chromium
        if: steps.configured.outputs.ok == 'true'
      - run: npx playwright test
        if: steps.configured.outputs.ok == 'true'

Three things to notice:

  • mailpit starts Mailpit as a service container. On a Linux runner its ports are published on localhost, so the app sends to localhost:1025 and the test reads from localhost:8025. It needs no secrets, so it runs on every pull request, including ones from forks.
  • mailsac-capture runs the app inside the job with its SMTP pointed at Email Capture. SMTP_USER is your Mailsac username and SMTP_PASS is the API key. Mail to any recipient is captured into that recipient’s Mailsac inbox rather than delivered, and the test reads it with the same API it would use for real delivery. The first step checks whether the secret is present and every later step is skipped if not, so a fork without secrets gets a green skip instead of a failure.
  • real-delivery does not start the app at all. APP_URL is set from the STAGING_URL variable, so Playwright signs up on your deployed staging environment, which sends through whatever provider and domain it is configured with. That is the point of the job. It is limited to pushes, the daily schedule and manual runs, because pull requests from forks never see the secret anyway.

GitLab CI

Set MAILSAC_API_KEY (masked) and MAILSAC_USERNAME as CI/CD variables under Settings, CI/CD, Variables, add STAGING_URL and schedule a pipeline for the real-delivery job. GitLab reads .gitlab-ci.yml from the repository root, so the example keeps its copy in its folder as a template to copy to the root of your project. Complete:

# GitLab CI template for this example. GitLab reads .gitlab-ci.yml from the repository root:
# copy this file there in your own project (paths below assume the example is the project root).
# The same two layers on GitLab CI. Set MAILSAC_API_KEY (masked) and MAILSAC_USERNAME
# as CI/CD variables; STAGING_URL enables the scheduled real-delivery job.
default:
  image: mcr.microsoft.com/playwright:v1.63.0-noble
  before_script:
    - npm ci

email-tests:mailpit:
  services:
    - name: axllent/mailpit:latest
      alias: mailpit
  variables:
    INBOX: mailpit
    MAILPIT_URL: http://mailpit:8025
    SMTP_HOST: mailpit
    SMTP_PORT: "1025"
  script:
    - npx playwright test
  artifacts:
    when: on_failure
    paths: [playwright-report/]

email-tests:mailsac-capture:
  rules:
    - if: $MAILSAC_API_KEY
  variables:
    SMTP_HOST: capture.mailsac.com
    SMTP_PORT: "5587"
  script:
    - SMTP_USER="$MAILSAC_USERNAME" SMTP_PASS="$MAILSAC_API_KEY" npx playwright test

email-tests:real-delivery:
  rules:
    - if: $CI_PIPELINE_SOURCE == "schedule" && $MAILSAC_API_KEY && $STAGING_URL
  script:
    - APP_URL="$STAGING_URL" npx playwright test

In GitLab a service is reachable by its alias rather than localhost, so the app sends to mailpit:1025 and the test reads from mailpit:8025. Playwright’s Docker image already contains the browsers, which is why there is no playwright install step; its tag matches the @playwright/test version pinned in package.json (1.63.0), and the two must move together. The rules: blocks make the hosted jobs appear only when their variables exist, and the real-delivery job only on scheduled pipelines.

Handling secrets

  • The Mailsac API key is used only by the test runner, which runs in Node, and by the app’s SMTP transport. It never reaches the browser or the page under test.
  • The key is the SMTP password for Email Capture. MAILSAC_USERNAME is not a secret, but keep the key masked everywhere it appears.
  • Use one key per pipeline. Business plans and up have multiple named API keys, so a leaked key can be rotated without touching other pipelines.
  • Pull requests from forks do not get repository secrets. The mailsac-capture job skips itself when the key is empty, and real-delivery does not run on pull requests at all. In GitLab, mark the variables protected so only protected branches and schedules see them.
  • Treat test output as sensitive. The HTML report is uploaded only on failure and this config records no traces, screenshots or videos. If you enable traces, remember they capture the codes typed and the links opened, including password-reset links. Do not log email bodies.
  • Prefer a private domain (below) so the messages themselves are not readable by anyone who guesses an address.

Keeping email tests from flaking

Email tests fail for timing reasons far more often than for product reasons. These habits remove most of it:

  • A new address for every test. newAddress() builds one from a prefix, a base-36 timestamp and 4 random bytes, for example signup-link-mulu72uk-e3dd48fa@mailsac.com. Parallel workers and retries then never read each other’s mail, and you never have to ask which of five messages is yours. Never share one fixed inbox across tests.
  • Poll with a deadline, not a sleep. waitForEmail checks every 2 seconds and gives up after 60 seconds (every 500 ms for 30 seconds with Mailpit). A fixed sleep(10000) is both too slow on good days and too short on bad ones.
  • Match on more than “a message exists”. The test filters by subject. If your inbox can hold older mail, also record a timestamp before the trigger and ignore anything received earlier, as the Playwright tutorial does.
  • Set the test timeout above the email wait. The config uses 90 seconds against a 60-second wait. Otherwise Playwright’s generic timeout fires first and hides the useful error, which names the address and the deadline.
  • Assert on content, not only arrival. The test checks the subject text, the link path and the code format before using them.
  • Clean up. Each test deletes its message at the end. On Mailsac this keeps private inboxes inside the plan’s stored-message limit (1,000 on Indie, 5,000 on Business). Move cleanup into test.afterEach if you want it to run even when an assertion fails.
  • Retries are safe only because addresses are fresh. The config allows one retry on CI. A retry re-runs the whole test with a new address, so it cannot read the previous attempt’s email. For a slow provider, a longer deadline is the better fix.
  • Check the provider when nothing arrives. Sandbox and test modes on some providers accept the message and deliver nothing. The error tells you which address it waited for; compare it with the provider’s log.
  • Public inboxes are throttled. A busy suite pointed at @mailsac.com can see mail delayed by up to about a minute. Run busy suites on a custom domain, which also has higher inbound limits.

Private domain or public inbox

Where the test email goes decides who else can read it.

  • Public @mailsac.com addresses work on every plan, including the free one, with no setup, and are the default when MAILSAC_DOMAIN is unset. Anyone can open a public inbox on the Mailsac website, and messages are temporary. Use them for a first run and for made-up accounts only.
  • A private address (POST /api/addresses/{email}, one included free) is readable only by your account. It suits one fixed test account, not a fresh address per test.
  • A custom domain, on Indie ($18 a month) and up, gives every test its own private address. A zero-setup yourteam.msdc.co subdomain receives mail immediately; your own domain works once its DNS is verified. Set MAILSAC_DOMAIN and nothing else changes. It also gets past signup forms that reject well-known disposable-email domains.

Each received message, API call and webhook or WebSocket push counts as one Op. A test that polls every 2 seconds typically uses 3 to 6 Ops for a message that arrives within a few seconds, plus one per extra poll if delivery is slow. The free plan’s 1,500 covers a few hundred runs a month, and Indie’s 25,000 covers a delivery check on every merge for most teams. Turning on webhook or WebSocket forwarding for a private address or domain delivers each message for one Op and removes the polling.

Next steps

Create a free Mailsac account to get an API key, add it to your pipeline as a secret, and run the delivery check on your next merge.


The Complete Checklist for Email Testing in QA Projects

Email remains a critical communication tool in business, making its reliability and functionality crucial for a wide range of applications. For QA teams, ensuring that emails are sent, received, and displayed as intended across various environments and platforms is a non-negotiable part of the software development process. This checklist provides a comprehensive guide for QA professionals to thoroughly test email functionality, ensuring a seamless user experience.

1. Preparation and Planning

  • Define Objectives: Clearly outline what you need to test, such as deliverability, content, links, and attachments.
  • Identify Email Scenarios: List all the scenarios in which an email would be sent. This includes transactional emails, marketing emails, notifications, and any others specific to your application.
  • Understand the Audience: Know the email clients (e.g., Gmail, Outlook) and devices (e.g., smartphones, tablets) your audience uses.

2. Functional Testing

  • Deliverability: Ensure emails reach the recipient’s inbox, not the spam folder.
  • Send and Receive Verification: Confirm that emails are sent and received without errors in all scenarios.
  • Link and Attachment Testing: Check all links and attachments for correct functionality and security.
  • Formatting and Layout: Verify that emails display correctly across different email clients and devices.
  • Accessibility Testing: Ensure emails are accessible, including alternative text for images and readable fonts for those with visual impairments.

3. Content and Design Testing

  • Spelling and Grammar: Verify the accuracy of content, including spelling and grammar.
  • Branding Consistency: Ensure the email design aligns with your brand’s guidelines and messaging.
  • Responsive Design: Test emails on various screen sizes to ensure the design is responsive and elements are clickable.

4. Security and Compliance Testing

  • Data Protection: Confirm that personal data is handled securely, in compliance with laws like GDPR.
  • Email Authentication: Check for SPF, DKIM, and DMARC records to prevent phishing and ensure sender authenticity.

5. Performance Testing

  • Load Testing: Assess the system’s ability to handle high volumes of emails without performance degradation.
  • Speed Testing: Evaluate the time taken to send, receive, and load emails, ensuring it meets user expectations.

6. Integration and Automation Testing

  • Integration Checks: Verify that email functionality integrates seamlessly with other systems and workflows.
  • Automation Suitability: Identify processes that can be automated, such as regression tests for email functionalities.

7. User Acceptance Testing

  • Real User Simulation: Conduct tests that mimic real-user scenarios to ensure the email meets user needs and expectations.
  • Feedback Collection: Gather and incorporate feedback from actual users to refine email functionality.

Review

Email testing is a critical component of QA that ensures your application communicates effectively and reliably with users. By following this comprehensive checklist, QA teams can systematically address and rectify potential issues, enhancing the overall user experience.

Interested in simplifying and accelerating your email testing process? Mailsac offers a robust platform designed to streamline email testing for QA teams. With features like disposable email addresses, zero-setup custom domain support, and extensive API access, Mailsac enables you to focus on what matters most—delivering a flawless product. Try Mailsac for free today, getting test email in seconds, and discover how we can elevate your QA email testing to the next level.

Cypress Email Testing: Check Reset Links, Verification Emails and OTP Codes with Mailsac

Updated September 23, 2026 by Mailsac Engineering. Examples use Cypress 16 and @mailsac/cypress 0.1.0.

New to automated email tests? See how the Mailsac email testing API works: trigger an email, wait for it, and check the code or link.

Cypress email testing can cover the whole password-reset journey: request an email, receive it, open the correct link, set a new password, and sign in. The difficult part is making sure your test reads the message it just requested, rather than an older reset email or an unrelated notification.

The Mailsac Cypress integration handles that wait in Cypress’s Node process. Your application sends mail through its usual email provider; Mailsac receives it, and the integration reads the matching message through the Mailsac API. The API key stays out of the browser.

Start with the runnable example below, then connect the same pattern to your application. For real delivery, create a Mailsac account and use a test inbox whose message bodies your API key can read.

Run a complete password-reset test first

Use Node.js 22 or 24, the versions exercised in the package’s CI. Clone the published release and run:

git clone --branch v0.1.0 https://github.com/mailsac/cypress-mailsac.git
cd cypress-mailsac
npm ci
npm run test:e2e

The runner starts a small example app and a local Mailsac API fixture, runs Cypress headlessly, then stops the app. This default run needs no account, API key, or SMTP credentials. It sends no email and does not test delivery to the real Mailsac service.

The fixture deliberately contains an old password-reset email and a newer unrelated message. The correct email arrives after a delay. The test waits for it, follows its reset link, changes the password, verifies that the old password fails and the new password works, and checks that the reset link cannot be reused.

The example’s README also documents a separate SMTP mode. That mode sends a real message through your SMTP provider to a Mailsac inbox you control. Copy its .env.smtp.example to the ignored .env.smtp file, supply your SMTP settings and Mailsac key, then follow the two-terminal instructions. The app is a learning example with in-memory accounts, not a production authentication service.

Add Mailsac to your Cypress project

For the versions used in this guide:

npm install --save-dev cypress@16.1.0 @mailsac/cypress@0.1.0

Set MAILSAC_API_KEY in your local process environment or CI secret store. Do not prefix it with CYPRESS_, put it in Cypress.env() or config.env, or commit it.

Register the Node tasks in cypress.config.js. This example uses CommonJS configuration; merge these settings into your existing configuration and adjust baseUrl to your running app.

const { defineConfig } = require('cypress');
const { createMailsacTasks } = require('@mailsac/cypress/node');

module.exports = defineConfig({
  video: false,
  screenshotOnRunFailure: false,
  e2e: {
    baseUrl: 'http://localhost:3000',
    setupNodeEvents(on, config) {
      on('task', createMailsacTasks());
      return config;
    },
  },
});

Then add the command registration to cypress/support/e2e.js or cypress/support/e2e.ts:

import '@mailsac/cypress/commands';

The command passes message criteria to a Node task; only the resulting message data comes back to the test. Automatic failure screenshots and video are disabled here because password-reset tokens appear in URLs. Also avoid logging message bodies, links, or codes.

Wait for the right email and follow its reset link

Save this spec as cypress/e2e/password-reset.cy.js. It uses the routes, button labels, and subject from the example app. When applying it to your own app, change the inbox, subject, reset path, selectors, and assertions to match your implementation. Start your app before running Cypress and configure it to send to the chosen test inbox.

import { extractLink } from '@mailsac/cypress';

it('resets a password and signs in', () => {
  const email = 'your-private-test-inbox@mailsac.com';
  const newPassword = 'my-new-demo-password';
  let receivedAfter;

  cy.visit('/forgot-password');
  cy.get('input[name=email]').type(email);

  // Capture immediately before requesting the email.
  cy.then(() => { receivedAfter = new Date().toISOString(); });
  cy.contains('button', 'Send reset email').click();

  cy.then(() => cy.mailsacWaitForMessage({
    email,
    receivedAfter,
    subject: 'Reset your Example App password',
    timeoutMs: 60_000,
    pollIntervalMs: 1_000,
  })).then((message) => {
    const resetUrl = extractLink(message, {
      origin: new URL(Cypress.config('baseUrl')).origin,
      pathname: '/reset',
    });
    cy.visit(resetUrl, { log: false });
  });

  cy.get('input[name=password]').type(newPassword, { log: false });
  cy.contains('button', 'Update password').click();
  cy.contains('h1', 'Password updated').should('be.visible');
  cy.contains('a', 'Sign in').click();
  cy.get('input[name=email]').type(email);
  cy.get('input[name=password]').type(newPassword, { log: false });
  cy.contains('button', 'Sign in').click();
  cy.get('[role=status]').should('contain', 'signed in successfully');
});

With your app running and the test adapted to it, run:

npx cypress run --spec cypress/e2e/password-reset.cy.js

receivedAfter excludes older mail. Capturing it before the click also prevents a fast-arriving message from being excluded. An exact subject narrows the result; you can additionally match a sender with from, or use subjectIncludes for a subject substring. All supplied filters must match.

extractLink requires one distinct link with your app’s exact origin and reset path. It fails if the email has no matching link or several different matching links. That keeps a test from accidentally following a footer, help page, or unrelated website. If your sender wraps links in a tracking URL, disable tracking for these test messages or explicitly test that redirect flow.

Keep email tests reliable in CI

  • Bound the wait. The default is 30 seconds; the example allows 60. The maximum is 120 seconds, including requests and retries. A timeout should fail the test rather than wait indefinitely.
  • Separate parallel tests. Use a distinct inbox or a unique subject per test. A timestamp alone cannot distinguish simultaneous requests to one inbox. Keep the runner’s clock synchronized.
  • Use dedicated inboxes. Each poll checks the latest 100 messages. Avoid a busy shared catch-all. Polls and message reads consume Mailsac API operations; choose your interval and concurrency accordingly.
  • Protect reset links. Use a private inbox or owned domain for sensitive messages. The integration reads mail; it does not delete messages or change retention settings.

To run the cloned repository’s fixture example in GitHub Actions, no service secrets are needed:

name: Email test example
on: [push, pull_request]
permissions:
  contents: read
jobs:
  test:
    runs-on: ubuntu-latest
    steps:
      - uses: actions/checkout@v4
      - uses: actions/setup-node@v4
        with:
          node-version: 22
          cache: npm
      - run: npm ci
      - run: npm run test:e2e

For your own app’s live-delivery CI test, start the app and its mail sender, provide MAILSAC_API_KEY through the CI secret store, and run your adapted Cypress spec. Keep that explicit live test separate from the local fixture run.

Testing verification codes too

For an OTP flow, use extractCode(message) on the matching message to return one distinct standalone six-digit code, then enter it with { log: false }. The helper rejects missing or ambiguous codes and supports custom patterns. See the OTP example and API reference.

The original 2023 video remains available for historical reference. It predates this integration; use the package and code above for the current workflow.

Create your Mailsac account, install the Cypress integration, or explore the complete password-reset example.

November 2023 Release Notes

Throttling notices in every inbox

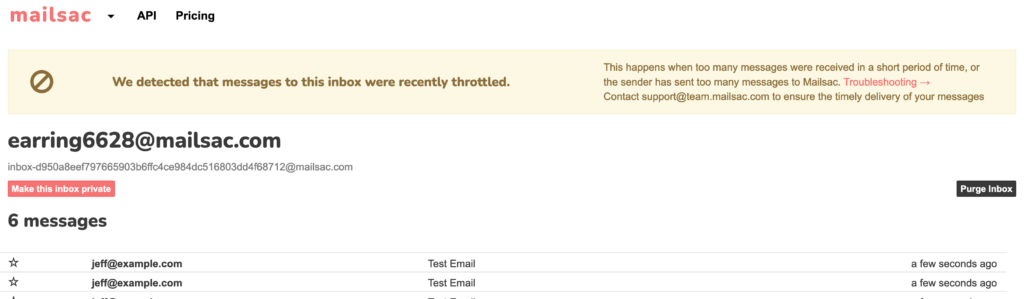
Custmers will start seeing informational messages in the inbox view https://mailsac.com/inbox/{{ email address }} when there has been throttling imposed on the inbox or sender to the inbox.

Paying customers will very rarely experience throttling. In almost all cases, throttling happens because they were sending to a public inbox, not a custom domain or private address.

We only throttle incoming messages to protect the stability of our service for all of our customers. These protections have been in place for years, but were not transparent to customers.

If you are on a paid plan and you are seeing throttling messages, reach out to support@team.mailsac.com, we can help you configure a custom domain or private addresses. These both can be done in seconds with no need for DNS changes.

If you are on our free tier and seeing these messages, this is a nudge for you to sign up for a paid plan. We would love to have you as a customer.

Updates and Fixes For October 2023

Unified Inbox, UI Modernization Efforts, and Maintenance Notifications

We do our best to be customer-focused by listening to our customer feedback and making sure your issues are addressed.

This month, we focused on UI issues that customers reported or we noticed when we were using our service.

Improved Maintenance Notifications

During a major database upgrade in September we noticed our maintenance notification on the website wasn’t always working properly. This resulted in customers seeing an unfriendly error.

From now on, customers will see a friendlier error page or API message when we are down for maintenance. That’s typically rare – once a year on average. We deploy often. Mailsac’s architecture has several load balancers and caches, and redundancies – we avoid stop-the-world events. But sometimes that’s unavoidable, and we hope it won’t be confusing.

Unified Inbox

The navigation bar for the Unified Inbox now works properly under Safari. It should no longer be cut-off (missing pagination buttons) in other browsers while viewing a message.

Starred messages for non-owned inboxes will now appear in the Unified Inbox.

UI Modernization

As noted in previous posts, we are migrating the entire Mailsac user interface to React and Next.js. After all pages are migrated, we will give the styling a facelift.

For now the migration should look seamless – perhaps slightly faster and more solid (thank you static typing and pre-compilation).

The account details page has been converted over to Next.js.

A bug that didn’t allow a customer to remove an invoice email was fixed.

The password reset and account deletion functions were moved to their own pages.

We added many more integration tests to account management features.

Backend upgrades

On a weekly basis we patch, upgrade and improve the many backend systems of Mailsac across several environments. Typically this involves making small change to ansible, terraform, docker, code dependencies, or other infra-as-code. We often migrate portions of the 12+ year old Node.js JavaScript codebase to TypeScript or Go. If we’re luckily, we can delete unnecessary code or remove a dependency.

To run this SaaS smoothly, every day we get onto the software treadmill. We we enjoy running this service immensely, and hope you enjoy using it.

Updates and Fixes In August and September 2023

Mailsac remains committed to continuous improvement. Every day we improve the product based on customer feedback and SaaS best practices.

Here’s a summary of the latest enhancements.

  • New homepage and header navigation enhancements.
  • SAML Configuration Fix: enabled customer-supported account deletion when SAML is configured.
  • Testing: refactored and extended test coverage to payment processing.
  • Database: A series of database upgrades have been applied. This will continue through October to ensure we are leveraging the latest fixes and performance improvements.
  • Next.js: we continue overhauling the entire site using Next.js, in anticipation of a major restyle in 2024.

There are no breaking changes to any public API in these releases.

For further inquiries, please contact support@team.mailsac.com