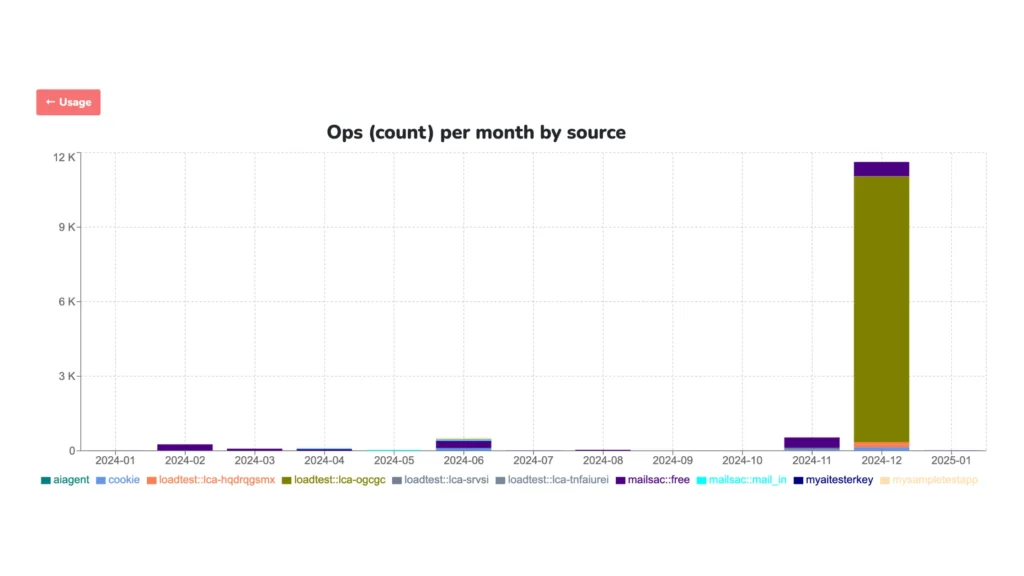
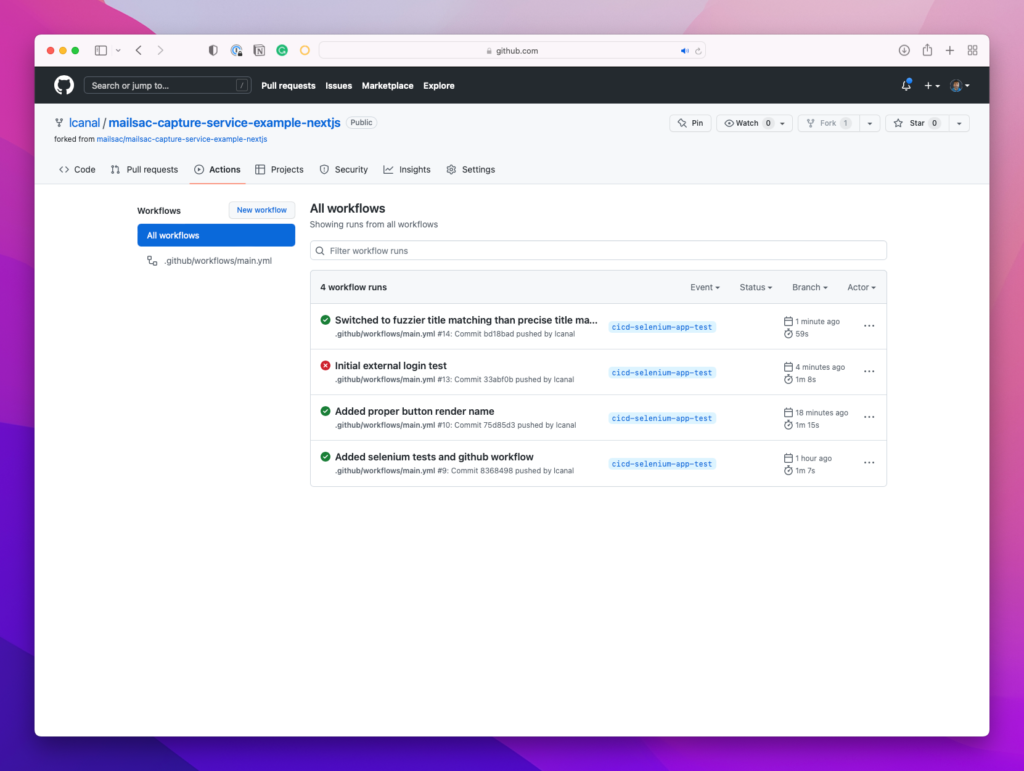
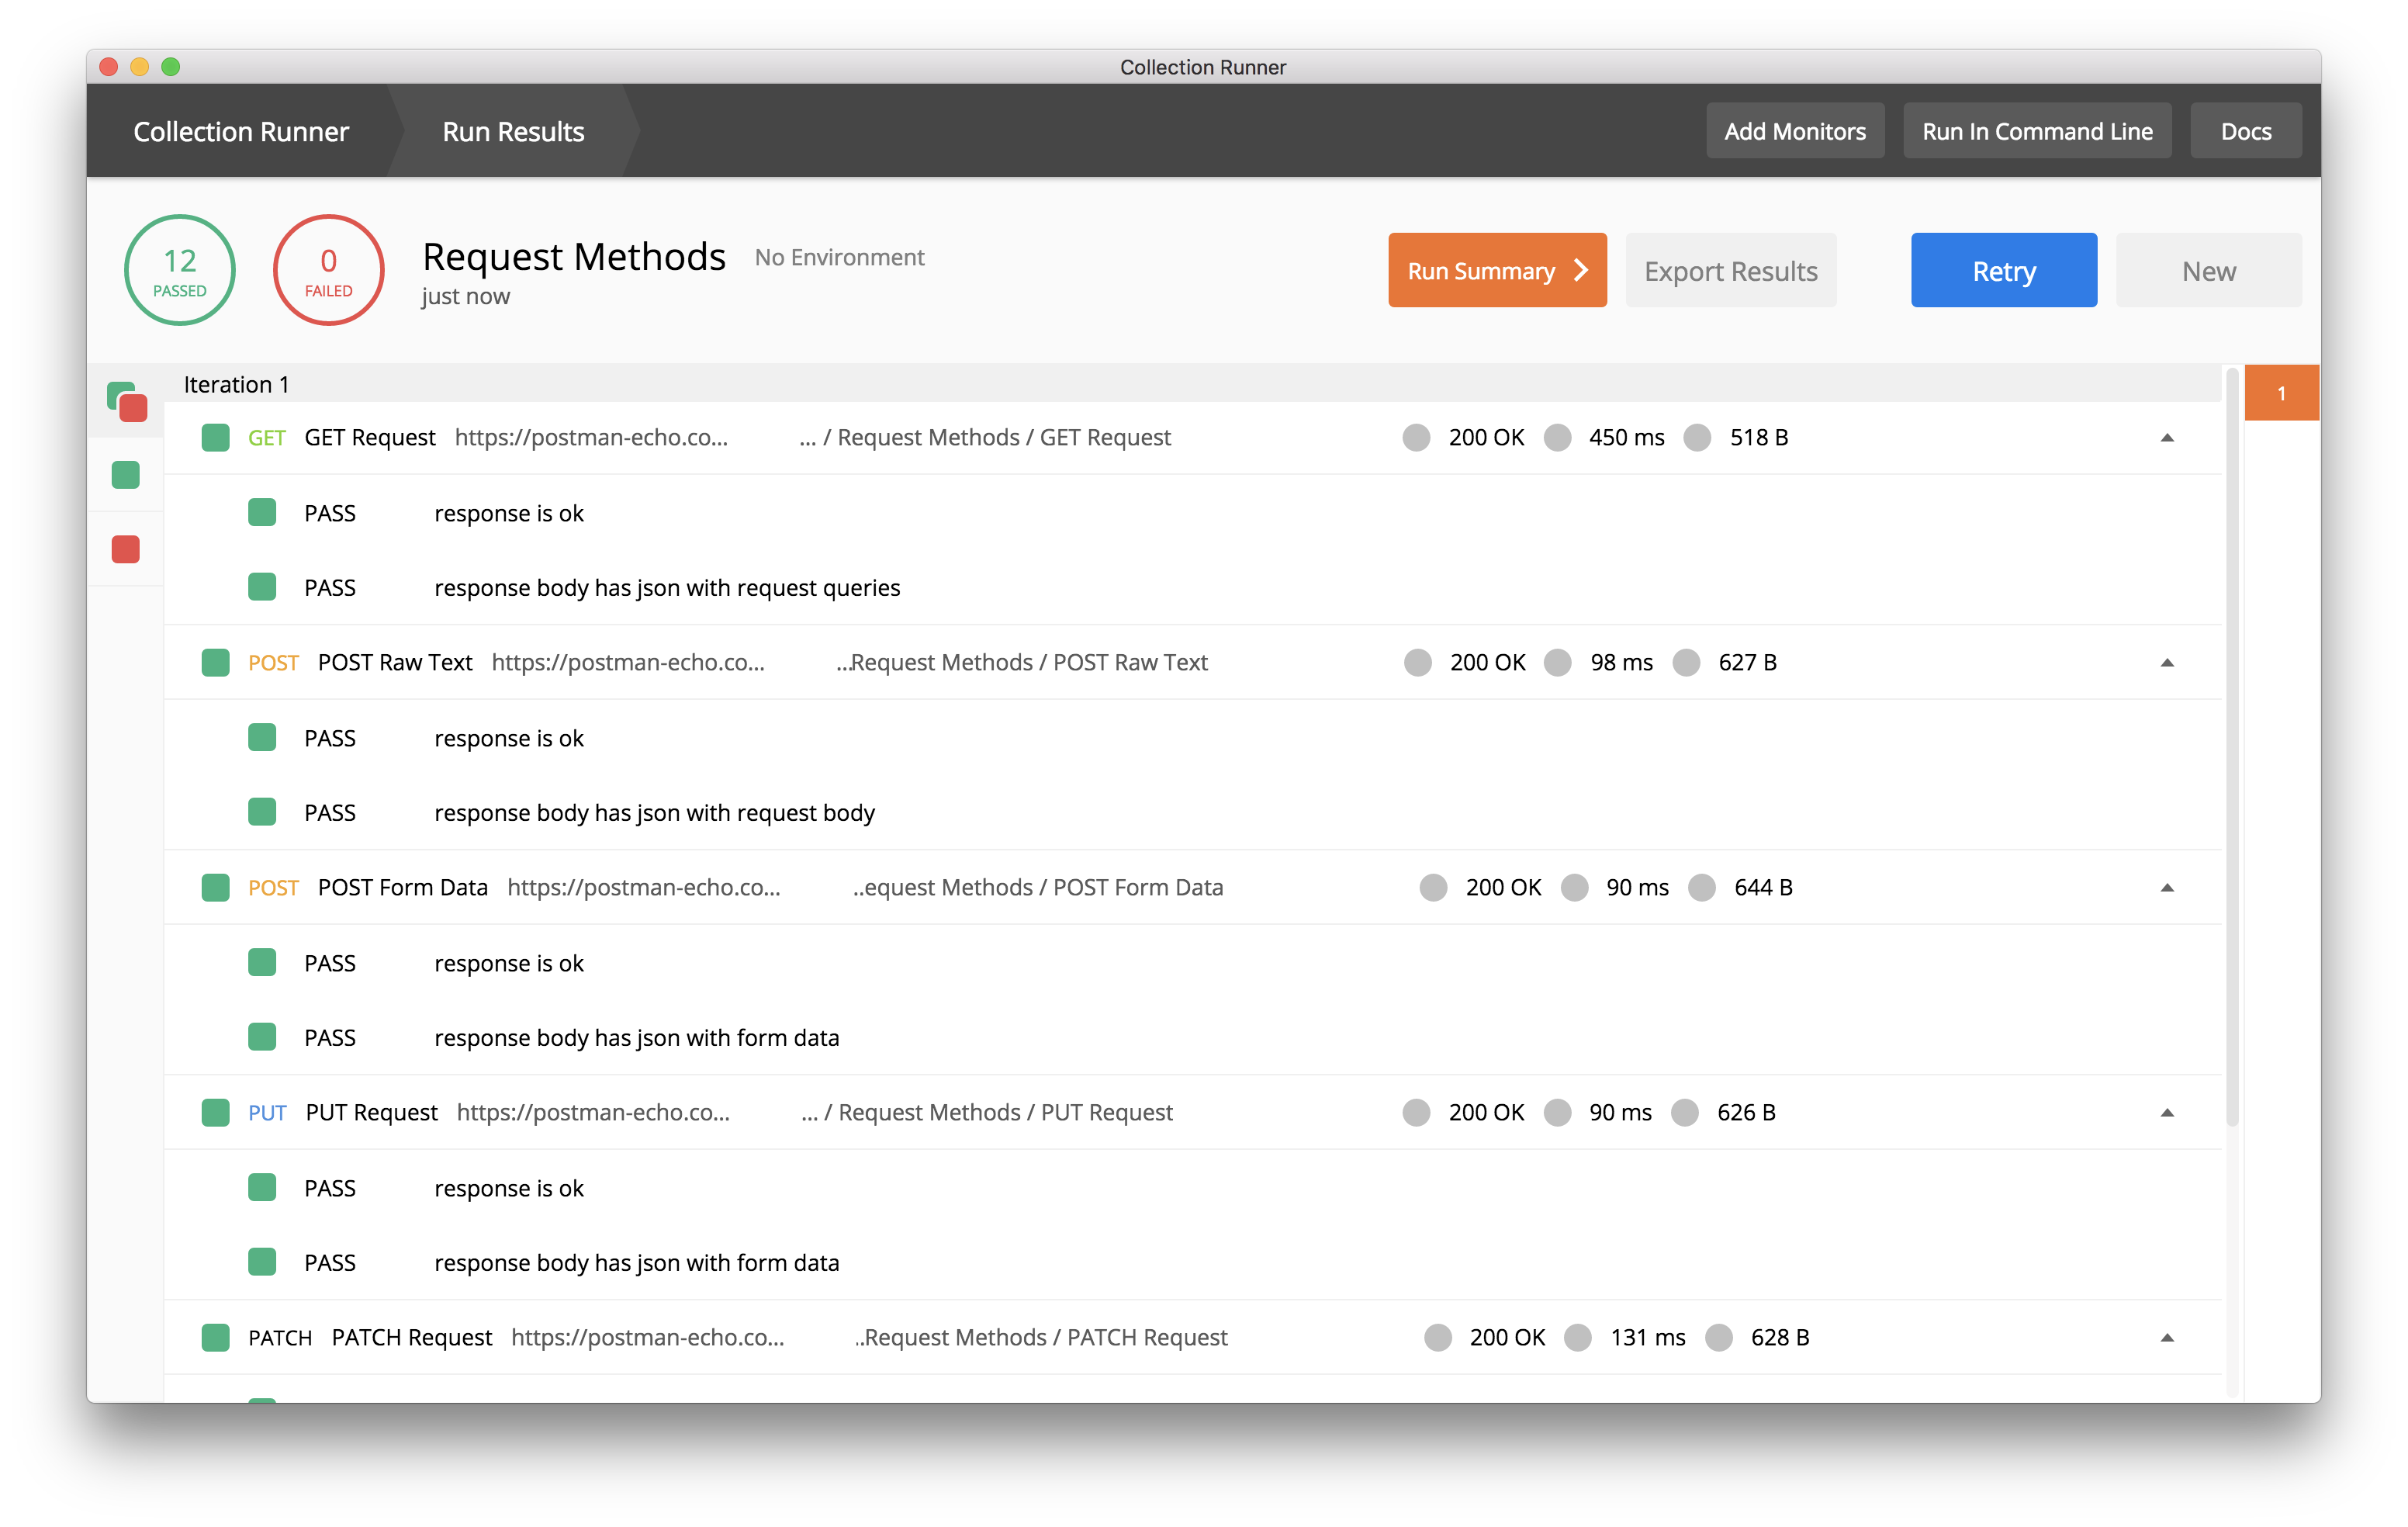
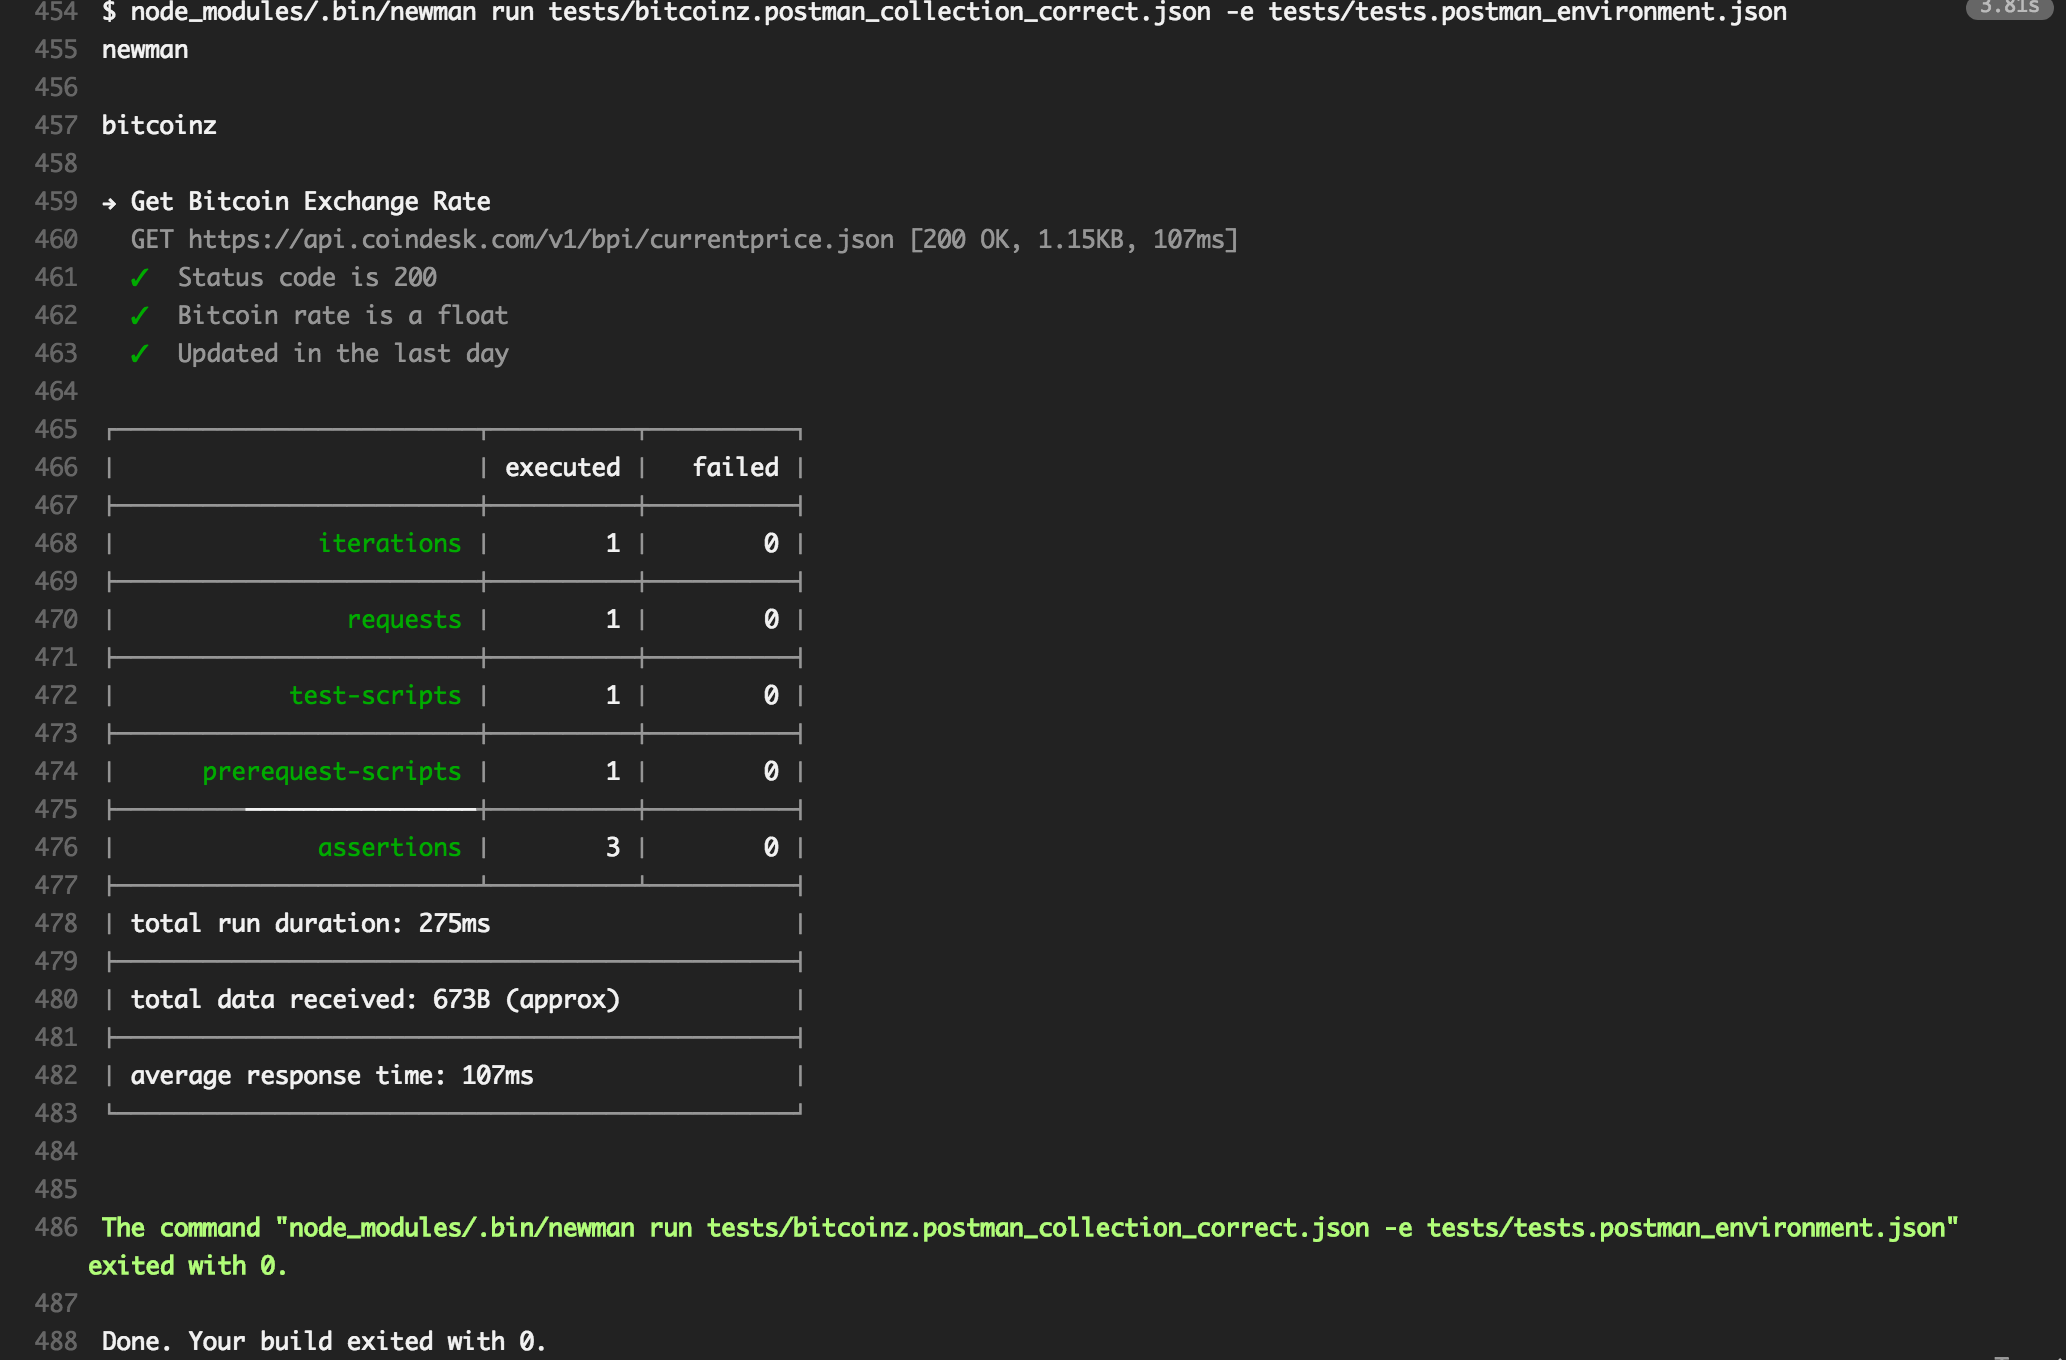
Today, we’re tackling a big question: With the rise of code generators and AI that can make UI elements based on a single drawing, will AI take your software testing job?
The short answer is no. Today we can safely tell you that no, AI won’t take your job. Instead, we think it will enhance the way you work. Let’s see how we can make AI a powerful ally for software testers.
Role of AI in Software Testing
We like to think of AI in the testing world’s context as a controlled chaos maker. We can simulate some parts of being human to introduce some unpredictability in our tests and see if our app mitigates against the chaos.
Instead of fighting AI, let’s embrace it. One of the ways we can do that is if we can have it write test cases for us, execute it, then tell us if it passed or not.
We can then easily move those generated tests to a framework like cypress or to a continuous integration environment like GitHub Actions.
So for the rest of the article, we’ll show you how you can have ai make a test case that:
Generates and sends an email.
Reads the contents of said email from the user’s inbox.
Ensures that contents of 1 and 2 are the same.
To be safe and not risk sending any emails out to customers, we’ll use Mailsac and its API.
Making the Assistant
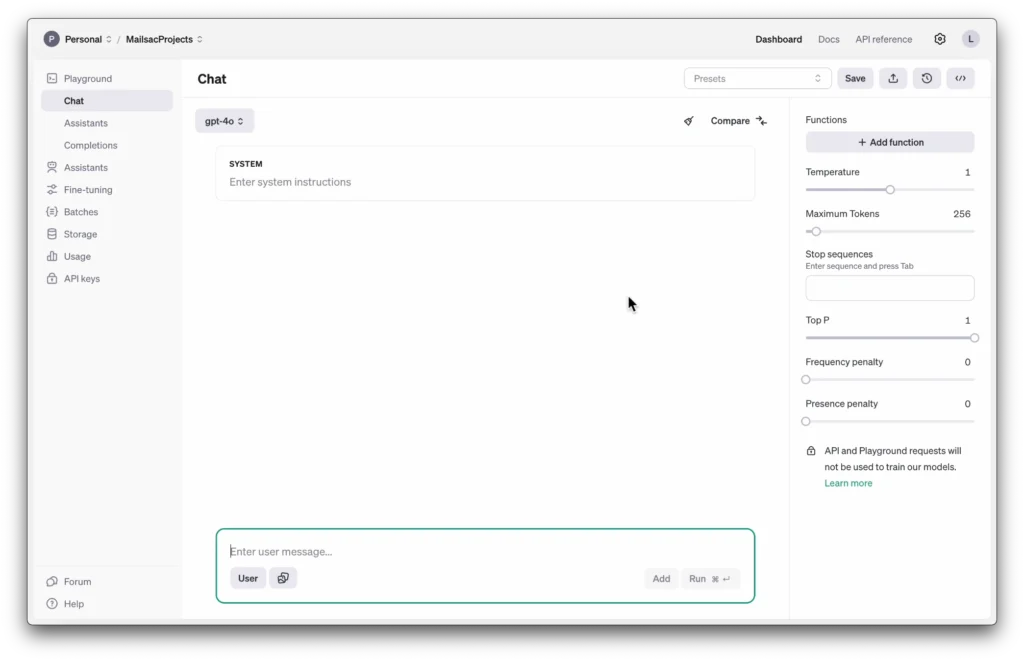
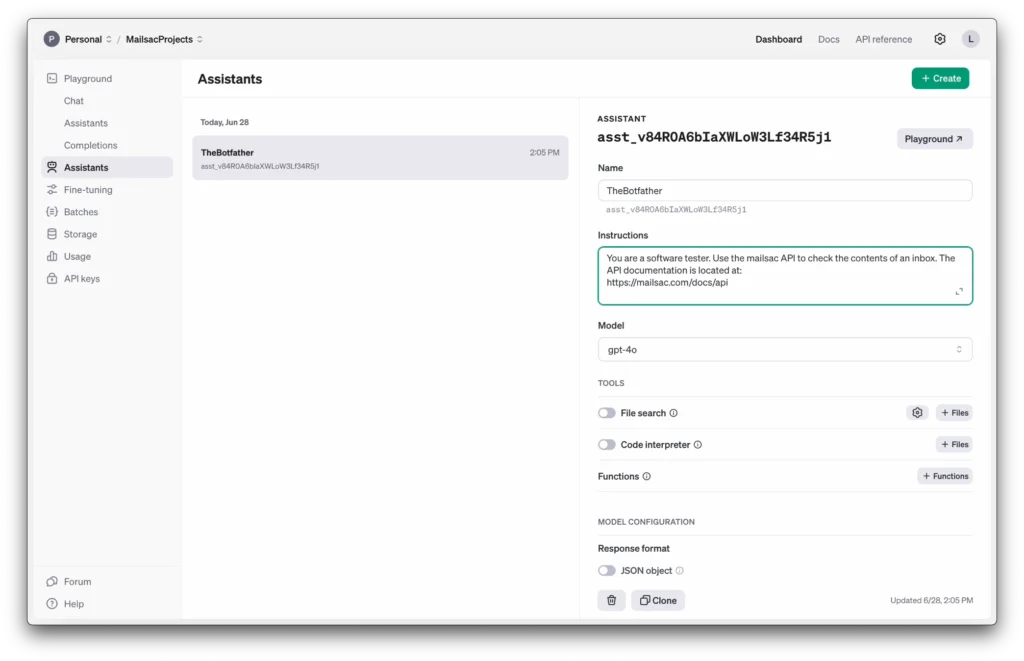
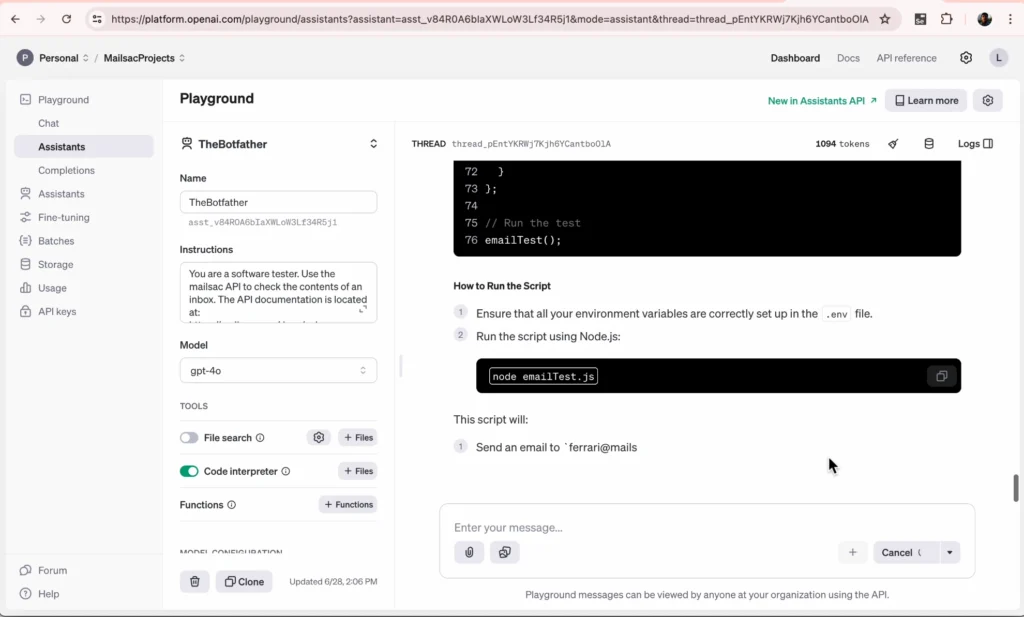
So for this walkthough we’re going to be using OpenAI’s “Assistant” feature. Assistants are a little bit more of a halfway point between the chat AI we all know, and an AI agent that is more autonomous.
We want to give this AI the ability to generate and run some code and read files, but not necessarily make any autonomous decisions.
For the instructions we’ll give it some system prompts to let it know under what context it should be operating under.
We’ll use the latest gpt-4o model and enable the code interpreter tools. That should allow it to read, run and execute some code for us.
Now let’s go ahead and start generating our test cases.
We’ll use the prompt
You are creating a code test that will return true of false if a certain criteria passes. The language for > all tests should be in javascript. Use dotenv for your API keys.
The criteria is:
Generate an email message and send it via nodemailer using google’s SMTP servers. Send it to ferrari@mailsac.com.
Wait 2 seconds for the email to send from Google then use the mailsac API to check the subject and content of the email.
Make the test pass if it matches what was sent in 1 and fail if it doesn’t match.
Keep in mind that you can easily tweak the SMTP to use your own service. We’ll stick with Google’s as its the most accessible for this walkthrough.
Generating the Test Case
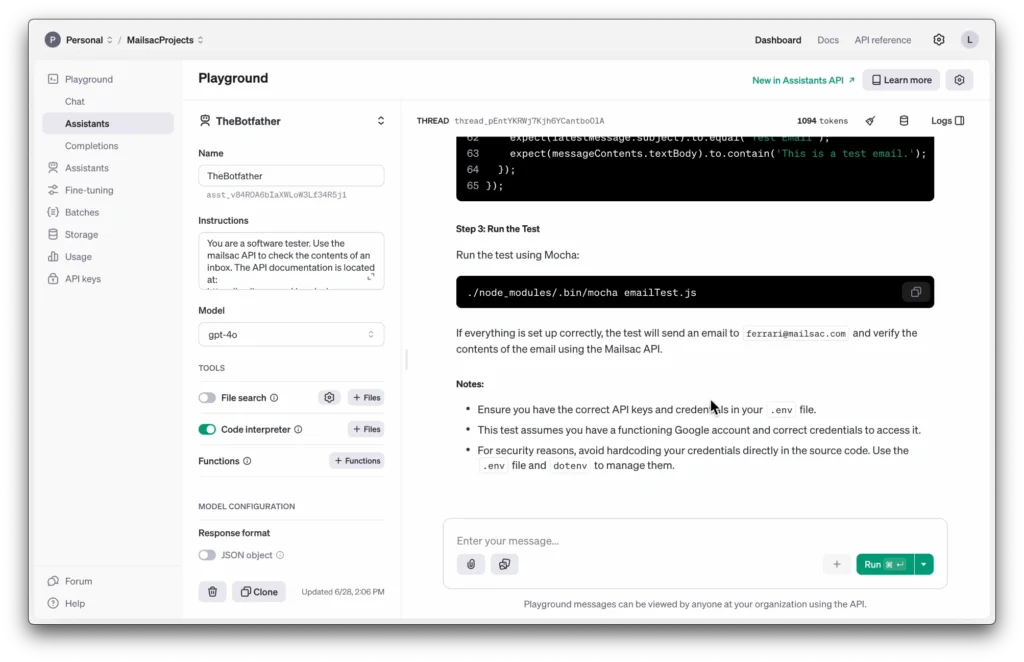
Fire it off to the AI Assistant and let it generate the test case. In this run it generated a mocha test for me. In previous iterations it didn’t generate a whole mocha test so I’ll ask it to just use node.
As you can see it pretty much walks you through the whole project creation process. Let’s go ahead and do our setup and install.
Now copy all of your keys and email onto the .env file.
Let’s start working through the code itself
Code
Looking through the code it looks fine, with 2 exceptions: It needs to be guided on the API endpoint (to use /api/text instead of /api/messages) and it the object retrived is the text itself, so we can remove the nonexistant child textBody
Now let’s go ahead and run the test.
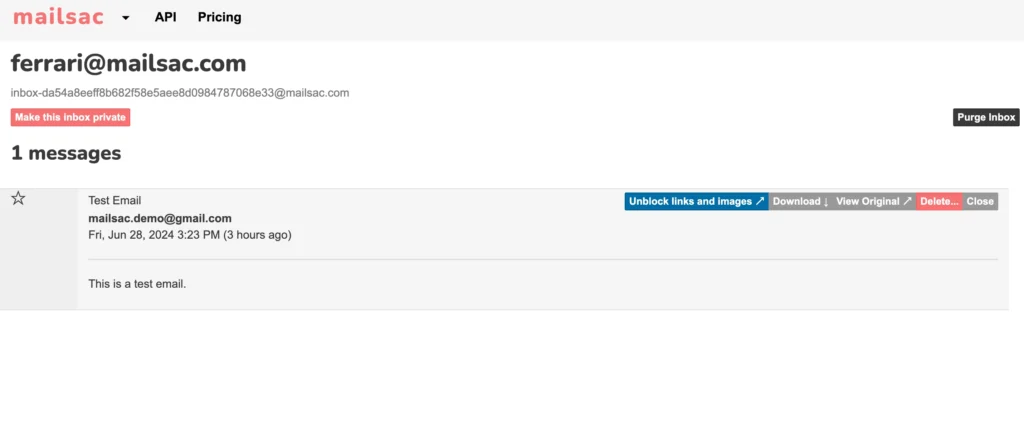
Check on mailsac to visually make sure an email was sent.
You can even make the test fail on purpose to ensure it’s working as intended.
It works!
Extending AI
From here it’s easy to incorporate these kinds of tests into specific continuous integration frameworks of your choice.
You could use cypress and work with existing libraries or an existing framework to run your tests.
Or you could use GitHub actions to fully run your now AI generated tests in the cloud. We have a guide showing you how to do just that.
Conclusion
As you can see it still took a human element to know what to want to test, frame it, and even tweak the AI’s output a bit to make sure that what it was generating made sense.
Tester’s aren’t going anywhere anytime soon, especially if you leverage AI to do the work for you while you focus on whats important to test and why.
Developing and testing an application is difficult enough without the stress of GDPR, CAN-SPAM, accidental information leak, etc. But it doesn’t have to be.
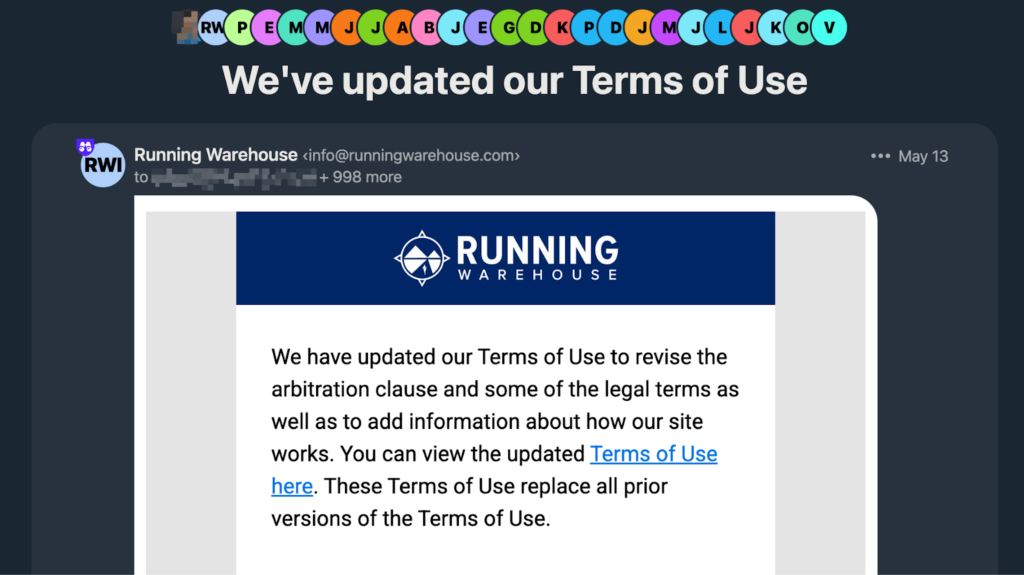
In this article I’ll walk you through how our email platform could’ve helped prevent Running Warehouse from exposing thousands of their customer’s emails.
Background on the Running Warehouse Incident
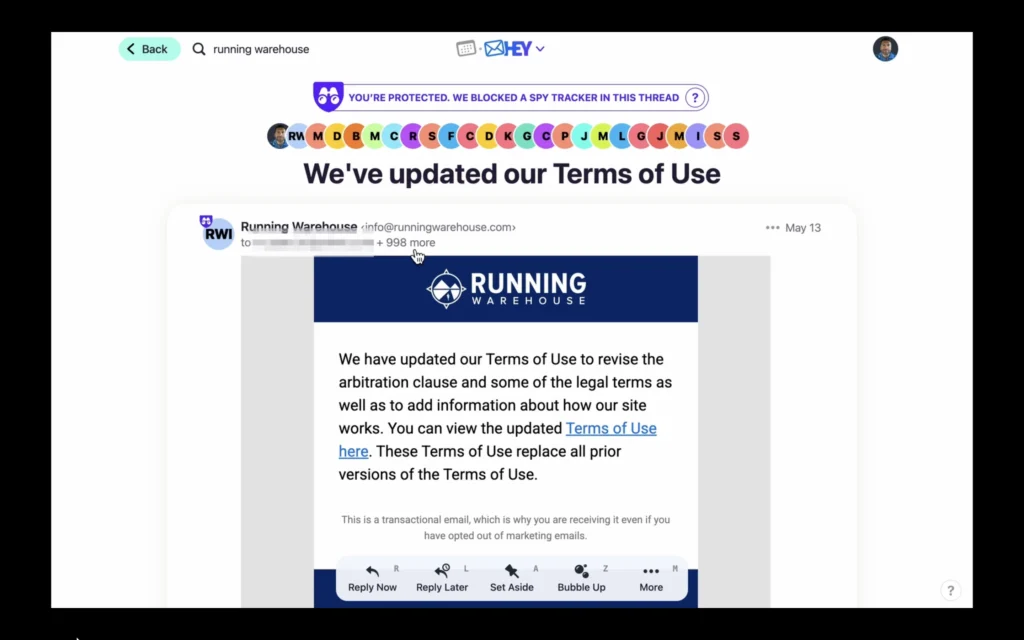
Now, this isn’t meant to poke fun at a company’s mistake but really to highlight just how easy these mistakes are to miss. Last month, I received two emails from “Running Warehouse” about an update to their terms of service. Nothing really unusual at first glance… Until you notice that about 1000 other customer’s email addresses had been sent along in the CC field. And to add even more insult to injury, they did this TWICE. So now I have a list of about 2000 of Running Warehouse’s customers that I’m sure the customers themselves are not happy about.
Really not a good look for a company who could be facing a class action lawsuit for a previous data breach back in 2021.
So let’s look at the implications of this easy to do mistake:
Company reputation lost via social media, youtube videos about you, forums, etc.
Prevent these errors with Mailsac
Obviously no company wants that! This is where mailsac steps in. We help prevent these kinds of easy mistakes, but at the application level. We have a set of features where you can hook up your continuous integration with our API to ensure the email you want to send is the one the recipient actually received.
So let’s walk through how we’d prevent this if this email was coming from our application.
Technical Deep-Dive
Here’s what we’ll do:
Setup a sample application that is meant to simulate sending emails.
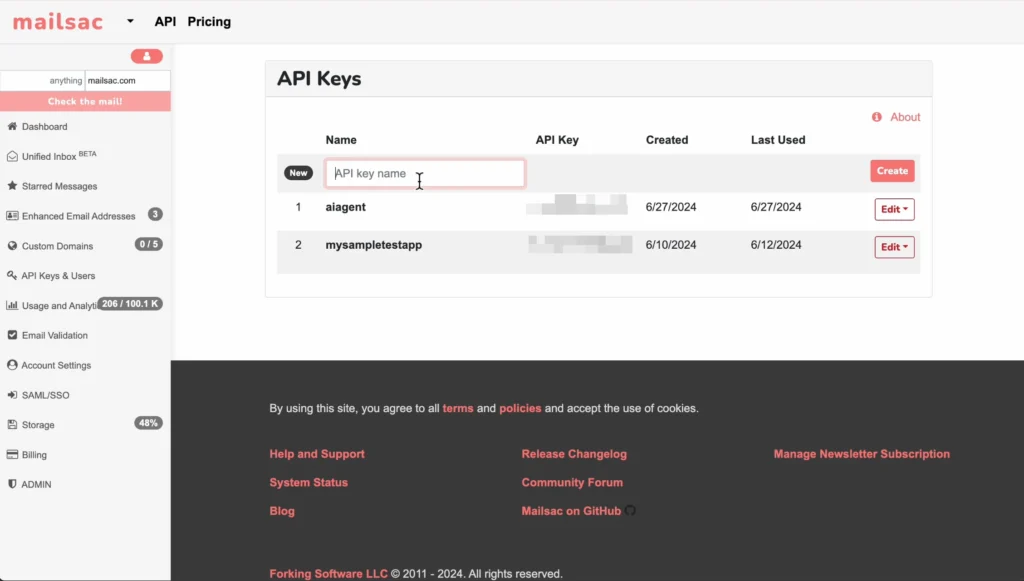
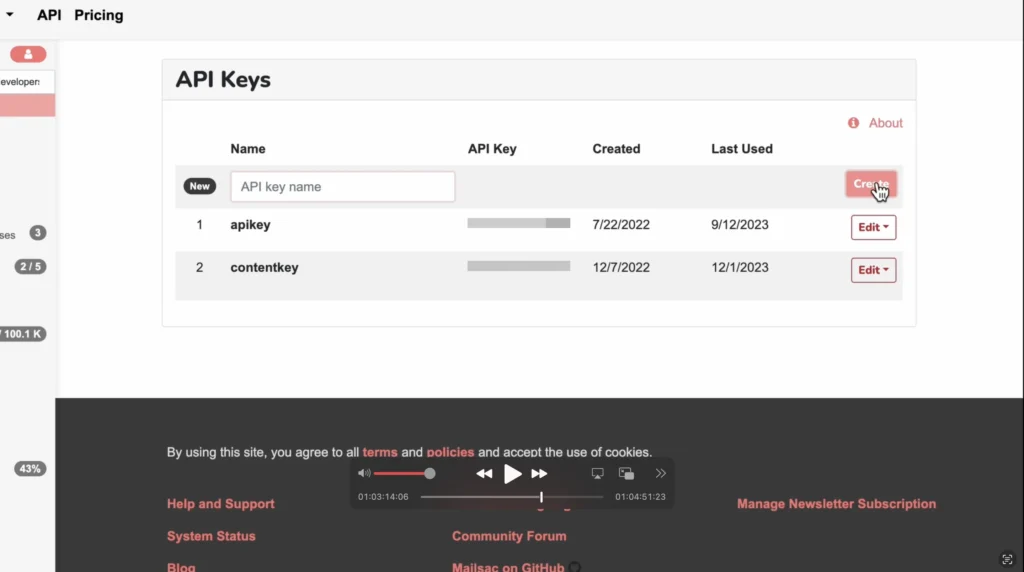
Setup our Mailsac API Key.
Send a sample email.
Use the API to ensure our cc and email fields match what we sent.
Let’s get started.
Sample Application
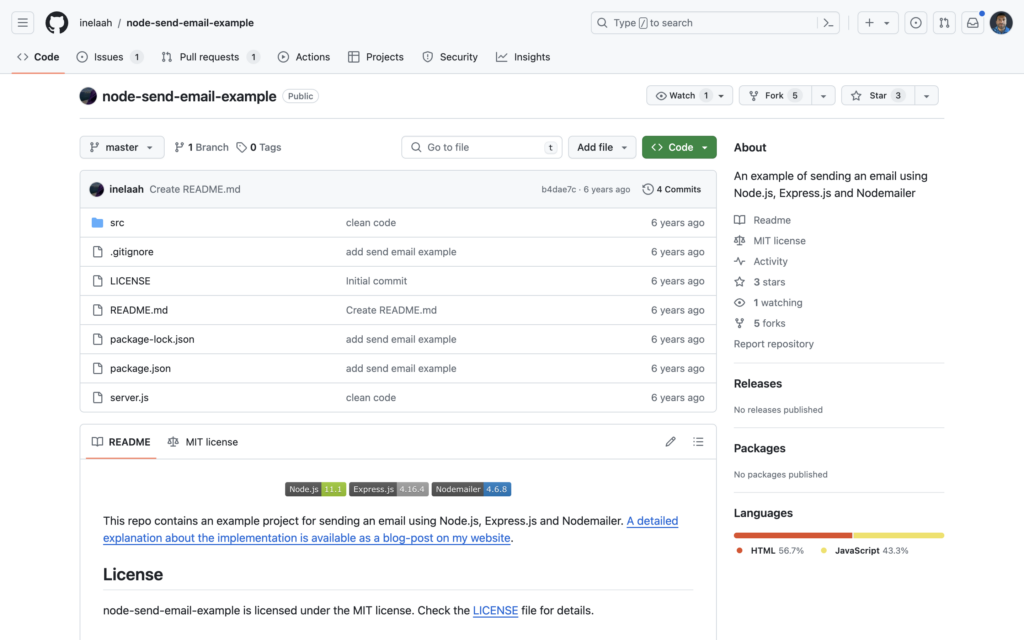
To stand in place of your application, we’ll use this dead simple node app whose sole purpose is to just send an email based on what you place in a form.
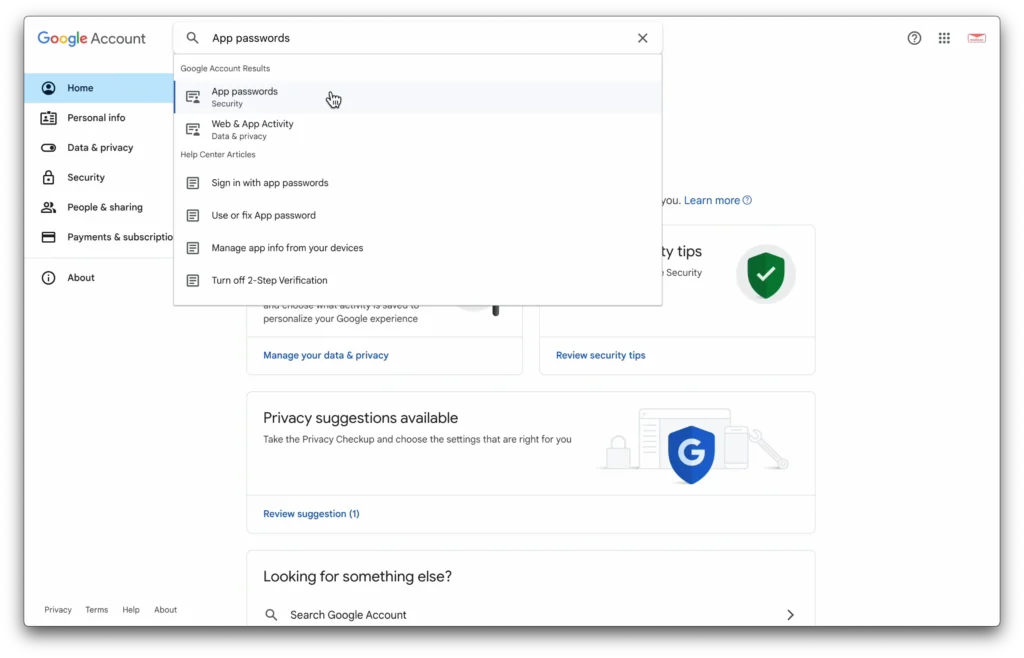
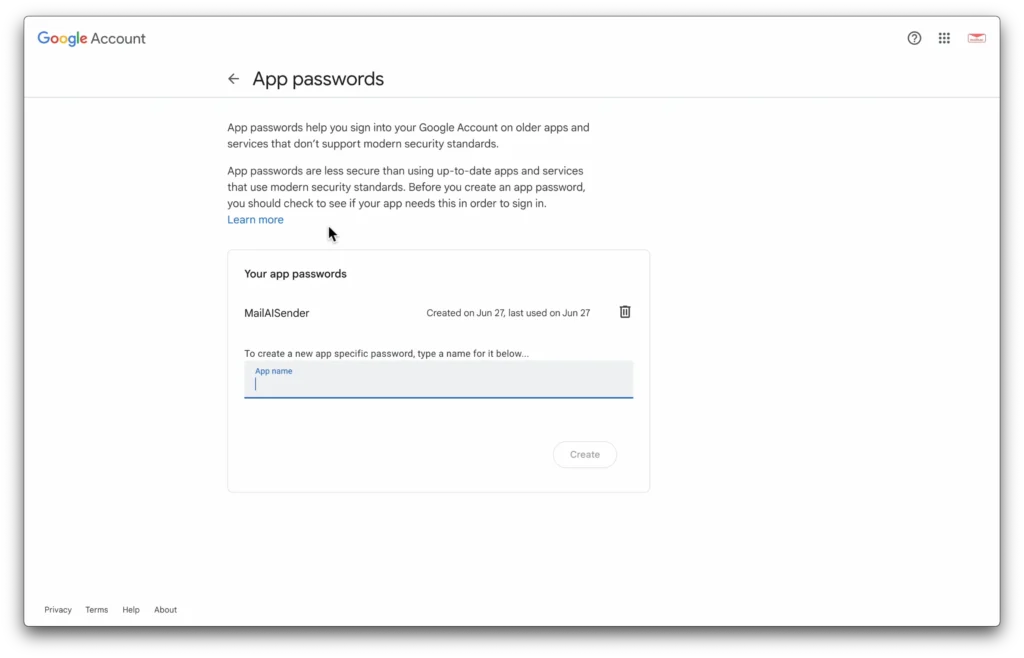
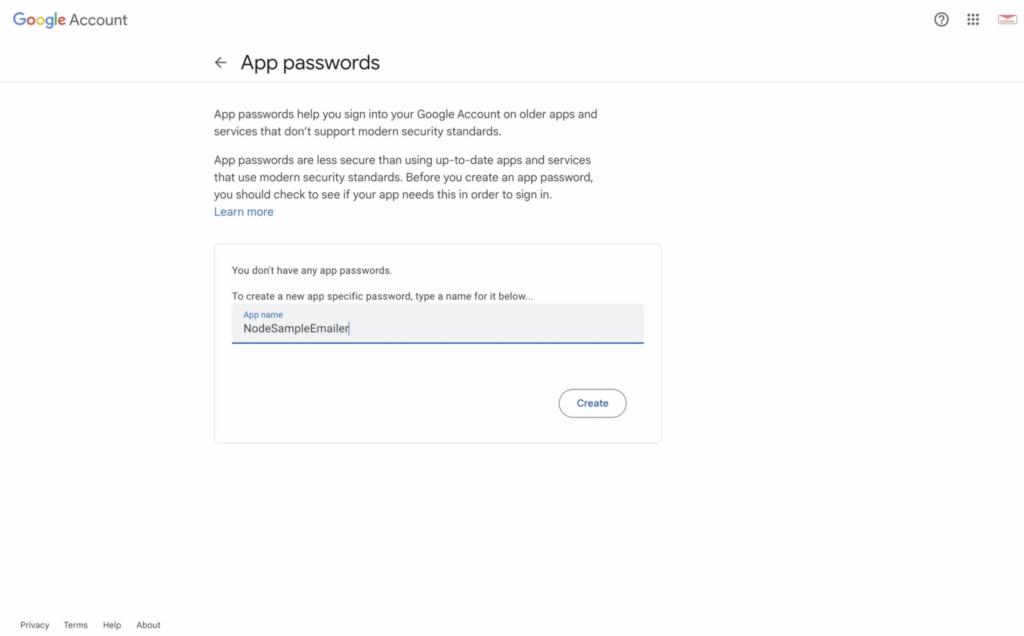
To simulate our email service API key, we’ll use our Application Key we generated for our gmail account. You can do this too if you want to step through this part. You can find it under your Google account -> security -> 2 FA -> App Password or just search for app passwords.
Add your credentials in the config.js file directly.
Again, while we embed the code here, you should really use a dot-env library.
Most importantly, for our example here, let’s use a mailsac temporary address. We have ad hoc inbox creation abilities so for now, let’s say we’ll send it to emailcontentcheck@mailsac.com
Fire up the app
The App Password Page
Setup our Mailsac API Key
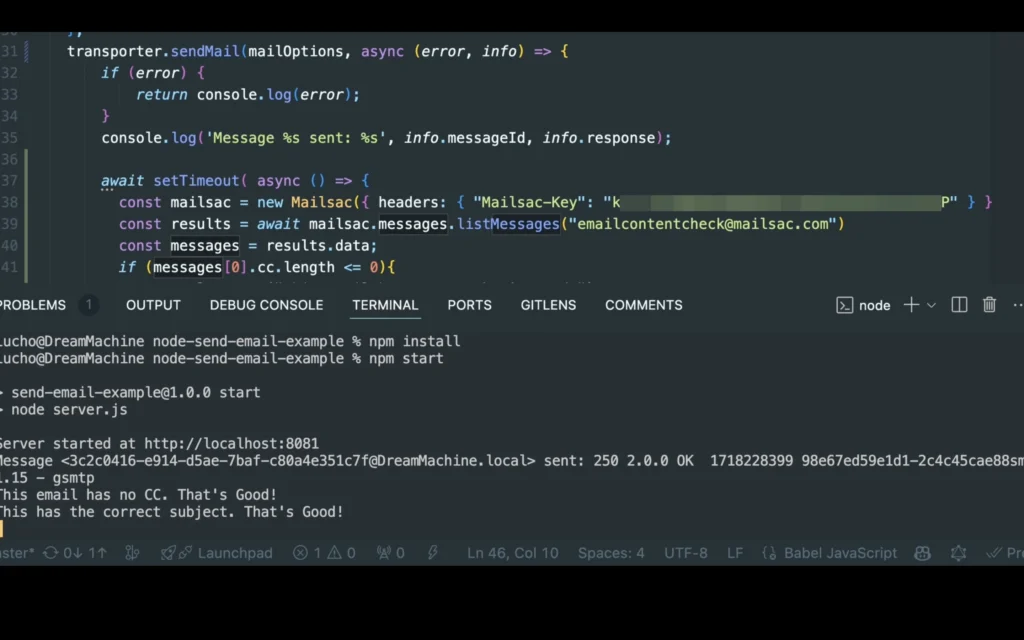
Before we fire off an email, let’s add some quick code to check whether what we send is the same or not once it’s received.
await setTimeout( async () => {
const mailsac = new Mailsac({ headers: { "Mailsac-Key": process.env.MAILSAC_API } })
const results = await mailsac.messages.listMessages("emailcontentcheck@mailsac.com")
const messages = results.data;
if (messages[0].cc.length <= 0){
console.error("This email has no CC. That's Good!")
}
if (messages[0].subject === req.body.subject){
console.error("This has the correct subject. That's Good!")
}
}, 1000);
Normally we’d place it in an .env file, but for our purposes here, we’ll just place it directly in the headers.
Send Sample Email
Alright now let’s fire this up and fire off an email
Let’s make the content and subject something specific like:
Subject: This email is intended only for emailcontentcheck
Content: Hey, this email is strictly for emailcontentcheck@mailsac.com. No others on cc field.
Fire it off
Wait for the check to fire off and print out comparison / success
Showing a successful email cc check.
Use the API to ensure our cc and email fields match what we sent
Right after our code fires off, it should print out the message comparison result. But now, let’s make sure our CC fields are also empty
await setTimeout( async () => {
const mailsac = new Mailsac({ headers: { "Mailsac-Key": process.env.MAILSAC_KEY } })
const results = await mailsac.messages.listMessages("emailcontentcheck@mailsac.com")
const messages = results.data;
if (messages[0].cc.length <= 0){
console.error("This email has no CC. That's Good!")
}
if (messages[0].subject === req.body.subject){
console.error("This has the correct subject. That's Good!")
}
}, 1000);
We’re even throwing in a subject line check. You can check out the full API documentation to see how you can check for empty BCCs, content checks, and more.
Fire it off again and enjoy having an automated way test your email content, cc fields, and more!
Wrap Up
Finding the right words to use in an email is already hard enough, don’t complicate it by worrying about whether the email went through, if it works right, if it accidentally cc’s people, etc.
Just let mailsac handle the double checking for you.
Email is a crucial communication tool for businesses, even in 2024. It’s simple and effective. But in its simplicity we can find ourselves complacent in how we use it. Or even who we send our emails to.
In this article, we’ll examine five real-life case studies where emails went wrong and caused significant problems for the organization that sent it. From exposing private information to damaging a company’s reputation, these examples highlight the potential risks of email errors. By understanding these incidents, businesses can learn the importance of proper email management and take steps to prevent similar mistakes. These case studies serve as a reminder that attention to detail is essential in all aspects of communication.
Case Study #1 – HBO Max’s “Integration Test Email” Incident
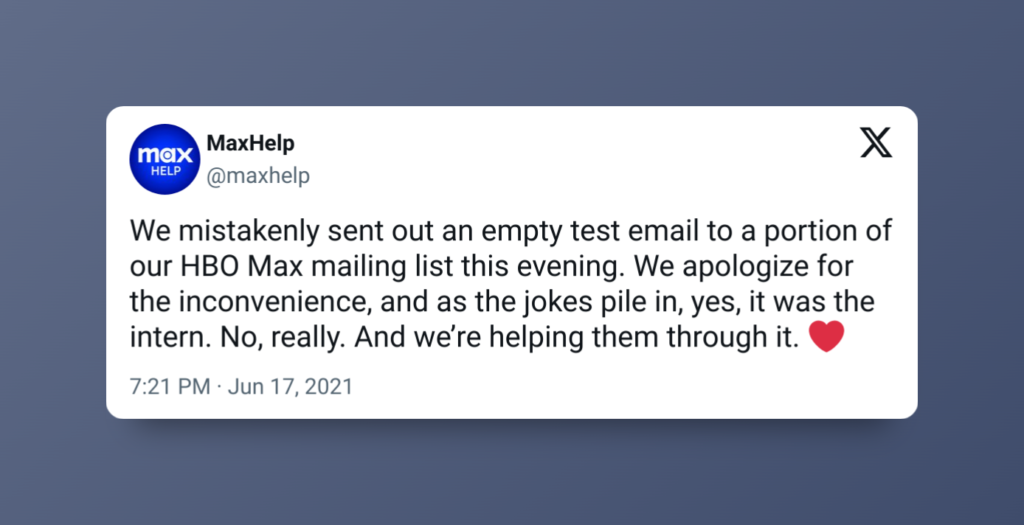
In June 2021, HBO Max accidentally sent an “Integration Test Email #1” to a large number of its subscribers. As you can guess, the email was meant for internal testing but mistakenly went out to real customers. The incident caused widespread confusion and snark on social media. Some people pointed out the optics of mistakenly sending out an email to your entire client base, but most took the email fail in jest:
Hilariously, the official HBO Max twitter account had this explanation:
We don’t blame the intern, but we do cast some judgment on their complete lack of email service testing! Using disposable email addresses for internal testing could have prevented this. But hey, we did at least get some genuine entertainment.
Case Study 2 – Running Warehouse CC vs BCC
Sadly this case is not as harmless. On May 2024 RunningWarehouse, a discount shoe seller, sent out what should have been a routine email about updating their terms of service.
As you can see, this wasn’t just sent to a single customer. While not the entire customer list, approximately 999 customers is pretty indicative of an email testing batching failure. And it didn’t go unnoticed either, as there was at least one 30 post thread on arguably the internet’s largest running forum.
The issue is still relatively fresh as of this writing, but it’s safe to assume that Running Warehouse did not intend to leak 1000 of its customer’s email addresses to each other due to someone mistaking CC vs BCC. And even more seriously, it could even be a violation of GDPR under “Sharing Email Addresses Without Consent” according to GDPR’s Data Breach Guidelines.
Case Study 3 – University Backtracks Acceptance Letters
In January 2019, the University of South Florida St. Petersburg mistakenly sent acceptance emails to nearly 680 applicants, although only 250 had been accepted. As you can imagine this caused confusion, disappointment, and reputational damage to the university. The affected students and their families were left feeling misled, and the university had to invest considerable time and resources to address the fallout from the erroneous communication.
You may not be shocked to hear that this isn’t the first time this has happened, as Columbia University also accidentally sent 270 emails to students who had not been officially accepted.
These cases are a clear cut impact of email errors on institutional credibility and the importance of systematic verification before sending mass emails. Systems sending out emails absolutely need to ensure that the emails they intend to send are 100% accurate.
Case Study 4 – Australian Leaks Citizen Emails
In September 2020, an employee at Australia’s Department of Foreign Affairs and Trade (DFAT) accidentally exposed the personal details of almost 3,000 citizens by not using the BCC field in an email. This revealed the email addresses of Australians stranded abroad due to COVID-19 travel restrictions. The mishandling of this sensitive information led to major privacy concerns and required immediate action, such as attempting to recall the email and asking recipients to delete it.
While not directly tied to a system, temporary email accounts could be used in place to ensure the intended audience and message gets to its audience intact.
Case Study 5 – Serco Accidentally Shares Contract Tracers
In May 2020, Serco, a business services and outsourcing company, accidentally exposed the email addresses of nearly 300 newly recruited COVID-19 contact tracers by using the CC field instead of BCC. This breach of privacy led to concerns about the security of personal data and put the company’s data protection practices under scrutiny. Serco apologized and announced that they would review and update their procedures to prevent similar incidents in the future.
Yet another case of manual implementations of email lists without temporary email addresses, email outbound trapping services, or message integrity verification (ie, only 1 person in the to field, nothing in the cc field).
Stop Customer Data Leaks & Company Reputation Hits With Mailsac
We offer several benefits that can help prevent incidents like the ones described above:
Enhanced Security: Temporary emails protect more than just attacks and spam. By using a disposable email address, you can send test emails either manually or via your system to ensure the message arrives exactly as intended.
Privacy Protection: Mailsac helps keep personal and sensitive email addresses private. This is especially useful for companies conducting internal tests or handling sensitive information.
Minimized Clutter: Using temporary emails for one-time use reduces inbox clutter around testing. It’s beneficial for both individuals and teams, as it keeps testing cycles organized. You can even split your testing into campaigns by using unique email addresses you control with every testing cycle with our Zero-Setup subdomains feature.
Testing and Development: Mailsac is ideal for testing campaigns, systems, and internal communications. Temporary emails can be used during development phases to catch errors and ensure that only verified emails are sent to real users. We have fully featured APIs to integrate between any systems.
Disposable email services are an essential tool for modern communication. They can help prevent costly mistakes and ensure that PR issues around email remain in the past. For those looking to enhance their email security and efficiency, we’re an excellent choice. Give Mailsac a try today and see how it can benefit your email needs.
These days, we have better options than writing our test specs by hand.
The open source community has released a variety of frameworks to relieve us from that particular tedium: Cypress, Selenium and Pupeteer. And in this video companion guide, I’ll focus on Playwright. Specifically, how playwright can help automate a lot of the boilerplate involved in writing test specs with CodePen.
The video will do a quick walk you through playwright in itself. This article will provide the core login.spec.ts file I used and where to go from next.
But before we do that, it’s worth mentioning that efficient testing isn’t just about the right tools; it’s also about the seamless integration of these tools into your existing systems. That’s where Mailsac comes in. Our platform offers unique capabilities for email testing within your automated workflows, making it an excellent complement to Playwright for end-to-end testing solutions.
With Mailsac, you can ensure not just the functionality but also the integrity of email interactions in your applications, all within the automation framework you’ll establish with Playwright.
So, What Is Playwright?
Playwright is an open-source automation library created by Microsoft. It’s designed to enable developers and testers to write reliable and efficient tests for web applications.
It’s cross platform and officially compatible with the major browsers.
Diving Into Codegen
Start by installing playwright inside your project
npm init playwright@latest
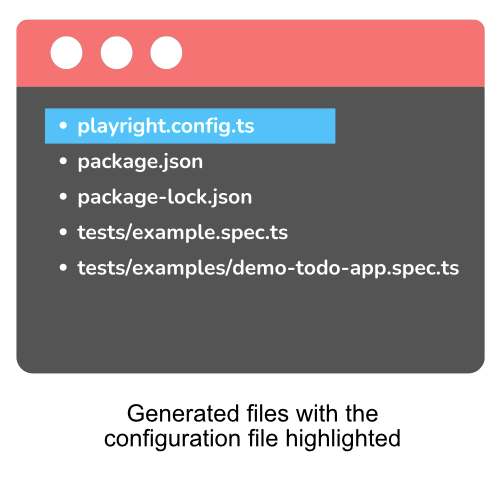
I’ll be using the defaults for this guide. After installation you’ll have these files generated in your project:
For more: https://playwright.dev/docs/test-configuration
Putting Codegen Through Its Paces
First Run
Fire up codegen via the built in console
npx playwright codegen
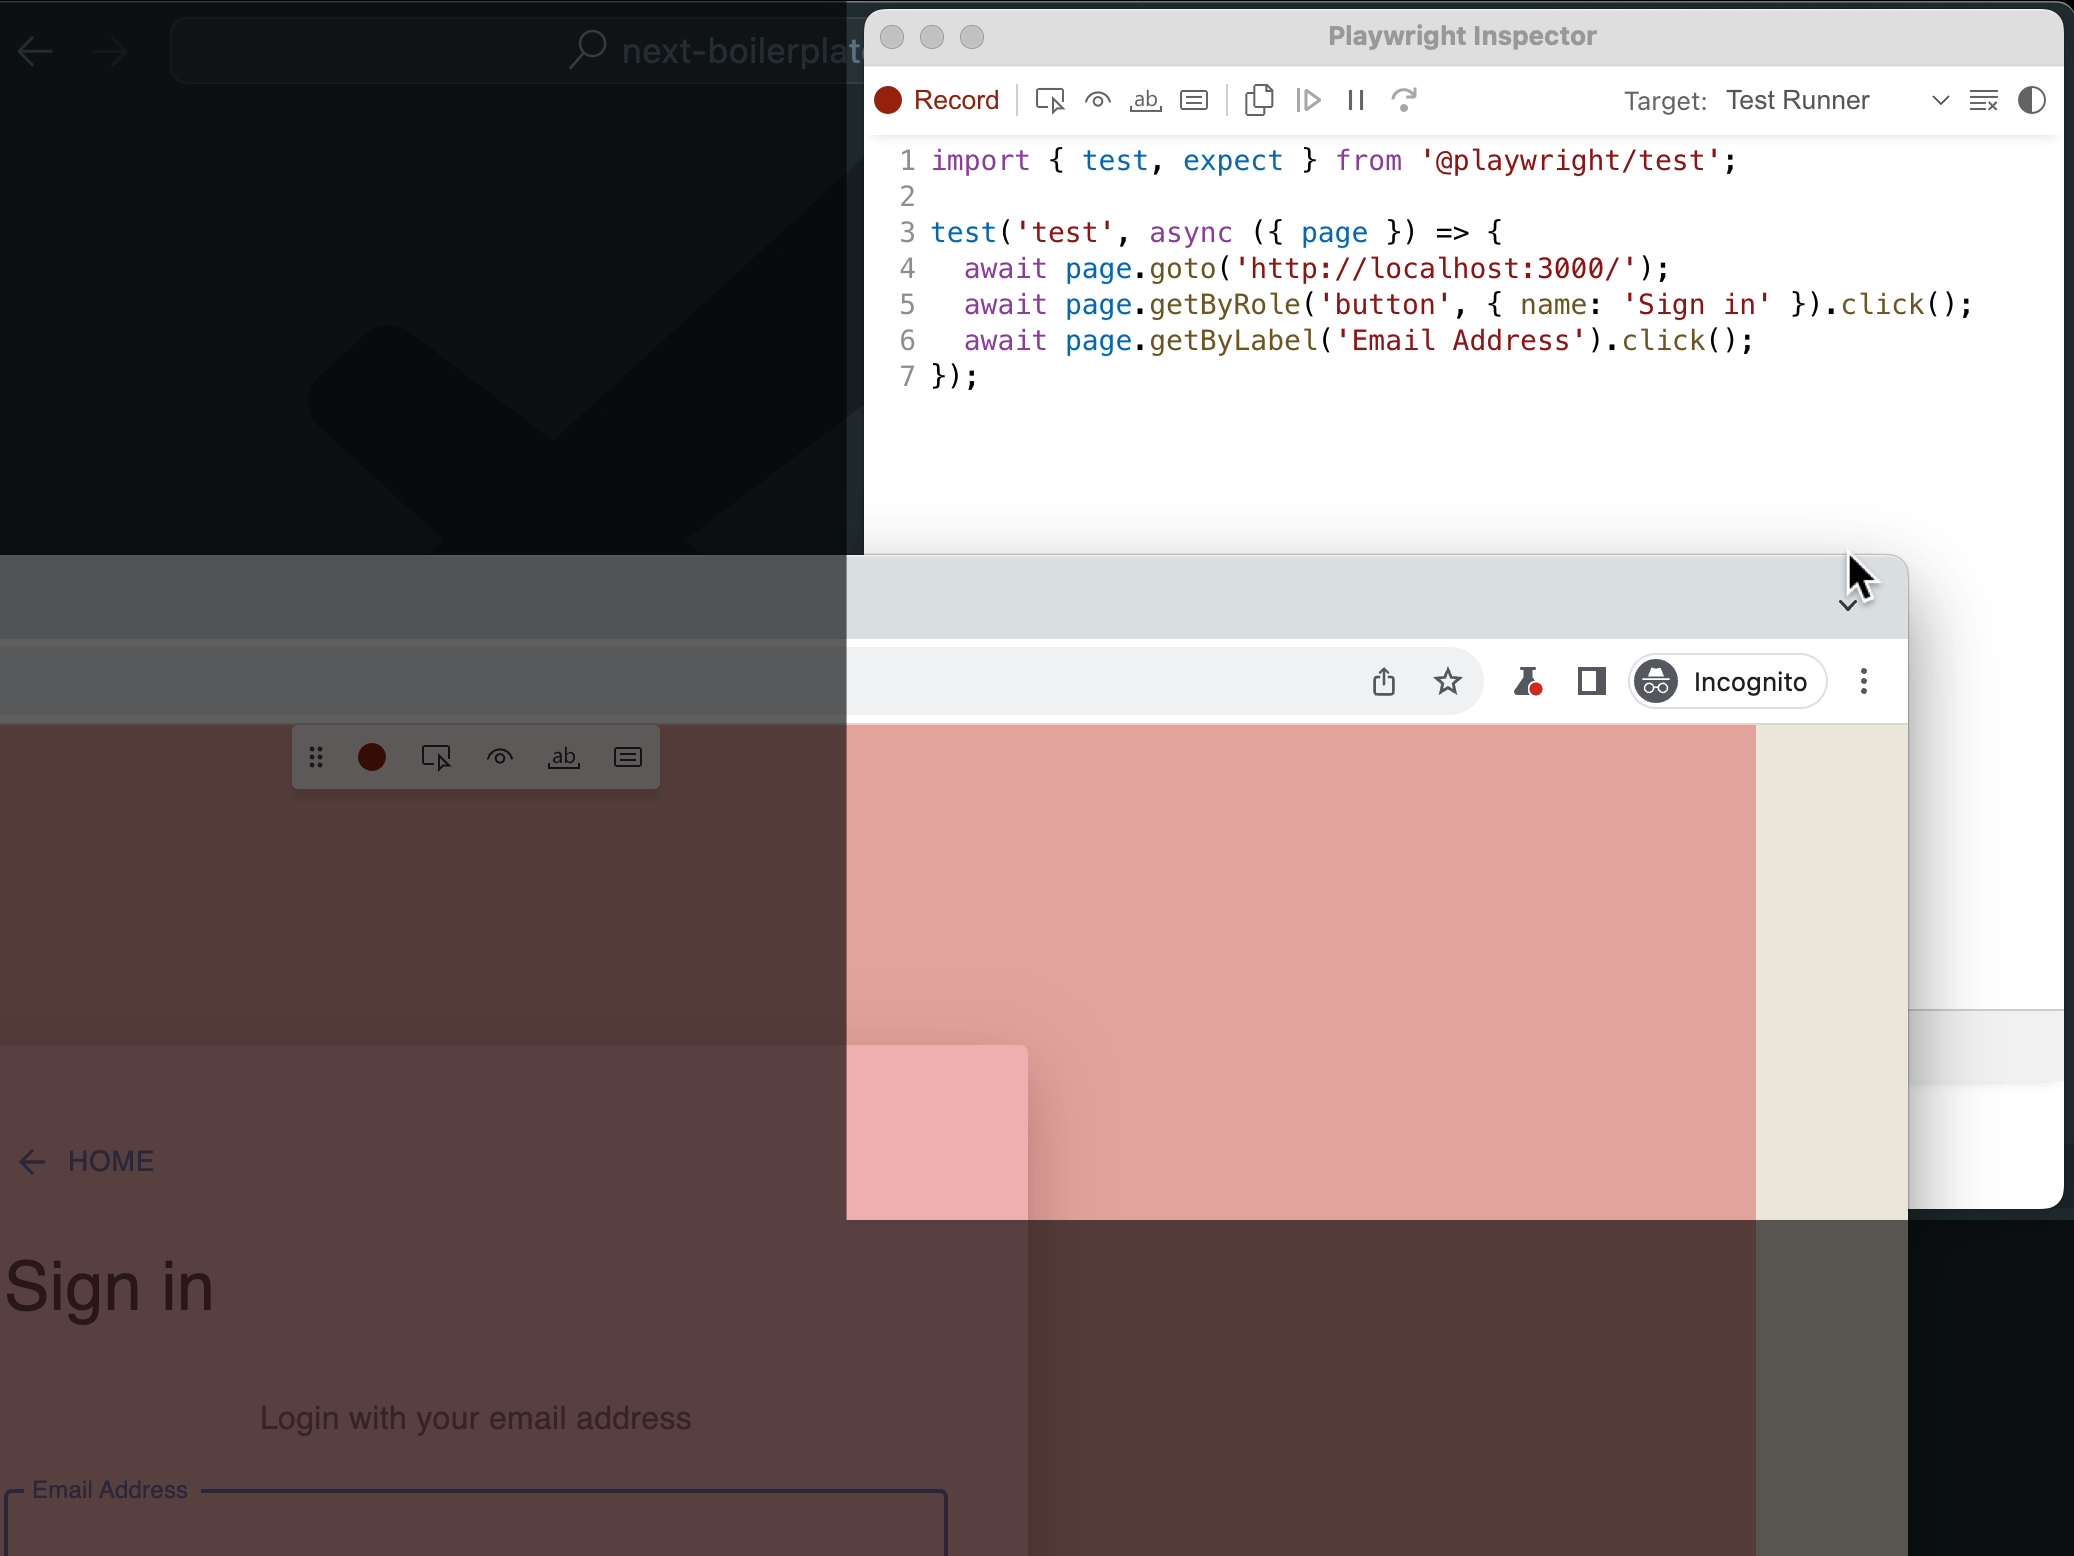
As you click around your application you’ll see codegen record each click based on its css class.
It will build each line as you go about your test. In our video, we perform a login with an incorrect set of credentials and a correct set.
Our login.spec.ts file
Before our manual edits, this is what codegen generated for us:
Running the test by default shows no visual progress. But if you’d like to see the browser run through your steps visually, you’ll need to issue the command:
npx playwright test --headed
Where to go next
The most natural next step is integrating playwright tests with a continuous integration platform like Travis or Github Actions. Plugging playwright into a CI system like Github Actions is fully supprted by playwright natively.
Another possible progression is using playwright to test critical paths in your application like user registration or password reset flows. We have a full guide on how to do that with another framework, Cypress.
If you want us to explore how you can integrate playwright with email testing and Github Actions or any other potential playwright integrations, let us know on our forums. We’ve only scratched the very surface of what playwright can do.
If you’re in the business of making or testing software, you’re well aware of the critical role email functionality can play in applications. Particularly in sensitive workflows like user sign-ups and password resets. Testing these features however can often be a complex and daunting task. This is where Cypress and Mailsac come in. Together these two streamline the email testing process; cypress driving it and mailsac capturing and validating any emails that may come out of your testing.
Join me as we explore how you can leverage these powerful tools to automate and enhance your testing workflow, ensuring a seamless user experience in your applications.
This article acts as a companion guide to the video linked at the top. Here, we’ll quickly walk through the topics mentioned in the video but also expand some areas and provide the code that the video uses.
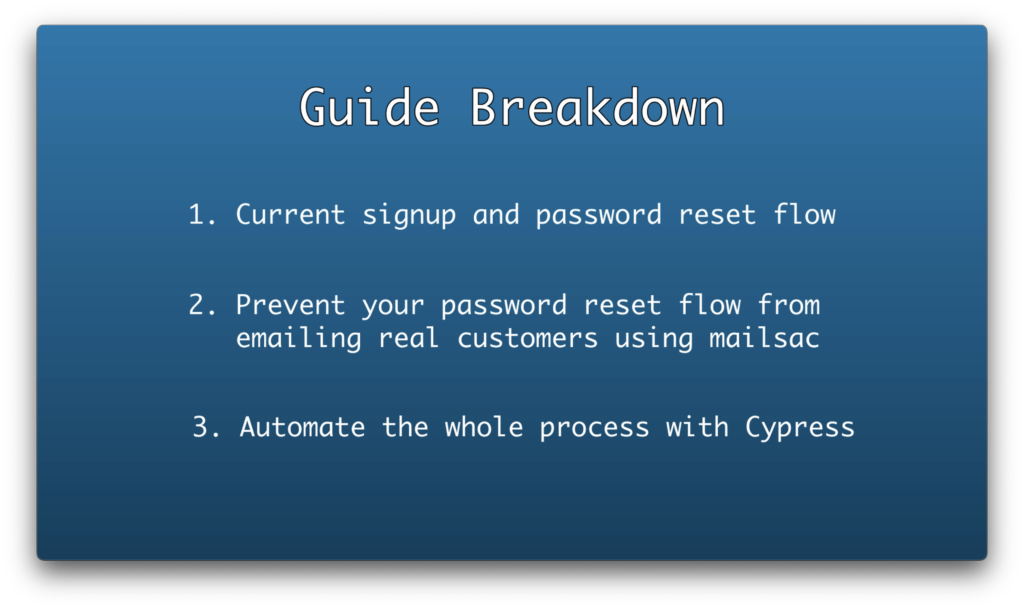
The general path we’ll take in this guide is:
Walk through our application’s reset flow
Safeguard against sending emails to real customers
Automate the password reset process with subject verification with cypress.
Let’s get started!
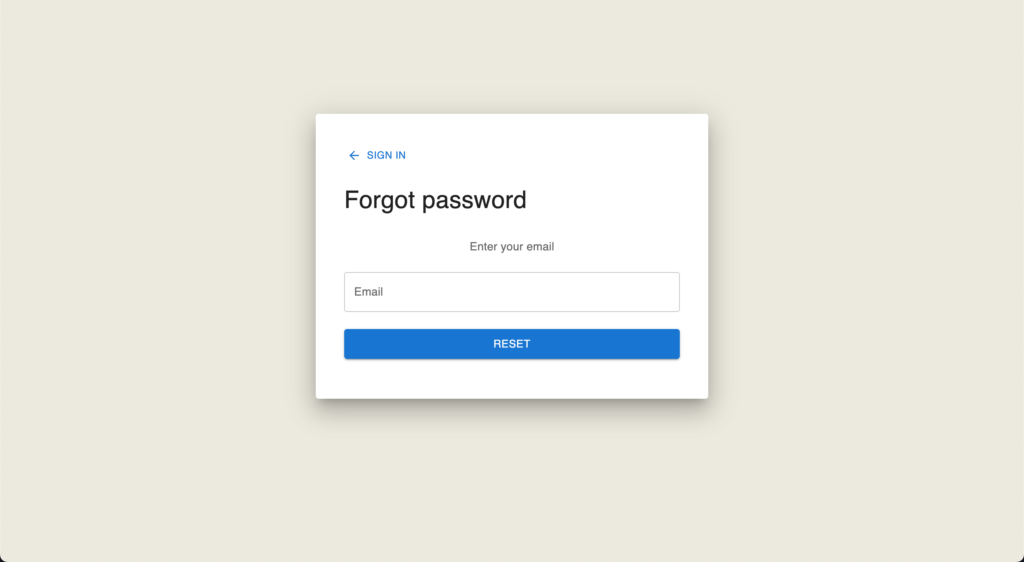
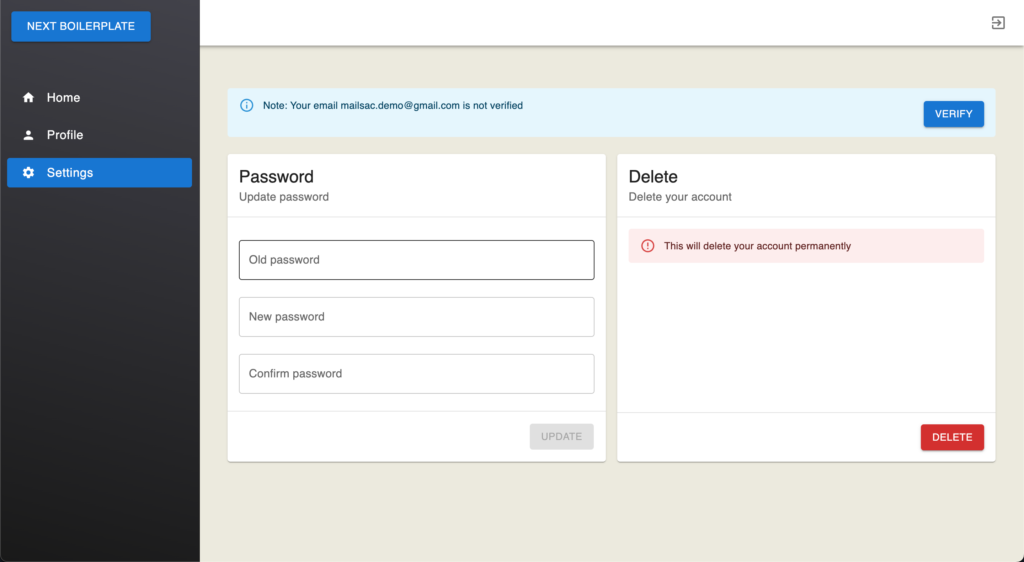
Setting the Stage: Manually Testing our Next.js App
Our main screens of interest
We’ll focus on a simple next.js application equipped with local authentication features. Instead of starting from scratch, we’ll use Martin Persson’s Next.js Authentication Template. The concepts we’ll test are a common part of almost every application, and by using his template we’ll have a starting point (most) of us can agree on. Martin’s application comes complete with login functionality, member-exclusive sections, and importantly, a password reset flow.
Our goal is to show how we can streamline testing the password reset flow, ensuring that branch of your code behaves the same way every time. By the end of this, you’ll have a clear blueprint for applying these techniques in your projects.
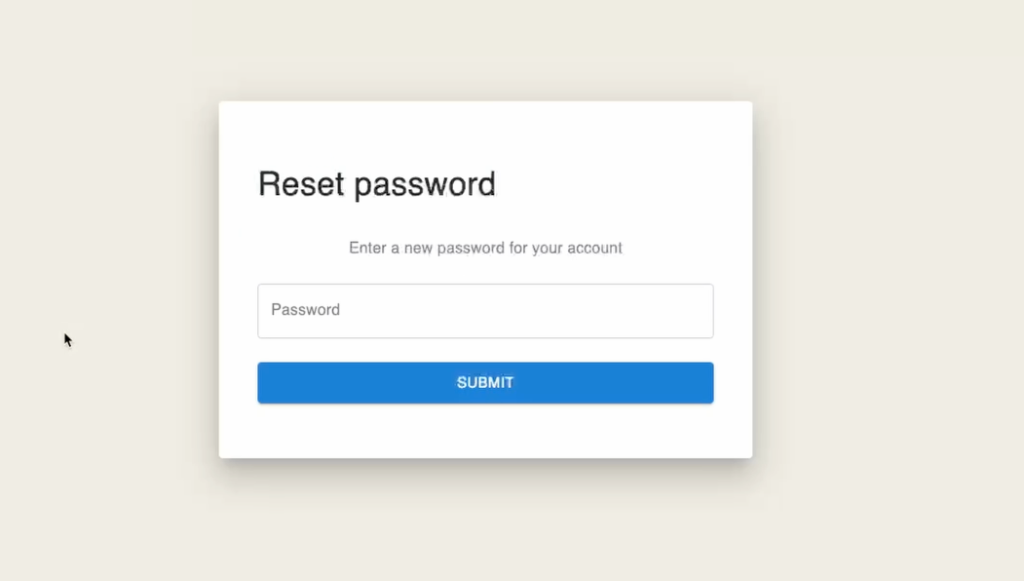
Regular Password Reset Speedrun
Let’s do a quick walk through on how we would reset our password in our app.
Create an Account
The app doesn’t do any email validation out of the box but it does create and store account credentials in its database.
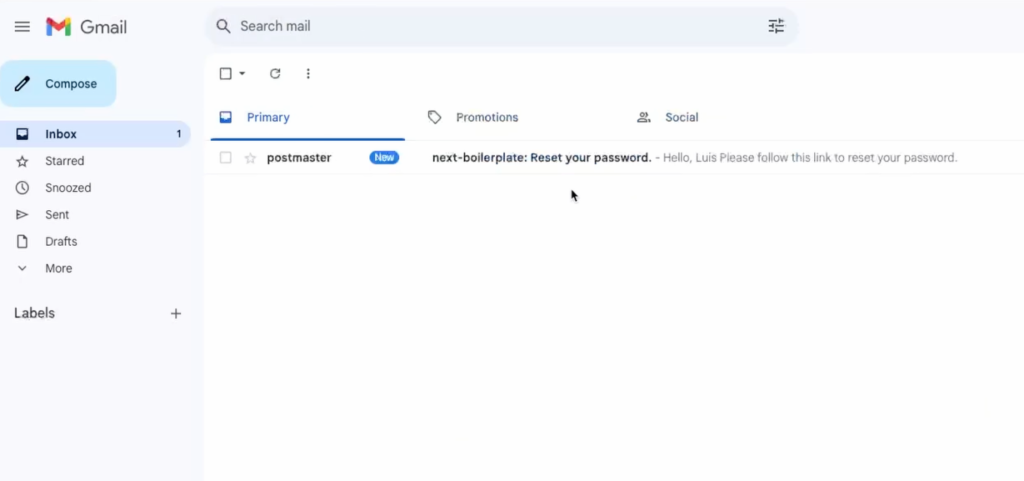
Reset Password To a Real Email Address
This is a standard password reset flow. The main thing to note here is that the application is sending out transactional emails to real email addresses.
Caveats
During continuous testing we could be building our application and testing its capabilities tens to hundreds of times per month. We’ll need to ensure we don’t send any emails real customers.
This is where Mailsac comes in.
Safeguarding Against Sending Emails to Real Customers
Mailsac has an email capture feature that enables customers to “reroute” any emails generated by your application to an inbox on the mailsac platform. Additional testing capabilities are available including verification of delivered content and ensuring the emails that get sent have the correct subject.
Start Capturing Emails from your Application
This guide assumes you have a mailsac user account. If not it’s free to sign up.
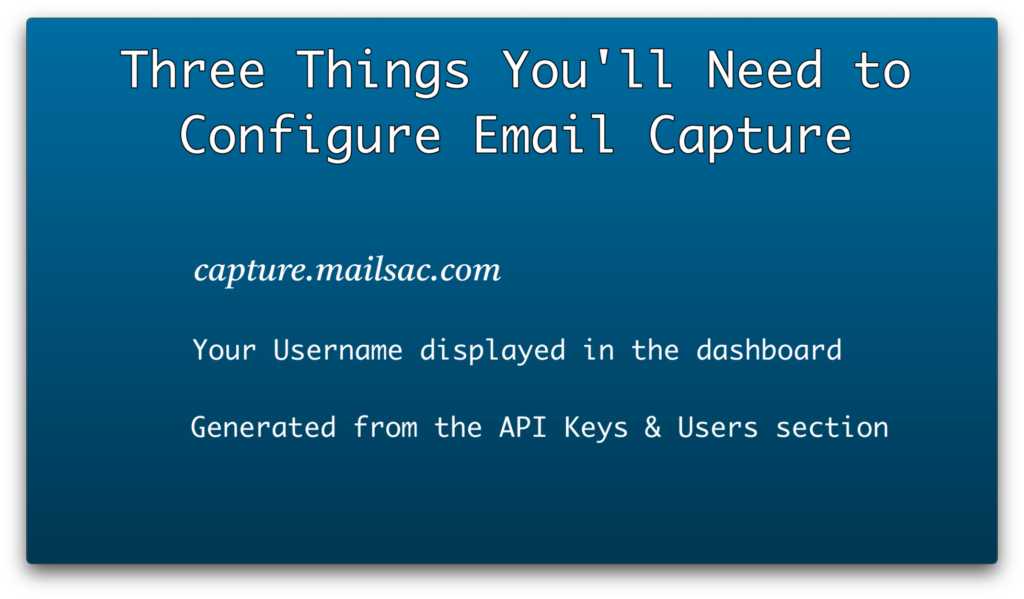
Getting started is extremely easy. Just point your application’s SMTP settings to the mailsac’s servers and all outbound emails will be captured.
Our sample application reads in a .env file:
MONGODB_URI="mongodb://localhost:27017"
WEB_URI="http://localhost:3000"
MAIL_PASSWORD="k_99dfuuifjd" # Your Mailsac API Key
MAIL_USER="mailsacuser" # Your Mailsac Username
MAIL_HOST="capture.mailsac.com"
MAIL_PORT="5587"
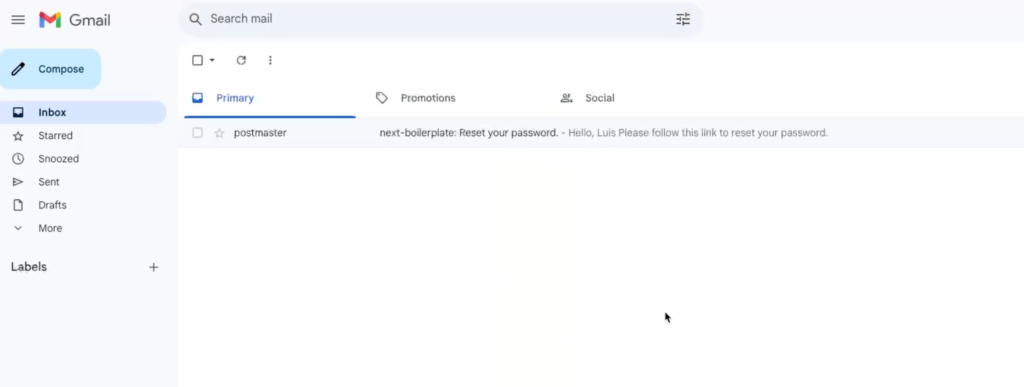
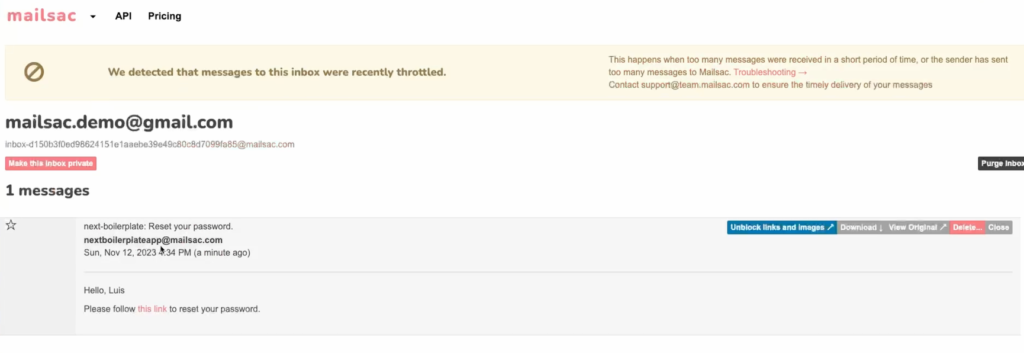
Going through the password reset flow in our application again, we successfully have no emails in our real gmail inbox, and an email in the Mailsac inbox.
Also, we did notcreate this inbox ahead of time. It was done ad-hoc as the email came into mailsac.
No emails in our real inboxAnd a successful password reset on our mailsac inbox.
Success. Now we are safe against sending out real emails to customers. Let’s begin the automated testing processes with Cypress
Automatic Testing with Cypress
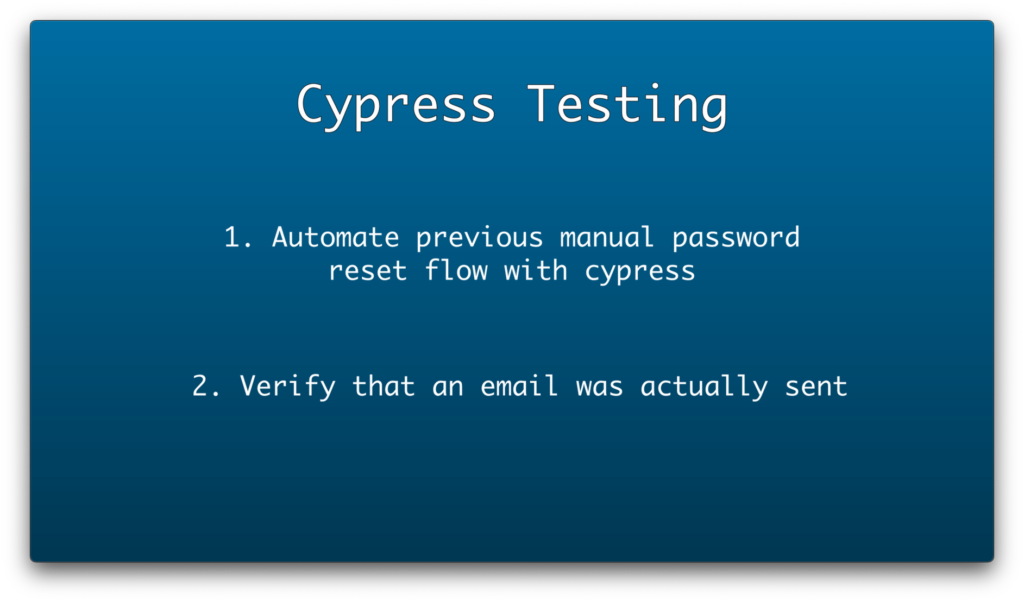
Our goal with cypress is to automate the clicking of a password reset link, and to verify that an email was actually initiated and sent by our application.
Installing and Configuring Cypress
Let’s start by installing cypress
npm cypress install
And then opening up the cypress testing center
npx cypress open
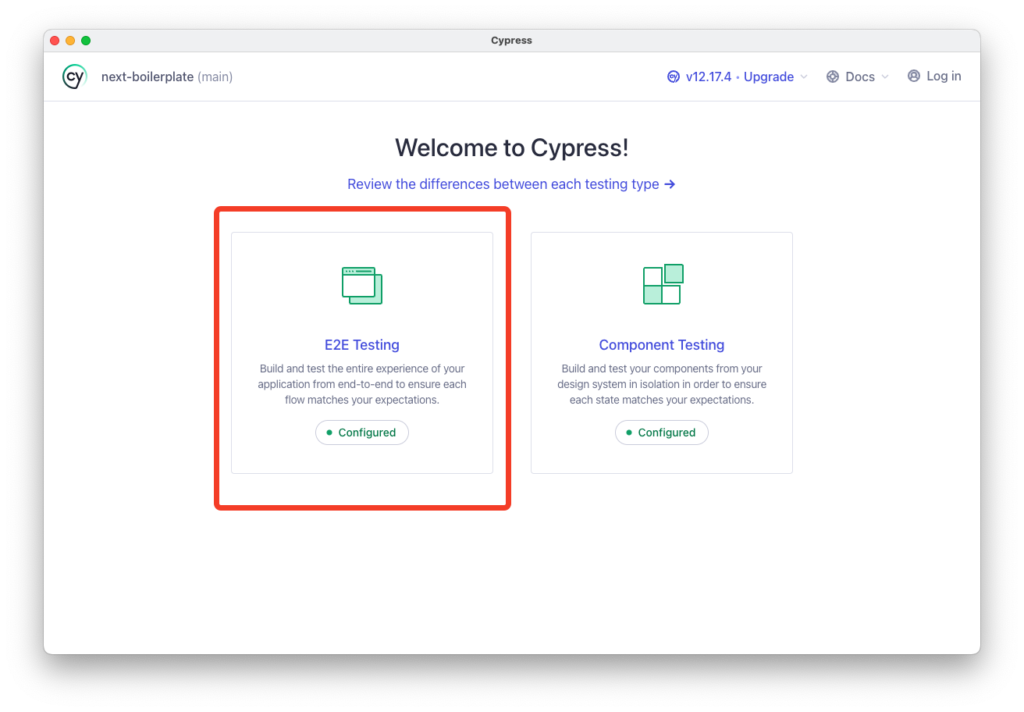
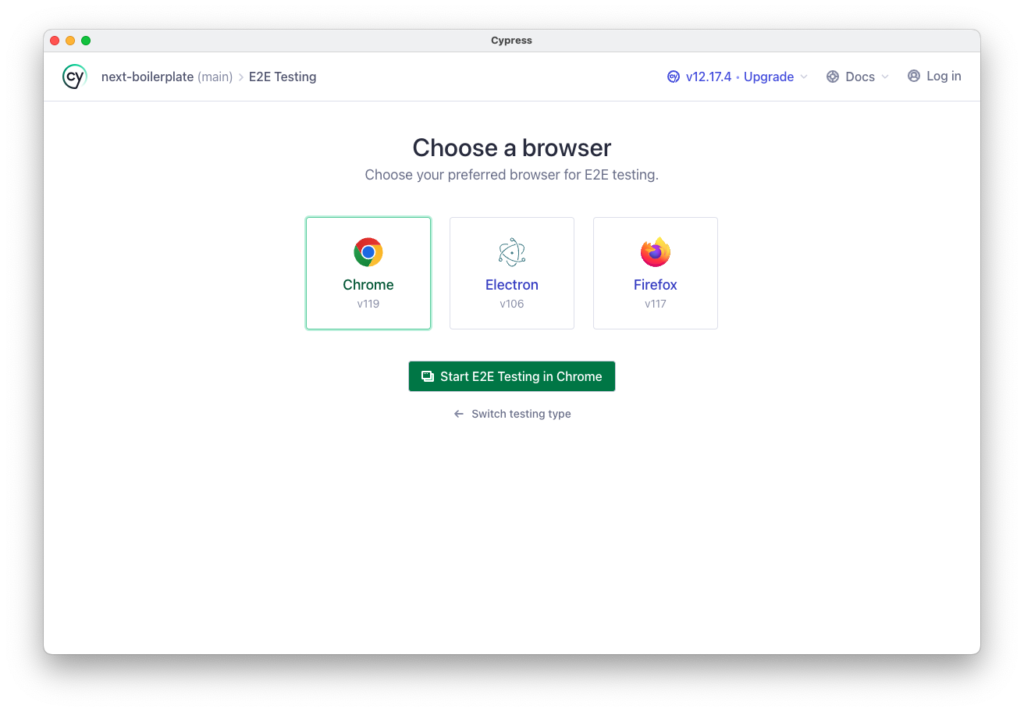
You’ll be greeted by what kind of testing type to initiate. In our case, we’ll use end to end testing
And the included Chrome browser
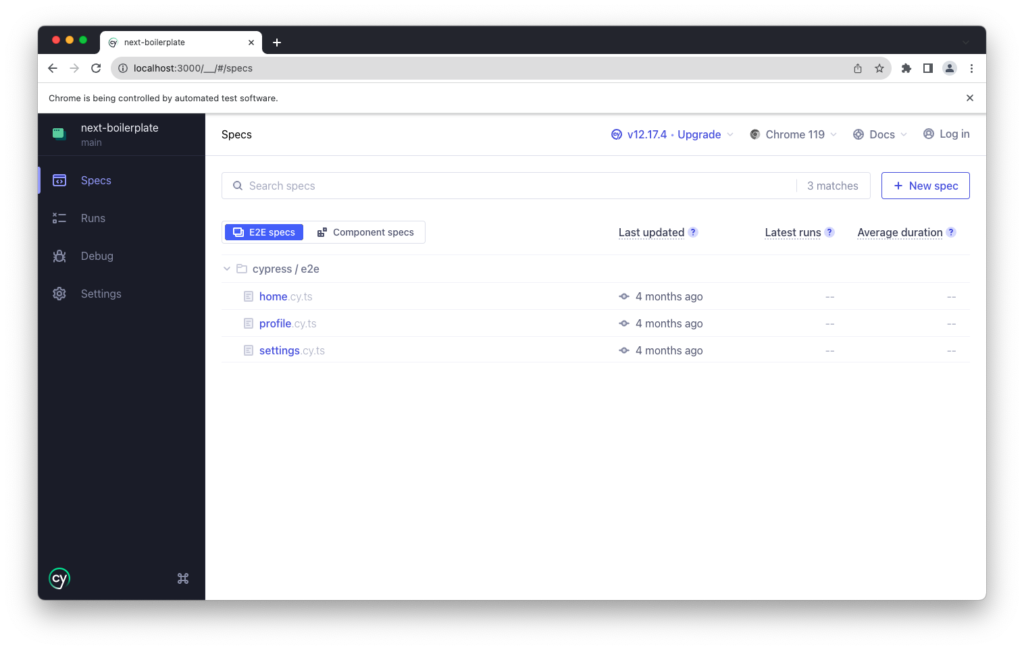
We are then greeted by the testing specs list
And now the real work begins.
Configure Cypress
Our configuration of cypress will need mailsac’s client and dotenv library. Cypress will need this to have the ability to read our application’s .env file
npm install @mailsac/api dotenv
We can now define what exactly a how exactly to execute a checkMailsacMail and deleteAllEmails function
The contents of this file are fully explained in the video (Starting at 6:24) but to call out the highlighted lines (13-30):
checkMailsacMail
The checkMailsacMail function initiates a mailsac client and uses the API key provided from the .env file variable, MAIL_PASSWORD. It then calls the listMessages function and passes it up to the calling function to do as it pleases. The function returns a JSON response as outlined in the Mailsac ListMessages documentation.
deleteAllEmails
Similar to checkMailsacMail but of course, deletes all messages in an inbox. Note that the return is a 204 to confirm deletion.
Let’s move on to the actual password testing spec
Password Reset Flow Test Spec
The spec itself is placed in the cypress/e2e/password_reset_flow_success.cy.ts path and contains:
describe('Password Reset Change', () => {
it('Should successfully change the password', () => {
cy.visit('http://localhost:3000')
// Find a button with class and contains text
cy.get(".MuiButton-root").contains("Sign in").click()
// The new url should include
cy.url().should("include", "/login")
const { username, password } = Cypress.env()
cy.get("a").contains("Forgot password").click()
cy.url().should("include", "/forgot-password")
cy.get("input[name='email']").type(username)
cy.get("input[name=email]").should("have.value", username);
cy.get(".MuiButton-root").contains("Reset").click();
cy.url().should("include", "/login")
cy.task("checkMailsacMail", username).then((messages) => {
const resetUrl = messages[0].links[0];
const subject = messages[0].subject;
const originalInbox = messages[0].originalInbox;
expect(subject).to.eq("next-boilerplate: Reset your password.");
expect(originalInbox).to.eq(username);
cy.visit(resetUrl);
cy.url().should("include", resetUrl);
cy.task("deleteAllEmails", username).then((result) => {
expect(result).to.eq(true);
});
});
})
})
Cypress will run through this spec file line by line and execute the steps we manually ran through at the beginning of the guide. The highlighted lines are really the structure of the returned JSON from mailsac’s ListMessages API
Final Automation
The the spec file in place, go ahead and run the spec
Wrap up
Combining Cypress and Mailsac is like giving your email testing a super boost. We’ve walked you through the nitty-gritty of automating a password reset flow, making sure your emails hit the mark without bothering real customers. It’s all about making your software solid while keeping things simple and stress-free. Give it a try, save time, and keep your users smiling.
If you have any questions about the guide or if you get stuck feel free to ask us anything in our forums.
Welcome to the second part of the two-part series on running selenium tests with GitHub Actions. In the first article, we outlined how to get started and how to set up your repo for Actions. In this guide, we’ll outline how to run email integration tests and pass secrets to GitHub Actions.
To start… Why would you want to test emails with live email services in the first place? Can’t you simply write to a log file or standard out? Yes… and no. Writing to log files or standard out is ok at the beginning of the application lifecycle. Building out the email send feature takes a back seat to ensure the application actually works.
But let’s say your application is almost ready for its initial release. You want to test that you can even connect to an SMTP server. Or test to ensure the right message can go to the right inbox. Testing via log files or standard out starts to get a bit limiting in that regard. Additionally, say you want to be really sure that the contents of an email you send are what you expect them to be. At this point, you’d like to simulate as much of the email delivery as possible.
You can accomplish this with a disposable email service like Mailsac.
Allow us to plug our mail service
At Mailsac we focus on the developer experience around email automation and testing. That’s why we’ve made it so you can test out the API mentioned in this guide with a free account. You can sign up here.
So let’s lay out our testing goal:
Simulate an email send with our sample application.
Let’s craft the email by driving Selenium through the form. Start by crafting a selenium test:
const chrome = require('selenium-webdriver/chrome');
const {Builder, Browser, By } = require('selenium-webdriver');
const screen = {
width: 1920,
height: 1080
};
(async function emailSendTest() {
let driver = await new Builder()
.forBrowser(Browser.CHROME)
// .setChromeOptions(new chrome.Options().headless().windowSize(screen))
.build();
try {
await driver.get('<http://localhost:3000>');
let didSendButtonRender = await driver.findElement(By.id('sendbutton')).isDisplayed()
if (!didSendButtonRender){
throw new Error(`Send button was not rendered properly.`);
}
await driver.findElement(By.id('email')).sendKeys("sampleapptest@mailsac.com");
await driver.findElement(By.id('comment')).sendKeys("This is some text from our Selenium test.");
await driver.findElement(By.id('sendbutton')).click();
} finally {
await driver.quit();
}
})();
tests/email-send.js
Note: I left the headless option off for this first test. You’ll want to turn the headless option back on for the test run via our continuous integration environment.
Note that you’ll need to install a couple of dev packages to get this to work: dotenv and superagent. dotenv is needed in this instance since our tests don’t load the entire next framework and as such, we need a method to read your .env file. superagent is a small client-side HTTP request library for doing quick HTTP calls like the one we’re about to do.
So go ahead and add them to your developer dependencies:
npm install --save-dev dotenv superagent
And add our own text comparison to Mailsac’s sample code:
require('dotenv').config()
const superagent = require('superagent')
const mailsac_api_key = process.env.MAILSAC_API_KEY
const expected_message = 'This is some text from our Selenium test.'
superagent
.get('<https://mailsac.com/api/addresses/sampleapptest@mailsac.com/messages>')
.set('Mailsac-Key', mailsac_api_key)
.then((messages) => {
const messageId = messages.body[0]._id
superagent
.get('<https://mailsac.com/api/text/sampleapptest@mailsac.com/>' + messageId)
.set('Mailsac-Key', mailsac_api_key)
.then((messageText) => {
if (messageText.text !== expected_message) {
throw new Error(`Message '${messageText.text}' does not match expected text '${expected_message}'`)
}
else{
console.log("Message comparison passed");
}
})
})
.catch(err => {
console.log(err.message)
process.exit(-1)
})
tests/email-read.js
Running the test locally should result in a passing test:
Of course, if we’ll run these tests many times we’ll also want to ensure that we delete the email contents after our successful read. Let’s add a cleanup step to our read test:
require('dotenv').config()
const superagent = require('superagent')
const mailsac_api_key = process.env.MAILSAC_API_KEY;
const expected_message = 'This is some text from our Selenium test.';
const testInbox = 'sampleapptest@mailsac.com';
superagent
.get(`https://mailsac.com/api/addresses/${testInbox}/messages`)
.set('Mailsac-Key', mailsac_api_key)
.then((messages) => {
const messageId = messages.body[0]._id
superagent
.get(`https://mailsac.com/api/text/${testInbox}/` + messageId)
.set('Mailsac-Key', mailsac_api_key)
.then((messageText) => {
if (messageText.text !== expected_message) {
throw new Error(`Message to delete '${messageText.text}' does not match expected text '${expected_message}'`)
}
else{
console.log("API Read Op: Message comparison passed");
superagent
.delete(`https://mailsac.com/api/addresses/${testInbox}/messages/${messageId}`)
.set('Mailsac-Key', mailsac_api_key)
.then((messageResponse) => {
console.log(`API Deletion Op: ${messageResponse.body.message}`)
})
}
})
})
.catch(err => {
console.log(err.message)
process.exit(-1)
})
tests/email-read.js
Let’s add it to a test script and our workflow YAML file:
Note that we added a run mail-tests script to our end-to-end testing.
Try your end-to-end script locally to ensure it works:
GitHub Action Test
Now that you have a working test on your local workstation, it’s time to push it up so GitHub Actions can start running your tests. If you haven’t already, read through the first article to catch up on GitHub Actions configuration and initialization.
As a reminder, this is our main.yml workflow file:
on: [push]
jobs:
tests:
runs-on: ubuntu-latest
name: Run Selenium Tests
steps:
- name: Start selenoid
uses: Xotabu4/selenoid-github-action@v2
- uses: actions/checkout@v1
- run: npm ci
- name: Run end to end tests
run: npm run e2e-test
- name: Run external login test
run: npm run external-tests
.github/workflows/main.yml
With all that said, let’s try and see if this email test sends an email on GitHub.
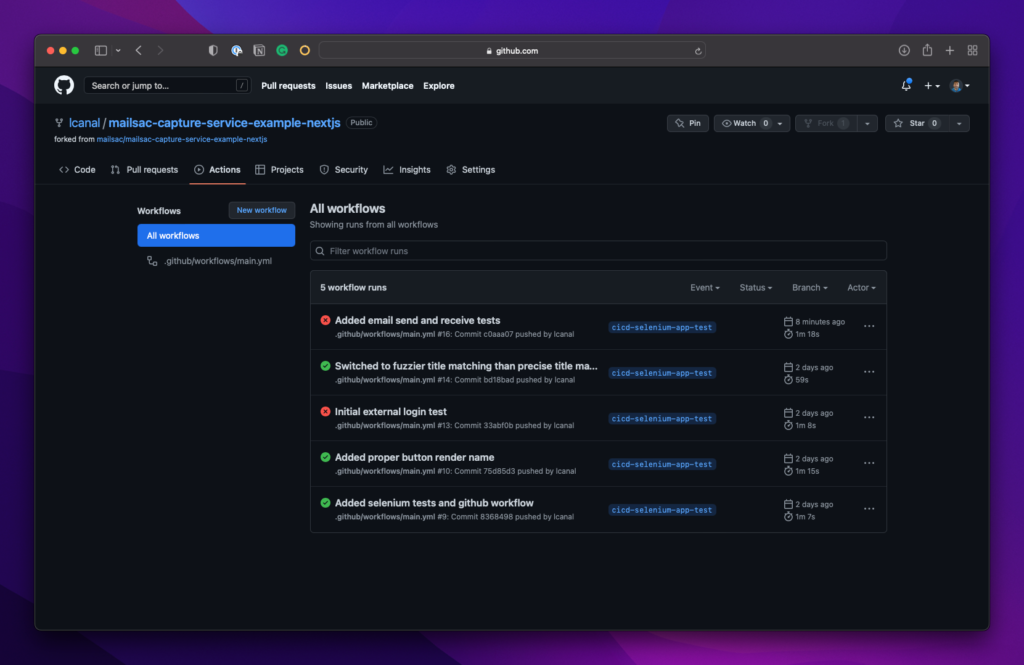
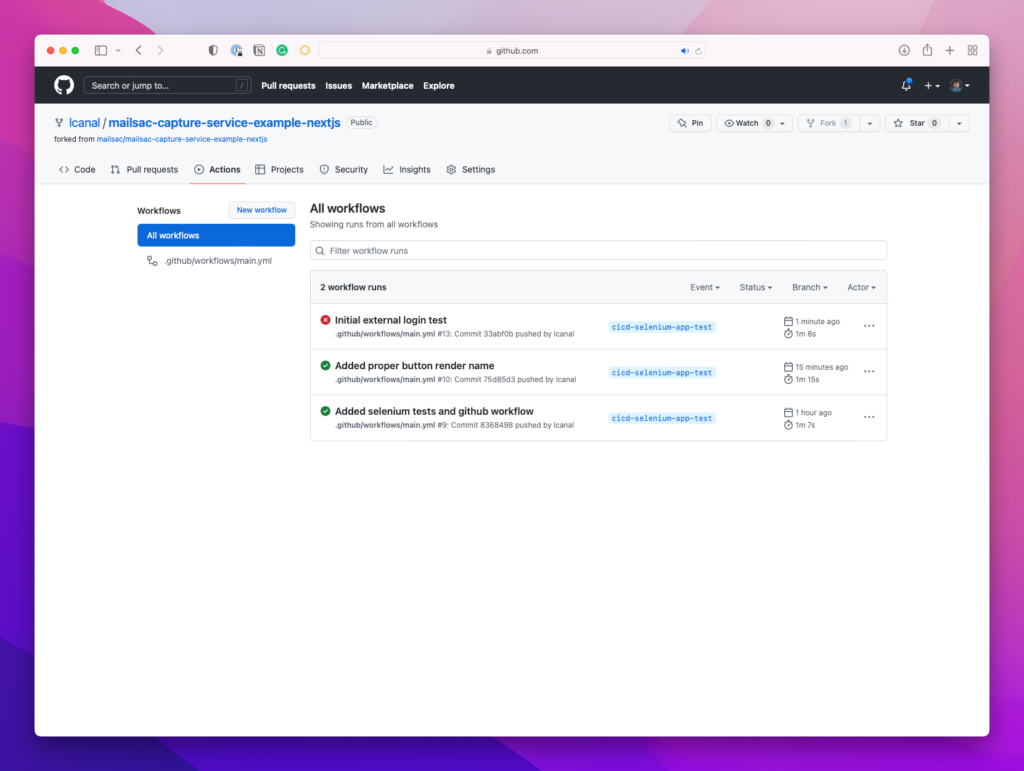
Do a git push and check your results on GitHub:
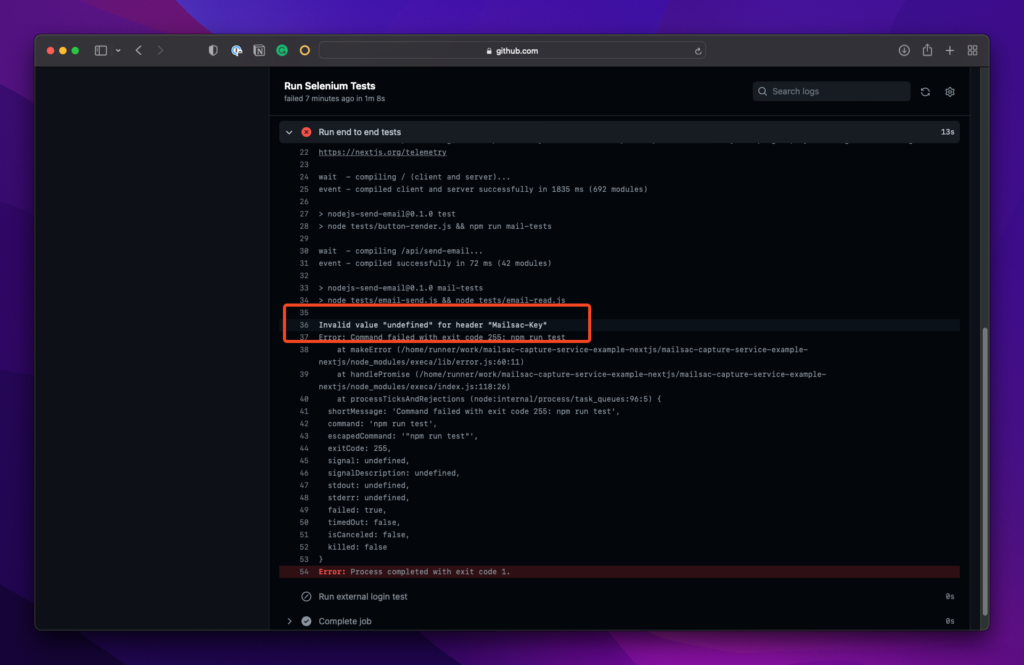
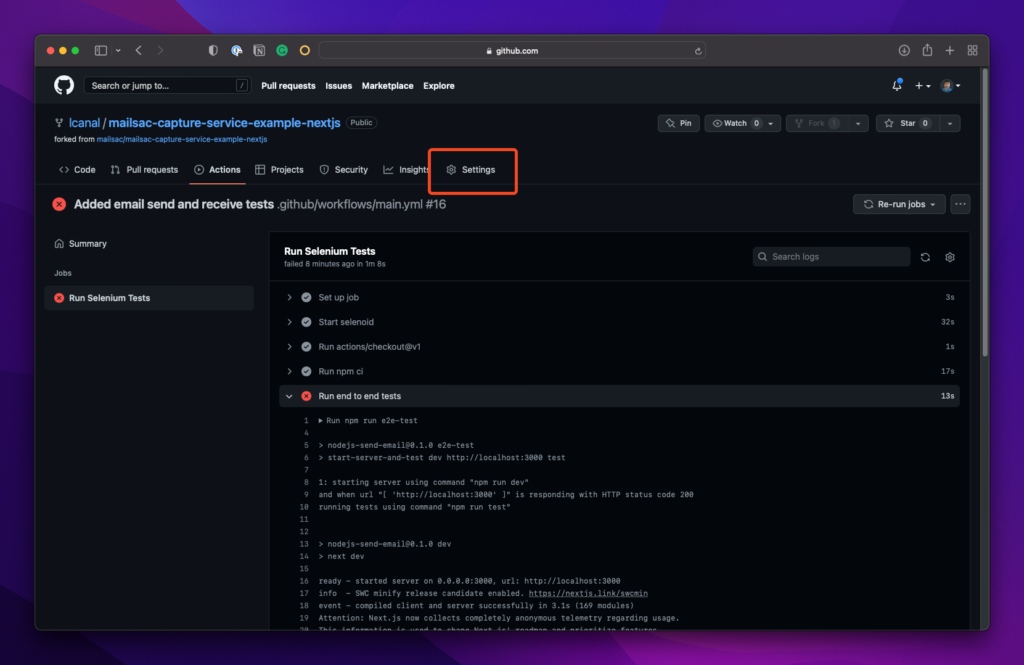
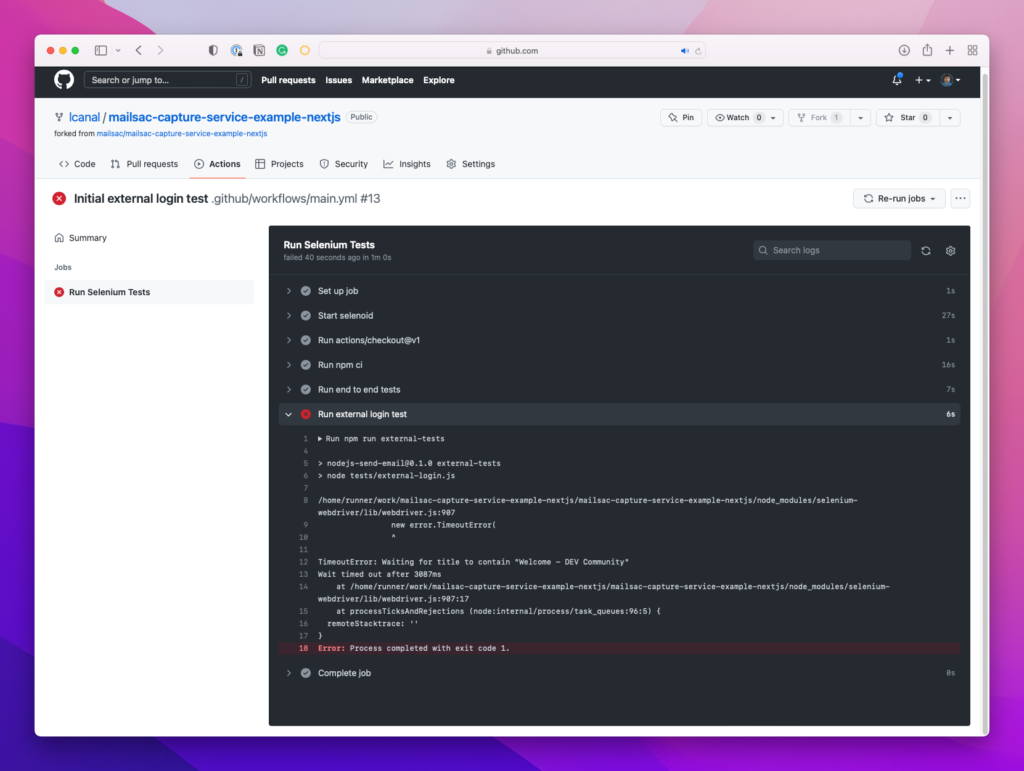
Looks like a failure. On closer inspection:
Ah, that’s right! We forgot to set our API keys at the GitHub level. Let’s go ahead and do that.
GitHub Actions Secrets
You can find it under Settings in your repo:
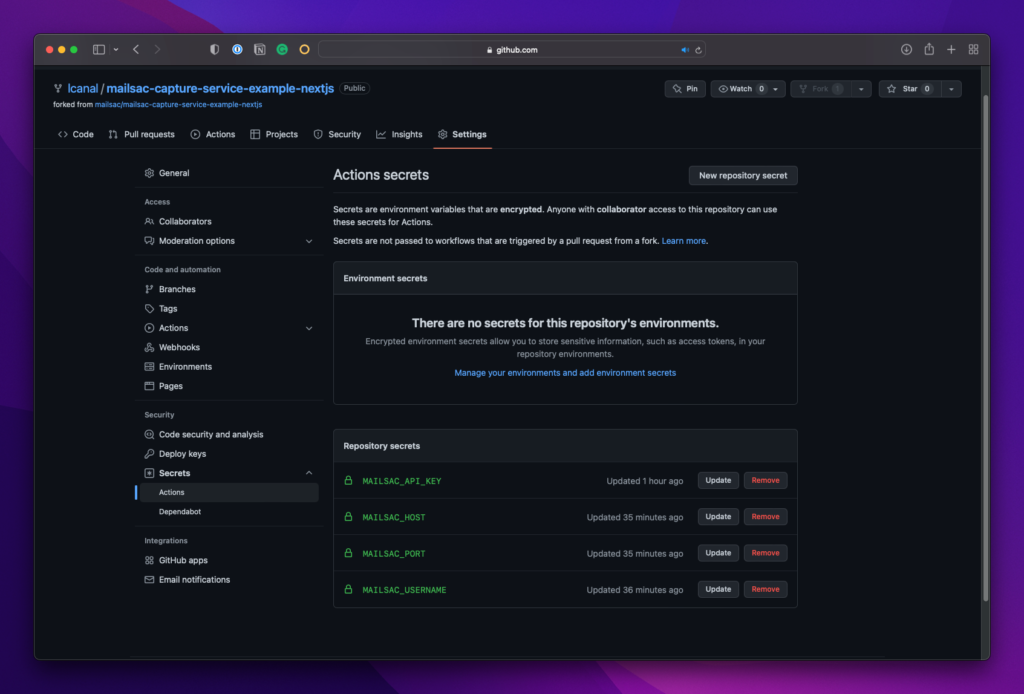
Then under Secrets → Actions click New repository secret
Add each secret that will be needed:
Finally, ensure you add it to the workflow file:
- name: Run end to end tests
run: npm run e2e-test
env:
MAILSAC_API_KEY: ${{secrets.MAILSAC_API_KEY}}
MAILSAC_USERNAME: ${{ secrets.MAILSAC_USERNAME }}
MAILSAC_HOST: ${{ secrets.MAILSAC_HOST }}
MAILSAC_PORT: ${{ secrets.MAILSAC_PORT }}
.github/workflows/main.yml
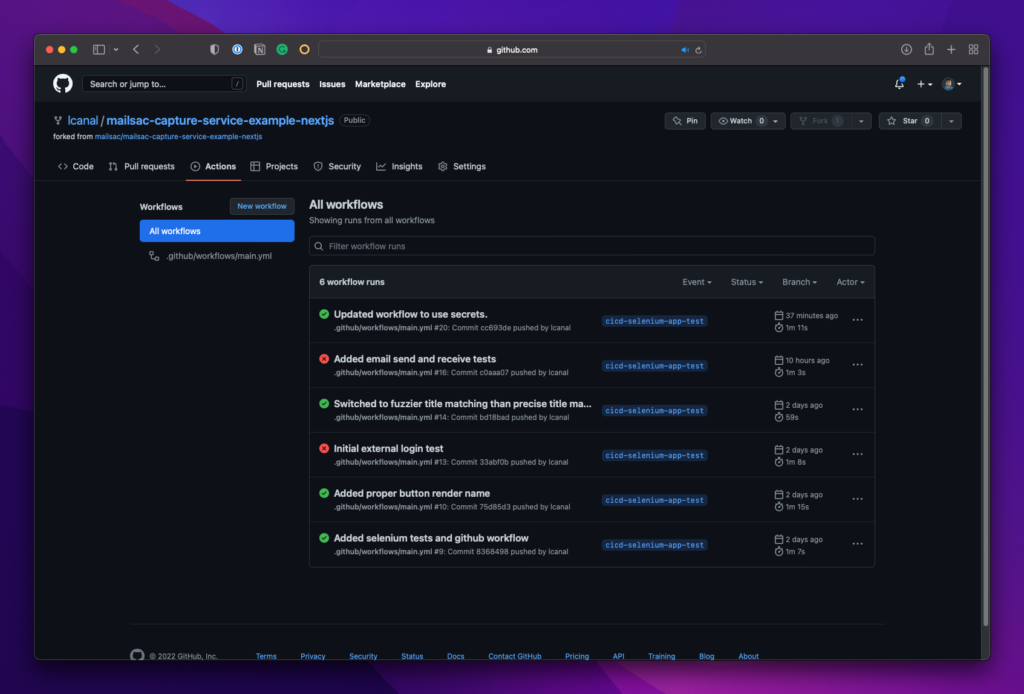
Do a git commit and git push and see the results on GitHub:
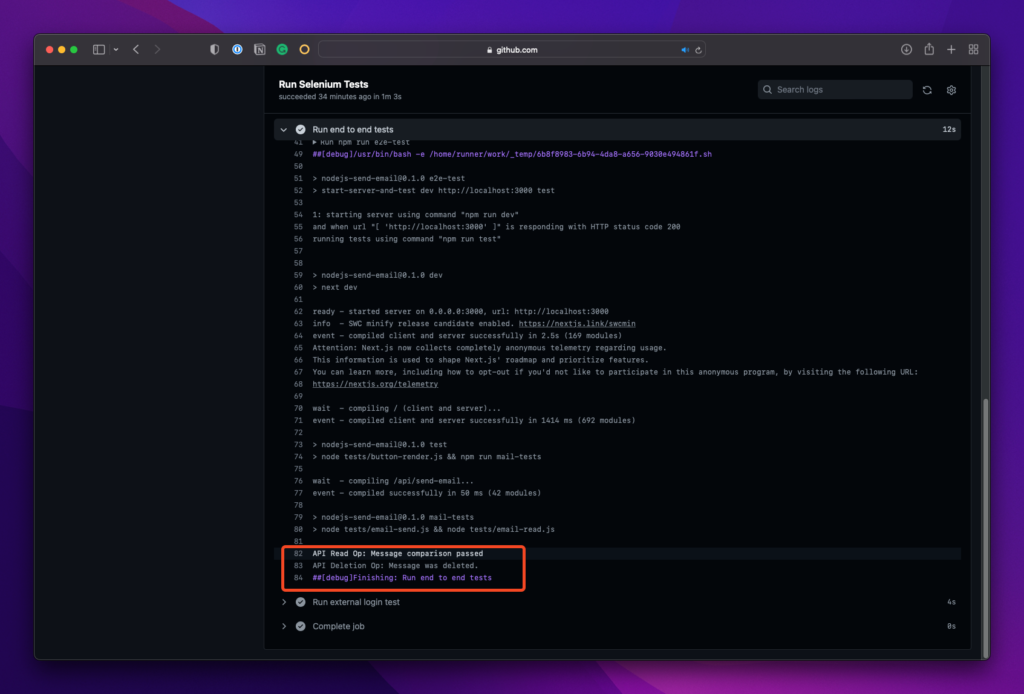
Success! You can check the details to ensure the API read and write options fire fired off:
Conclusion
GitHub Actions is a powerful CI/CD tool and we have only scratched the surface of its capabilities with Selenium. We’ve also shown the power of email testing and how you can ensure the contents of every email are intentional.
We hope you enjoyed the guide, and hope to hear from you on our forums or follow our other content on LinkedIn.
Browser automation is an invaluable tool. At a personal level, you can use it to automate repetitive tasks online. But browser automation can deliver so much more. At its best, it can run tasks with consistent results. Tasks that need lots of manual execution and complexity. Tasks like checking button placement, evaluating user login, and registration workflows. And in our modern era, we have our pick of browser automation frameworks.
We’ve covered browser automation before, but in this guide, we’ll do a deep dive into one of those frameworks. Additionally, we’ll cover using those testing frameworks alongside a specific continuous integration application.
In this guide we’ll walk through three testing scenarios using Selenium and GitHub Actions:
Check if a button rendered
Test a login workflow
Ensure the contents of a sent email
We’ll use our sample application to make our examples concrete, informative, and useful.
First, let’s talk about what you need to enable GitHub Actions.
Getting started with GitHub Actions
First, if you’d like a primer on GitHub Actions their page is a great resource. To summarize, it’s an easy way to run tasks when someone takes an “action” against your repo.
Actions can be:
Pull request merges
Commits
Repo pushes
GitHub takes your action and runs a task like integration tests, unit tests, etc. All you need to do is create a .github/workflows/main.yml file. Note: Running tasks is just one of the many possibilities for GitHub Actions. You can encompass entire workflows and even produce packages.
We’ll introduce more details further along the guide. For now, you can start by adding an empty file at:
We’ll use this repo to walk through the examples mentioned in the intro. These sample scenarios are not meant to be comprehensive, of course. They’re meant to kick-start your journey with GitHub Actions.
To start, you’ll need to run the standard node installation and run the command:
npm install
npm run dev
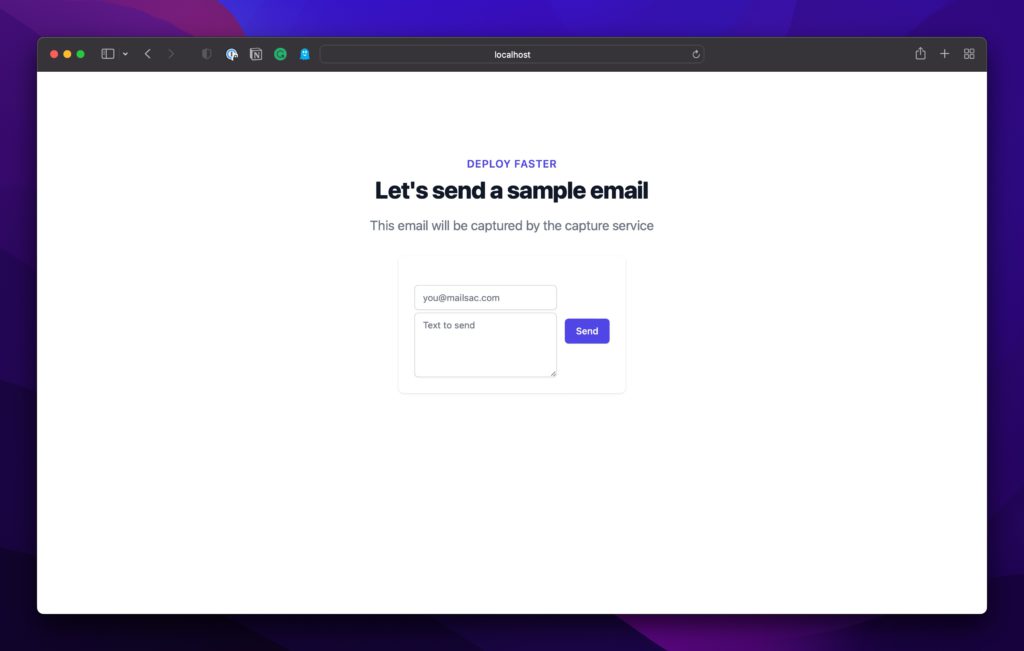
Navigate to http://localhost:3000 and see our application in action:
With the preliminary steps done, on to the tests.
First Selenium Test: Check if the button rendered
Let’s start with the simplest test, a button render assertion test.
For this first section, we will:
Add the node packages required to test
Add our selenium test
Add testing scripts to our package.json so that GitHub Actions can call our tests
Add a simple Github Actions workflow file
Let’s start by adding a new branch (or you can fork the repo if you’d like):
We’ll need to add selenium and a start-server-and-test package. start-server-and-test starts our application. Then it calls our selenium tests so they can run against our running application.
start-server-and-test is one of our most straightforward ways to add live server testing capabilities. If you need more flexible frameworks, you may want to investigate mocha or cypress.
We’ll just focus on the core GitHub actions and selenium testing in this guide.
Selenium Test: Button Render
On to the test itself.
Let’s create a test under tests/button-render.js using selenium and headless chrome:
const chrome = require('selenium-webdriver/chrome');
const {Builder, Browser, By } = require('selenium-webdriver');
const screen = {
width: 1920,
height: 1080
};
(async function buttonRender() {
let driver = await new Builder()
.forBrowser(Browser.CHROME)
.setChromeOptions(new chrome.Options().headless().windowSize(screen))
.build();
try {
await driver.get('<http://localhost:3000>');
let didSendButtonRender = await driver.findElement(By.id('sendbutton')).isDisplayed()
if (!didSendButtonRender){
throw new Error(`Send button was not rendered properly.`);
}
} finally {
await driver.quit();
}
})();
Now let’s add the workflow main.yml file to the repo. This is the main file that kicks off a GitHub Action workflow. To keep things simple, we’ll execute our actions based on when a comitter pushes code. You can find the full list over at GitHub’s documentation pages.
on: [push]
jobs:
tests:
runs-on: ubuntu-latest
name: Run Selenium Tests
steps:
- name: Start selenoid
uses: Xotabu4/selenoid-github-action@v2
- uses: actions/checkout@v1
- run: npm ci
- name: Run end to end tests
run: npm run e2e-test
.github/workflows/main.yml
For our project, we’ll use solenoid-github-action, a GitHub Action that starts a selenium grid instance in a docker container. Solenoid is a golang reimplementation of Selenium. It makes it very easy to integrate with any continuous integration/deployment environment.
In the last portion of the file, the npm run e2e-test section kicks off the end-to-end test that starts our server and runs the selenium tests.
That’s it! Before you commit and push your code, try running it locally:
npm run e2e-test
The test should pass in your local environment. If it fails due to chrome driver issues you can find a full guide on browser driver installations here.
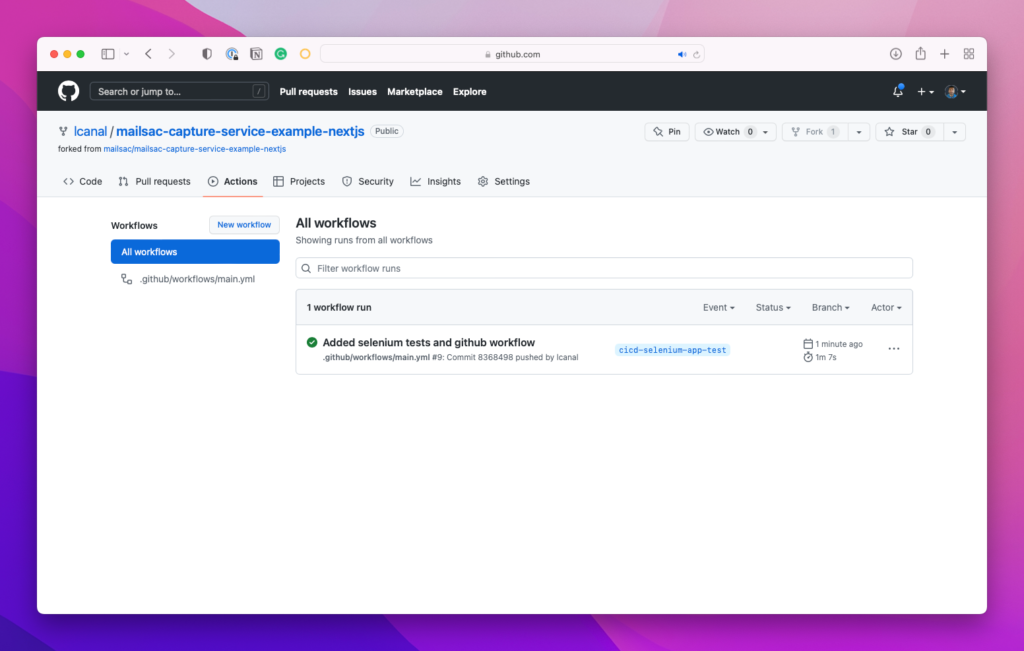
Head over to your repo on GitHub and under the Actions tab you should now see a selenium test run
You can drill down and see where our specific tests ran
Congrats! That completes our first successful test using selenium and GitHub actions. Let’s move on to something a bit more useful.
Second Selenium Test: Open and login into a web app
Let’s expand on our tests a bit. Since we’re aiming for simplicity in this guide, I won’t add a whole authentication workflow to our application. Instead, let’s focus on an existing website and attempt (and fail) to log in.
As a software developer, it’s crucial to have effective testing tools. They run the gamut from quick libraries to full-fledged analytic frameworks. They also range from free to paid. But which ones are the best in the testing space? In this article, we will list the top 10 best testing tools for software development teams.
But why test?
We can hear the groaning now. Testing is like exercise. We know we’re supposed to, but only so many of us do. Even fewer of us genuinely enjoy it. But testing doesn’t have to be a grind. In fact, we’re willing to bet a portion of you will enjoy it. Why bother with tests?
Testing can be fun – A lot of these tools are automation based. You can focus on crafting a comprehensive test as part of your feature building.
Testing can be done by other groups – It can create a bridge between you and, for example, the QA team. Commiserating around shared testing struggles can go a long way in building trust between teams.
An investment in yourself – Much like the exercise analogy, an investment in testing is an investment in yourself. Refactoring code, deployment flight checks, and all-around confidence about your changes can only be achieved by proper testing.
Now that you know some of the whys, let’s walk through the 10 best testing tools for software developers.
The 10 Best Testing Tools For Software Developers in 2022
1. Puppeteer
Puppeteer is a favorite of the NodeJS community due to its easy integration into your existing build system. It automates form submission, UI testing, keyboard inputs, and more. The main limitation it does have surrounds browser support. As of this writing Puppeteer only supports Chrome. Firefox support is still in the experimental phase.
Puppeteer’s killer feature is that it installs the browser binary for you, making integrating it into your build system easy.
We’ve written an article on using Puppeteer to walk through a common testing scenario. It guides through testing a login screen to dev.to and ensuring entering a bad password does not allow you to log in. You can find it under Automate the Testing Pain Away with Browser Automation.
2. JMeter
JMeter is a popular open-source tool that can test web applications, network performance, and more. It has a versatile GUI for manual testing and a CLI for automated testing. It also offers recording capabilities much like some other tools on this list. It’s a powerful tool with one enormous drawback: it can only integrate with Java applications.
3. Selenium WebDriver
Selenium WebDriver is an open-source automation tool that can test web browsers across different platforms. It’s by far one of the more popular testing tools available around browser automation testing. It can incorporate into a variety of different continuous integration / continuous deployment tools.
Additionally, WebDriver is one of the few tools to be W3C recommended! In their words:
Major browser vendors (Mozilla, Google, Apple, Microsoft) support WebDriver and work constantly to improve the browsers and browser controlling code, which leads to a more uniform behavior across the different browsers, making your automation scripts more stable.
Allow us to shamelessly plug ourselves for a moment, but for your email testing and capture needs, Mailsac is top-notch. We provide just-in-time subdomains and a robust API for automation-driven email testing.
A video walkthrough of using ad-hoc Developer Environments in your testing
5. Postman
Postman is a flexible tool for managing and automating testing requests. It has an intuitive GUI and can generate scripts in various programming languages. You can also store playbooks in Postman to call later using their collection runner.
Give Postman a shot, it’s one of the most popular web API testing tools for a reason.
6. Selenium IDE
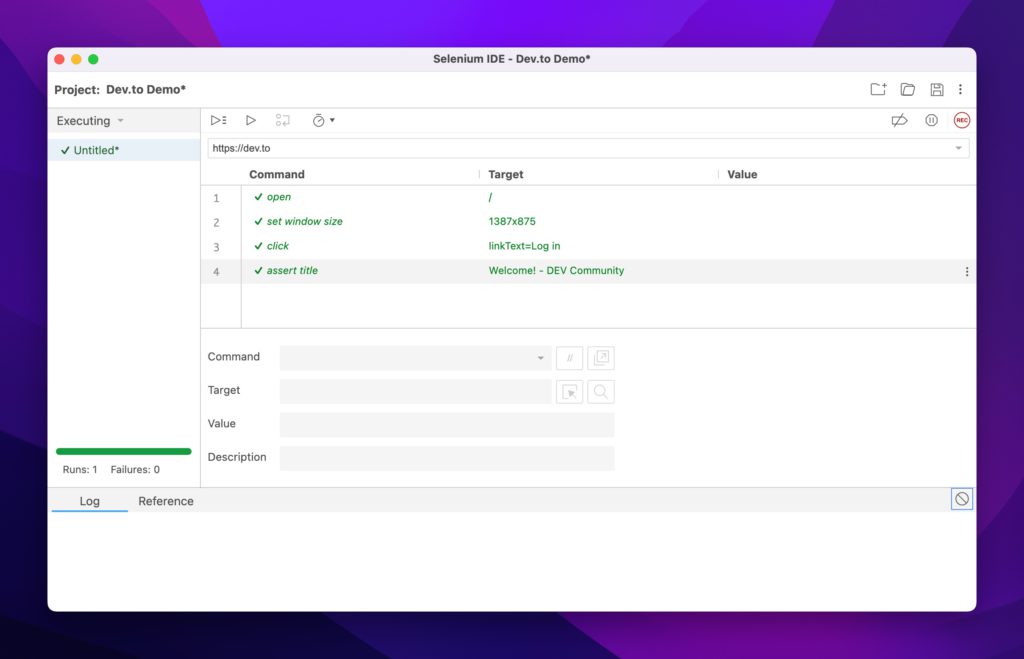
Selenium IDE is WebDriver’s GUI-driven sibling. It does a similar job of orchestrating browser functions but with the twist that it can “record” actions as you perform them in your browser.
Successful test suite
Selenium IDE can test web applications, API endpoints, and everything else that WebDriver can do. It’s available as Firefox, Chrome, and Edge extensions.
The built-in Chrome DevTools offer a powerful extension that allows you to inspect and test web pages in real-time. Most other browsers offer this capability but Chrome is hard to beat. It offers:
Built-in Lighthouse report capable of grading the accessibility of your page
Artificial network throttling to simulate slow connection speeds
Performance measurement across pages
Hundreds of extra plugins
8. JUnit5
JUnit5 is a popular open-source unit testing framework that can test Java applications. It offers the ability to have test runners for your test cases and enables you to focus on Test Driven Development.
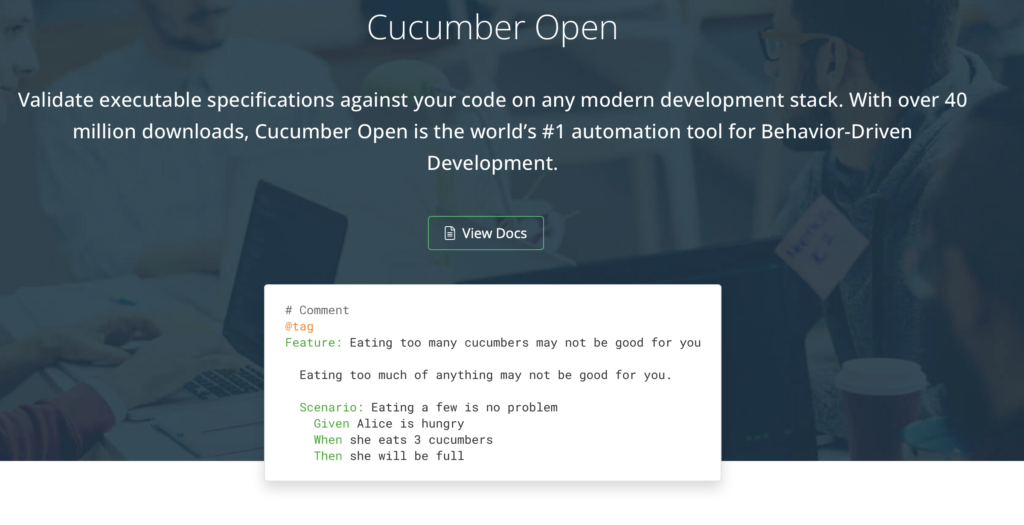
Cucumber is an open-source testing tool that can be used to test web applications and APIs. Cucumber is a rather unique one on this list in that it focuses on getting the specifications right the first time. It’s called Behavior Driven Development and it allows project managers and technical contributors to collaborate on concrete aspects of the application.
10. Firefox Developer Tools
Firefox does a great job innovating on the developer toolset. (3D View anyone?) Since it can do anything the Chrome DevTool set can, we’ll use this section to focus on specific plugin shoutouts:
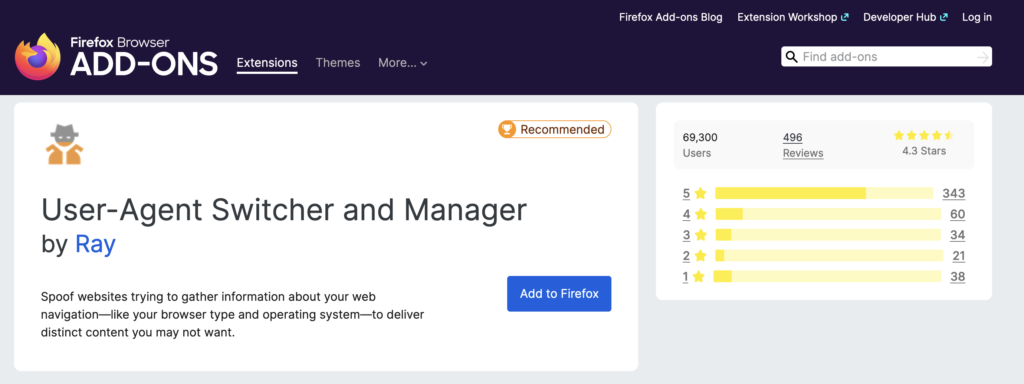
User-Agent Switcher
Test your browser detection logic with this extension.
Ghostery
Ghostery is great for a variety of reasons, not least of which is to prevent distractions. It blocks a variety of trackers, ads, and generally improves page performance.
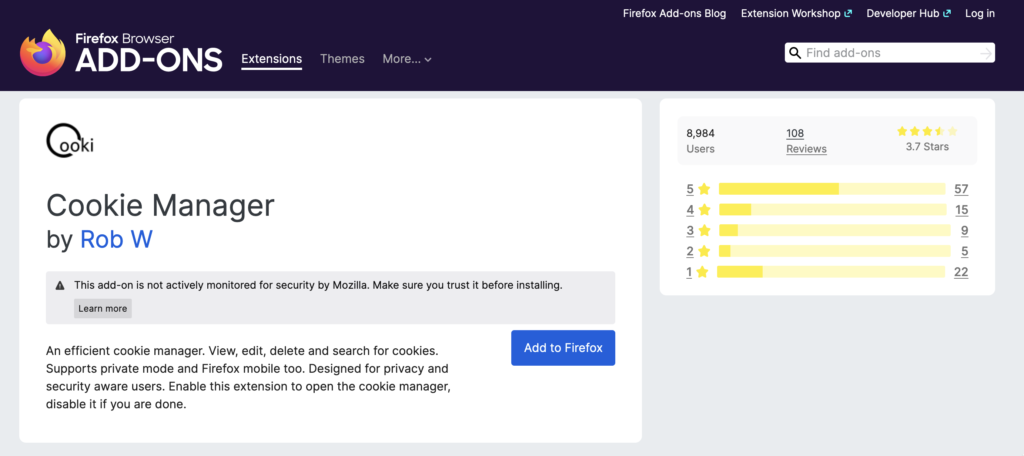
Cookie Manager
A versatile extension that can help you test all sorts of functionality in your application. Cookie Manager can help you with everyday tasks from authentication testing to session switching and inspection. You can additionally export and import cookie sets.
Conclusion
These are some of the best software testing tools available for developers. They all have their strengths and weaknesses, but they are all powerful tools that can help you improve your code quality.
If you’d like to discuss some of the tools you use for your software testing we’ll love to hear about it! Head on over to our community at forum.mailsac.com and discuss your must-have or time-saving tools.
When the topic of domains and email comes up most people begin and end the conversation at the top domain level. Subdomains seem to be left out of the conversation in their entirety. Are we trapped in our thinking about subdomains as mere marketing and newsletter features? Maybe it’s too difficult to use subdomains without an IT team involved. Maybe no one has brought up subdomains outside of meme-filled newsletters. Maybe you just haven’t thought about subdomains in general.
Well, let’s break up that thinking. Subdomains have a lot to offer. Do you have trouble testing 10 different email features in your application? Does the thought of accidentally sending an email to thousands of users that says “Test” make you break into a cold sweat? Subdomains can help.
We’ll show you some of the possibilities of subdomains and walk through some use cases. We’ll also provide a quick 15-second walkthrough at the end that will setup up 2 new subdomains for development and testing purposes.
But before we show you some of the juicy scenarios, let’s do a quick rundown of what a subdomain actually is.
What’s the difference between an email domain and a subdomain?
Subdomains are a way to slice up domains for specific functions like newsletters and blogs. The advantage of a subdomain is having a clear purpose tied to the name. Receiving emails from tom@memenews.mailsac.com and jane@hottakes.mailsac.com show their intent from their name alone. Receiving emails from tom@mailsac.com and jane@mailsac.com is a lot vaguer. The former set clearly sends memes and educational nuggets. The latter could be a friendly name for our billing bots.
Subdomains = an easy way to differentiate email by function.
Alright, sorry about that. Had to make sure everyone was on the same page on subdomains. Let’s move on to 3 different subdomain scenarios.
Subdomain Use Case 1: Developers Get Their Own Email Domains
You work on a team of developers, and each of you needs to test the same features on a few different applications. Additionally, each feature has an email workflow attached to it. The usual response to this is to have a shared inbox, for example, timesheetsystem-dev@acme.com. But the pain around that approach comes fast. Issues like:
Difficulty in separating out each developer’s testing scenarios
Having to sift through 1000 other unrelated emails while looking for that 1 workflow email is painful
Complex workflows are pretty difficult to track
A domain for me, a domain for you
Creating an email subdomain per developer is an effective way to isolate these emails across systems:
Jon gets:
timesheets@acme-jon.msdc.co
billing@acme-jon.msdc.co
travel@acme-jon.mdsc.co
Emma gets:
timesheets@acme-emma.msdc.co
billing@acme-emma.msdc.co
travel@acme-emma.msdc.co
Remember that you don’t need to create these inboxes ahead of time. They are made on the fly and removed when they make sense for you, the person knee-deep in the application.
Also not shown above just yet: Mailsac’s unified inbox in action.
Subdomain Use Case 2: Company-Wide Domains per Environment
Ensure emails stay in their zone
Environments for each set of applications are a pretty common scenario amongst enterprises. A sample above shows 2 applications split between 3 environments:
timesheets@acme-dev.msdc.co
timesheets@acme-test.msdc.co
timesheets@acme.com
billing@acme-dev.msdc.co
billing@acme-test.msdc.co
billing@acme.com
The upside of this approach is having predefined email subdomains for each environment. Developers, QA teams, and operations all know which environment the emails are associated with. QA testers can review the messages easily knowing which environment sent the emails. Operations and developers know which email address and domain to use as variables when configuring tests or environments. Ultimately, this saves time for all the teams involved.
Subdomain Use Case 3: Email Driven API Workflow
An email-driven API workflow is a workflow that kicks off when an email arrives. The approach resembles the first scenario, where each developer gets their own domain. The difference is the usernames are less flexible. You pin it once to an API and use it for the long term. For example:
An email to submit@acme-emma.msdc.co can trigger a Submit API action that can create a case in the HR management system
An email to hr-help@acme-emma.msdc.co can trigger an Integration API action that can automatically create a ticketing workflow in your Incident Management system.
You can even string together a received email to a webhook using Mailsac’s webhook service. If you’d like to poll for updates instead we have websocket for close to real-time processing or the rest API for polling.
Alright, enough theory let’s do a walkthrough.
Walkthrough: Company-Wide Environments
Using the company-wide scenario we can have a working subdomain in a few seconds using Mailsac. A partner video will walk through the individual developer scenario.
You also have the option of using your own domain. This requires an external domain service provider. There are lots of guides out there on which domain registrar is the best.
But let’s make this easy. Let’s use Mailsac’s Zero-Config Subdomain tool and bring up a new subdomain in 2 clicks. Note that you will need at least a Business Plan to make this scenario work. You can still enjoy the benefits of a single subdomain through the Indie Plan.
Type the name of the subdomain you’d like, in our case acme-dev and acme-test
And that’s it! You should have 2 custom subdomains ready to use. Let’s put it them rough their paces. We’ll send out these emails from any client (I’ll use Gmail):
To: billing@acme-dev.msdc.co Subject: Email sent to Billing (DEV) Content: This is meant for dev
To: timesheets@acme-dev.msdc.co Subject: Timesheet Submission (DEV) Content: Sample timesheet submission
To: timesheets@acme-test.msdc.co Subject: Timesheet Submission (TEST) Content: Sample timesheet submission
Nothing special here, just simulating a programmatic email
After submitting your set of emails, you *could* just check timesheets@acme-dev.msdc.co and timesheets@acme-test.msdc.co individually…
This is already looking painful…
…or you could use the Unified Inbox feature that displays all of your custom domains, subdomains, and private addresses in one convenient location:
Much better
It’s just that easy!
Wrap Up
With this new superpower, you should be able to conjure up lots of different use cases for subdomains. The friction of creating and importing domains is completely taken care of for you. No need to register a domain with an external registrar, or manage an IT team to handle registration for you.
We’re always looking for feedback, so let us know what you think or if you run into any problems on our forums.
When I say “You need to test your code”, do you wince? Is it a feeling of guilt, one of “I know I should, but…”. Testing may not conjure up the sexiest of images. We as developers frequently put tests off until the end of our feature cycle. Or respond to a production bug by issuing a quick patch. Or worse, just bury our heads in the sand and pretend that we don’t have any bugs in our code at all. (Note: All code has bugs).
The reality is that testing is an incredible investment in your code’s future. Investing in tests is like an insurance policy: hedging your bets against an unknown future. An unknown future consisting of bitrot, dependency deprecations, or service API changes. Testing provides the ability to patch those unknowns through refactoring or flat-out removing stale dependencies. Testing can also buffer against those risks, providing peace of mind.
In this post, I’ll outline 3 different types of testing tools:
Selenium WebDriver
Selenium IDE
Puppeteer
To do an apples-to-apples comparison the testing scenario will be the same for all three tools. I’ll also model my testing after a user’s typical behavior. Behaviors like login attempts, searching, and form submissions. They also try to hit every layer of the application, from the user interface to the database.
Benefits of Testing a User Interface
Testing isn’t just limited to the backend. Testing your interface can provide complete end-to-end testing scenarios such as:
Repeated calls to your modal. Does the modal come back after the first call?
Does your submit button produce an error if the form has an incorrect value?
Does the UI load after a successful login to an empty state in your application?
Does a specific result come back after a form search?
I’m going to walk through a straightforward testing scenario with three tools. Not to rank them, but to touch on the nuances of each. Some of these tools allow you to create tests through simple browsing. Others are headless, allowing you to drive through programming languages.
What’s a headless browser?
Conventional browsing involves rendering forms, buttons, and images to the user. A headless browser interacts with websites through code without displaying any controls. Headless browsing opens up possibilities that are tough to achieve with conventional browsers like:
Integration with your build systems
Consistency in testing
Decreasing the duration of your tests
Layout screen captures and comparisons
Tools of the Automated Browser Trade
Onto the good stuff: The tools and testing scenarios.
WebDriver targets as its core base Developers and QA Team members who can write code.
The Easiest To Get Started with – Selenium IDE
Selenium designed the IDE version for exploratory testing and bug replication. It’s perfect for walking through a bug with someone else or creating a recording of a bug for your ticketing system.
Puppeteer is a favorite of the NodeJS community due to its easy integration into your existing build system. It automates form submission, UI testing, keyboard inputs, and more. It’s main limitation however is the browsers it supports. As of this writing Puppeteer only supports Chrome. Firefox support is, as of this writing, experimental.
Puppeteer’s killer feature is that it installs the browser binary for you, making the integrating into your build system easy.
Testing Scenario: A Failed Login to dev.to
Here’s our testing scenario:
Load https://dev.to
Click the “Log in” button
Load a page with “Welcome! – DEV Community” in its title.
Click on the “Continue” button
Ensure an “Unable to login” banner appears on the page.
For consistency throughout the walkthrough, I’ll use:
Chrome as my browser
Javascript as the programming language of choice
Test Case 1 – Selenium WebDriver
Let’s begin with an empty directory and selenium package installation:
npm init tests
cd tests
npm install selenium-webdriver
Next, download a browser driver. You can find the full supported list in selenium’s code repository. You can place the binary anywhere. For this walkthrough, I’ll place it in the current project directory under the bin/ path.
Set your specific browser driver path:
export PATH=$PATH:$PWD/bin
I’ll be using this quick test setup (selenium.js):
const {Builder, Browser, By, Key, until} = require('selenium-webdriver');
(async function example() {
let driver = await new Builder().forBrowser(Browser.CHROME).build();
try {
await driver.get('http://dev.to');
await driver.findElement(By.linkText('Log in')).click();
await driver.wait(until.titleIs('Welcome! - DEV Community'), 3000);
await driver.findElement(By.name('commit')).click();
await driver.wait(until.titleIs(''), 3000);
let errorBox = await driver.findElement(By.className('registration__error-notice'));
await driver.wait(until.elementIsVisible(errorBox));
let errorText = await errorBox.getText();
if (!errorText.includes('Error')){
throw new Error(`Error text does not contain expected value: ${errorText}`);
}
} finally {
await driver.quit();
}
})();
Set your driver and run the file
SELENIUM_BROWSER=chrome node selenium.js
A failed Selenium Test
In general I like to ensure my tests fail from the start, followed by working towards passing the tests:
const {Builder, Browser, By, Key, until} = require('selenium-webdriver');
(async function example() {
let driver = await new Builder().forBrowser(Browser.CHROME).build();
try {
await driver.get('http://dev.to');
await driver.findElement(By.linkText('Log in')).click();
await driver.wait(until.titleIs('Welcome! - DEV Community'), 3000);
await driver.findElement(By.name('commit')).click();
await driver.wait(until.titleIs(''), 3000);
let errorBox = await driver.findElement(By.className('registration__error-notice'));
await driver.wait(until.elementIsVisible(errorBox));
let errorText = await errorBox.getText();
if (!errorText.includes('Unable to login')){
throw new Error(`Error text does not contain expected value "${errorText}"`);
}
} catch(e) {
console.error(`Error running test suite: ${e.message}`)
}
finally {
await driver.quit();
}
})();
With line 15 fixed, rerun the script:
A successful Selenium Test
Success!
The above was a taste of what you can do with Selenium. You can even break out of the testing mindset and use Selenium for scraping and populating activity trackers.
On to the next tool.
Test Case 2 – Selenium IDE
While the previous test requires some programming ability, Selenium IDE is friendly to anyone who can drive a browser. The IDE version’s main use case is bug discovery, recording and profiling.
After you hit “Start Recording”, Selenium will launch a new Chrome window and redirect you to dev.to
Initial Dev.To Walkthrough with Selenium IDE
From the video, we:
Let the initial dev.to page load
Clicked on the “Log in” button
Clicked on the Selenium IDE extension
Stopped the Extension recording
Arrived at the Commands window below
Selenium testing properties loaded automatically
To continue our test scenario, let’s ensure that the page title is Welcome! - DEV Community and that our login attempt fails with an empty submission.
Again, I always like to have my tests fail first, so let’s start with that case. Use Selenium’s assert title command to ensure the title is what we expect. Add it to the command list:
Asserting the page title to fail
If you run the test, it should fail:
Example of a failed test
Let’s go ahead and fix it with the correct title and rerun the test:
Successful Title Check
And success! Now let’s add the login check:
Walking through a complete test to success.
To summarize the video, we:
Started a new recording
Hit the Log in button
Clicked Continue without supplying credentials
Used the Selenium element picker to pick out the element we were interested in asserting.
The Commands window should now look like this:
Added Command Check
Success!
The IDE version is the simplest to get started with and I recommend it for initial test write-ups. It can help you identify which elements you need to test against, think about app flow and what counts as a failure.
One question remains: Rendering the browser is nice, but I want to hook this into my continuous integration system. How can I do that when every test wants to load an application that requires a windowing system?
The answer is to go headless.
Test Case 3 – Puppeteer
Puppeteer is the perfect match to test web UI components inside a continuous integration system. It’s fast, headless, brings its own dependencies and runs the latest versions of Chrome and Firefox.
Let’s start by installing puppeteer on a new project:
mkdir tests
npm i puppeteer
Keep in mind that this automatically installs the chrome driver we had to manually download in the Selenium example. From Puppeteer’s documents:
When you install Puppeteer, it downloads a recent version of Chromium (~170MB Mac, ~282MB Linux, ~280MB Win) that is guaranteed to work with the API (customizable through Environment Variables).
https://pptr.dev/#installation
With that said, let’s create a test file that will run (and fail) our test scenario (puppeteer.js):
const puppeteer = require('puppeteer');
(async () => {
const browser = await puppeteer.launch({headless: false});
const page = await browser.newPage();
const loginSelector = 'a[href="/enter"]';
const submitLoginSelector = '[name="commit"]';
const errorBoxSelector = '.bad notice';
try {
await page.goto('https://dev.to');
await page.waitForSelector(loginSelector,{ timeout: 3000 });
await page.click(loginSelector);
const pageTitle = await page.title();
if (pageTitle !== 'Welcome! - DEV Community'){
throw new Error(`Page title ${pageTitle} does not match expected value`);
}
await page.waitForSelector(submitLoginSelector,{ timeout: 3000 });
await page.click(submitLoginSelector);
await page.waitForSelector(errorBoxSelector,{ timeout: 3000 });
}catch(e){
console.error(`Error in test suite: ${e.message}`)
}finally {
await browser.close();
}
})();
Failed test due to incorrect error box selection
Some notes on the above code:
Lines 6-8 are Puppeteer’s method of selecting elements on the page.
Like Selenium WebDriver, you have to manually check a page’s attributes and decide on what to do should they fail
In the above code it’s line 15, asserting the title matches the expected value
It’ll also implicitly fail on line 20, due to the error div class not matching what dev.to sends to the browser.
I’ve disabled the headless feature to show that Puppeteer lets you do that!
Let’s fix the test. Change it to the correct value *and* turn on headless mode:
const puppeteer = require('puppeteer');
(async () => {
const browser = await puppeteer.launch({headless: true});
const page = await browser.newPage();
const loginSelector = 'a[href="/enter"]';
const submitLoginSelector = '[name="commit"]';
const errorBoxSelector = '.registration__error-notice';
try {
await page.goto('https://dev.to');
await page.waitForSelector(loginSelector,{ timeout: 3000 });
await page.click(loginSelector);
const pageTitle = await page.title();
if (pageTitle !== 'Welcome! - DEV Community'){
throw new Error(`Page title ${pageTitle} does not match expected value`);
}
await page.waitForSelector(submitLoginSelector,{ timeout: 3000 });
await page.click(submitLoginSelector);
await page.waitForSelector(errorBoxSelector,{ timeout: 3000 });
}catch(e){
console.error(`Error in test suite: ${e.message}`)
}finally {
await browser.close();
}
})();
Now rerunning the test simply gets you the empty prompt:
I’ve gone through three different sets of tools for different needs. The best part about these tools is that you can string them all together or pick and choose the ones that are right for you.
I hope the main takeaway is the same: Testing can be painless and even fun!