Write Integration Tests Using Mailsac

Mailsac has a REST API that can be leveraged to validate emails are being received with the correct contents. This can be useful for web applications that send customized emails to customers.

This example will demonstrate how to send an email via an SMTP server and validate the email was received. The code used in this example is available on GitHub.

Setup Project Directory

Node version 12 or greater is required for this example due to the use of async and await.

Begin by creating a directory for the project.

mkdir mailsac-tests
cd mailsac-tests
npm init # enter project information, for test command use 'mocha'

Verify package.json looks something like this. The most important part is "scripts": { "test": "mocha" }

{
  "name": "mailsac-integration-tests",
  "version": "1.0.0",
  "description": "",
  "main": "index.js",
  "directories": {
    "test": "test"
  },
  "scripts": {
    "test": "mocha"
  },
  "author": "",
  "license": "ISC"
}

Installing a Test Framework

The test framework for this example is Mocha. It is a test framework for Javascript applications. A test framework will allow us to write tests against our code.

Setup Test Directory

These directions are inspired by the Mocha Getting Started Guide.

cd mailsac-tests
npm install --save-dev mocha
mkdir test
$EDITOR test/test.js # or open with your favorite editor

Write a Test to Test For Truth

This section is for people who are new to Mocha and test frameworks. Skip ahead if you know how to write tests.

Mocha follows a Behavior Driven Development (BDD) model of testing. This allows for human readable descriptions of software behavior. The first line of the code shows exactly what the following tests will test (ie describe("tests truth"). The following lines state the expected outcome of the test (ie it(true equals true).

This test uses Node’s built in assert. The first parameter passed to assert() is checked for true. If it is true, the assert passes. If the value is false, it throws an exception. In this example, we assert that true is true and that false is equal to false.

Create a describe block in test/test.js
describe("tests truth", () => {
    it('true equals true', function() {
        assert(true); // assert checks for truth
    });
    it('false equals false', () => {
        // assert equal checks the first and second parameter are equal
        assert.equal(false,false);
    });
})

This code can be run and the test should pass. Run the test with npm test . Confirm the test passed.

Congratulations! You have a working test.

Write an Integration Test

In this example, an email will be sent to Mailsac using the ubiquitous Javascript SMTP library NodeMailer, then the test framework will call Mailsac to validate that the email was received.

Install Dependencies

There are a few Node modules that will make sending an email and interacting with the Mailsac REST API easier. NodeMailer will be used to send the email via SMTP. SuperTest will be used to call the Mailsac API.

npm install

Integration Test Example

Back in the text editor, open / create the file test.js in the test folder. Copy and paste the following code or see GitHub for the complete example.

Import required modules
const assert = require("assert");
const nodemailer = require("nodemailer");
const request = require("supertest");
Configure SMTP settings and Mailsac Credentials
// Generated by mailsac. See https://mailsac.com/api-keys
const mailsacAPIKey = "";
// Mailsac email address where the email will be sent
const mailsacToAddress = "example@mailsac.com";
// Username for smtp server authentication
const smtpUserName = "";
// Password for smtp server authentication
const smtpPassword = "";
// hostname of the smtp server
const smtpHost = "";
// port the smtp is listening on
const smtpPort = 587;
Create wait Function

The test will contact the Mailsac API multiple times while waiting for the email to arrive. This function will be used later in a for loop while waiting for the email to arrive.

const wait = (millis) => new Promise((resolve) => setTimeout(resolve, millis));
Add a Describe block with Timeout and Test Cleanup

The describe callback describes in human readable terms what the test is going to do. The increased timeout is required because the default timeout for Mocha is 2 seconds. The test email will likely not arrive that quickly. The afterEach section is used to delete all messages after the test runs. This prevents a leaky test.

describe("send email to mailsac", function () {
  this.timeout(50000); // test can take a long time to run. This increases the default timeout for mocha

  /* delete all messages in the inbox after the test runs to prevent leaky tests.
       This requires the inbox to private, which is a paid feature of Mailsac.
       The afterEach section could be omitted if using a public address
    */
  afterEach(() =>
    request("https://mailsac.com")
      .delete(`/api/addresses/${mailsacToAddress}/messages`)
      .set("Mailsac-Key", mailsacAPIKey)
      .expect(204)
  );
});
Add it block and NodeMailer Configuration

The it interface describes what the test will do "sends email with link to example.com website“. The transport variable is used to store the configuration of the SMTP server.

result = await transport.sendMail({… Attempts to send the email and capture the result.

describe("send email to mailsac", function () {
...

  it("sends email with link to example.com website", async () => {
    // create a transporter object using the default SMTP transport
    const transport = nodemailer.createTransport({
      host: smtpHost,
      port: smtpPort,
      auth: {
        user: smtpUserName,
        pass: smtpPassword,
      },
    });
    // send mail using the defined transport object
    const result = await transport.sendMail({
      from: smtpUserName, // sender address
      to: mailsacToAddress, // recipient address
      subject: "Hello!",
      text: "Check out https://example.com",
      html: "Check out <a href https://example.com>My website</a>",
    });

    // logs the messageId of the email, confirming the
    // email was submitted to the smtp server
    console.log("Sent email with messageId: ", result.messageId);
});
Add Loop to Check Mail

This section of code uses a for loop and a http library (supertest) to check if the message has arrived at Mailsac. The test uses the Mailsac API endpoint /api/addresses/{email}/messages which lists all messages in an inbox.

describe("send email to mailsac", function () {
...

  it("sends email with link to example.com website", async () => {
...
    // Check email in the inbox 10x, waiting 5 secs in between. Once we find mail, abort the loop.
    let messages = [];
    for (let i = 0; i < 10; i++) {
      // returns the JSON array of email message objects from mailsac.
      const res = await request("https://mailsac.com")
        .get(`/api/addresses/${mailsacToAddress}/messages`)
        .set("Mailsac-Key", mailsacAPIKey);

      messages = res.body;
      if (messages.length > 0) {
        break;
      }
      await wait(4500);
    }
  });
});
Add Assertion to Check for Link in the Message

assert is used twice. First, to check to see if any messages were fetched from the Mailsac inbox. This checks the length of the messages array to see if any messages were received. The second assert is used to check for a link to http://example.com .

describe("send email to mailsac", function () {
  // ...
  it("sends email with link to example.com website", async () => {
    // ...
    let messages = [];
    for (let i = 0; i < 10; i++) {
      // ... await get messages from mailsac
    }
    assert(messages.length, "Never received messages!");

    // After a message is retrieved from mailsac, the JSON object is checked to see if the link was parsed from the email and it is the correct link
    const link = messages[0].links.find((l) => "https://example.com");
    assert(link, "Missing / Incorrect link in email");
  });
});
Run Test

At this point the test code is complete and can be run using npm test. If all went well the following output is written to the console.

npm test

Run Test Using GitHub Repository

If you are having some trouble with the tests, I recommend downloading the code from GitHub and running it.

git clone https://github.com/mailsac/mailsac-integration-test-examples.git
cd mailsac-integration-test-examples
npm install
$EDITOR test/test.js # or open with your favorite editor

Edit the test.js and fill in your SMTP settings and Mailsac API key

const mailsacAPIKey = ""; // Generated by mailsac. See https://mailsac.com/api-keys
const mailsacToAddress = "example@mailsac.com"; // Mailsac email address where the email will be sent
const smtpUserName = ""; // Username for smtp server authentication
const smtpPassword = ""; // Password for smtp server authentication
const smtpHost = ""; // hostname of the smtp server
const smtpPort = 587; // port the smtp is listening on

Run test running the command npm test in your terminal.

Next Steps

The example above can be used as part of your team’s quality assurance process. A real world example would be validating password reset links to customers. This test could be used to validate that when a customer requests a password reset an email is sent to them containing the correct password reset link.

If you have any questions about this example or want to talk about other implementations reach out to our community at https://forum.mailsac.com .

Multi-User Login using API Credentials, For Team Collaboration

Update: April 2021 – Multi-User login is now called “Sub-Accounts”

Named API Keys can now be used as website authentication.

Custom domains and Private Addresses have been great for quality assurance teams to conduct end to end automated testing of email. But sometimes interacting with an REST API can be a lot of overhead for non-repeating tasks. API Credentials can now be used to login to the website.

All private addresses and custom domains associated with the primary account will be visible from the website for API users. The permissions for API users are the same as API keys.

Quality assurance teams often share credentials of test accounts for the web application they are testing. These test accounts might to be associated with an email provisioned by their IT department or the QA tester’s personal email. Mailsac private domains allow the test accounts to be created in an an environment all members of the QA team have access to.

This feature allows teams to work together in the Mailsac platform. There is no longer a need to for each person to have their own Mailsac account. A named API Key can be created for each person. That API key can be used to interact with the REST API and the website. As a result, password resets and transaction emails sent to a Mailsac private domain can be accessed by any member of the QA team.

“Internally we have used Mailsac for collaboration. Being able to share a private address or domain allows my team members to see exactly what I am seeing. This feature allows our customers to do the same with their own private domains and addresses” Michael Mayer – Member – Forking Software LLC

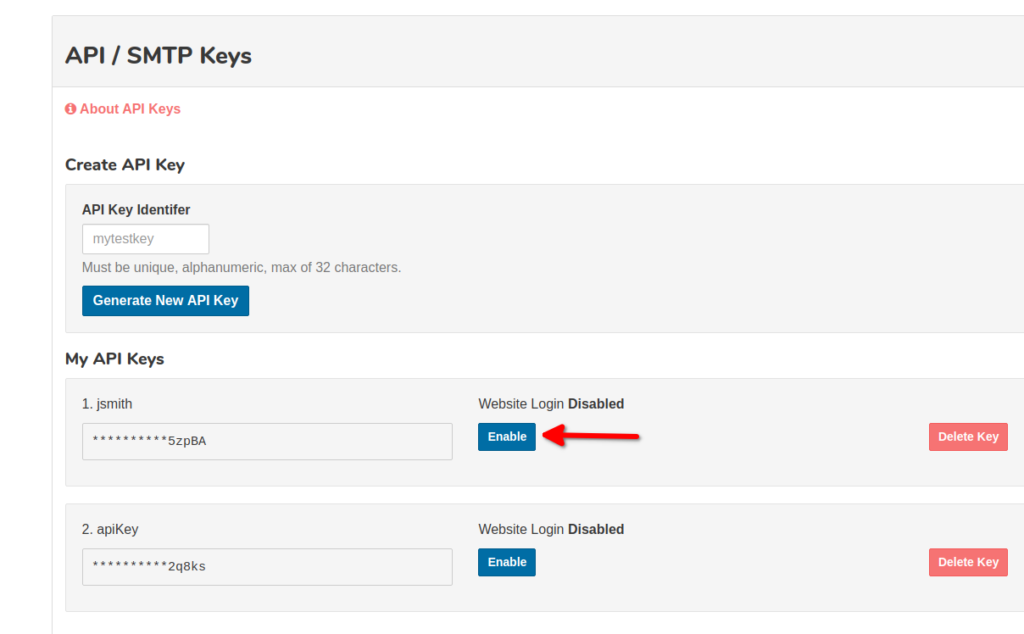
Getting started is as easy as provisioning a new set of API credentials and enabling the website login on the API Key. This can be done the the Dashboard and selecting API Credentials & Users

Enable Website Login

We will be rolling this feature out to our Business and Enterprise Plans in the next couple weeks. If you have an immediate need for this feature we can enable it on your account. Contact support@team.mailsac.com to get early access to this feature on you Business or Enterprise Plan.

Using Mailsac for Shared QA Email Accounts

When building software-as-a-service, several pre-production environments are often in play.

Developers, product managers, and QA engineers work together to test software in the various environments.

But there’s confusion around which user accounts can be used in which environments. Which accounts have the right permissions for testing. And your test environments environments don’t map 1:1 with 3rd party services. It’s confusing to know if you tested the right thing.

Mailsac lets you create disposable email accounts within a private custom. Temp email addresses to share with the team. This results in less effort keeping testing environment accounts separate. It prevents user collisions with third party providers.

Common Environment Setup Example

A QA team may have a test environment called “UAT” and developers have a different test environment called “Staging.”

The infrastructure might map to URLs with different subdomains like:

  • uat.example.com – QA team
  • staging.example.com – Developers
  • app.example.com – Production (customers)

where each subdomain has a completely separate database with a users table.

However, our sample app uses a 3rd identity provider (such as Amazon Cognito, Forgerock, Auth0, etc). The identity provider only has two environments:

  • test-identity.example.com – All non-production usage (UAT, Staging)
  • identity.example.com – Production (customers)

Furthermore, our app uses Stripe, which also has only two environments:

  • Stripe Test Mode – All non-production usage (UAT, Staging)
  • Production Mode – Production (customers)

One can imagine a users database table with the following properties:

  • users.id int, primary
  • users.email text, unique
  • users.identity_provider_id text, unique, corresponds to the Identity Provider
  • users.stripe_customer_id text, unique, corresponds to the Stripe Customer ID

Such a setup is common. Problems begin brewing when using the same email address in multiple environments.

Password issues with shared email addresses

A QA person wants to test their app. They sign up with alice@example.com in UAT. alice@example.com was created by a friendly sysadmin at their company. It is a real email inbox. The company has to pay a few bucks per month for the inbox, and it isn’t easily accessible by anybody else. Where’s that password again? Oh you asked Dave from IT to reset the email password? Oh you mean the UAT app password was changed only? The new password should be in a spreadsheet..oops somebody reset it and didn’t update the password? It doesn’t look like I have access to the alice@example.com inbox. Wait a second..the Dev team is also using it?

Identity Provider Clash, Stripe duplicate

UAT person uses alice@example.com and creates the user account with the Identity Provider, linking the identity_provider_id to their user in UAT. They also link the Stripe customer.

idemailidentity_provider_idstripe_id
22alice@example.comidp_q7e4cus_t6n
UAT users table

But then a developer in Staging attempts to perform the action but gets blocked by the identity provider, and duplicates the customer in Stripe with the same email address, making the tracking of financial transactions overly complicated. UAT and Stating also end up with a different user id.

idemailidentity_provider_idstripe_id
19alice@example.comNULL (failed)cus_yb1
Staging users table

It is possible the same password is used for alice@example.com with the identity provider, and both UAT and Development are able to login. But the identity_provider_id will need to be manually set to match both environments, and it will never match the users.id column.

Let’s add one more common layer: role based permissions.

Developer 1 sets up alice@example.com to

These are just a few of the problems with using a limited number of shared credentials for testing software.

Using Mailsac for Test User Accounts

A software team and QA team can share the Mailsac Business account to add nearly unlimited email addresses, and apply special features to up to 50 private address across 5 custom domains (and more via addons). Mailsac allows any custom subdomain of *.msdc.co, it may not even be necessary to involve an IT department to configure DNS.

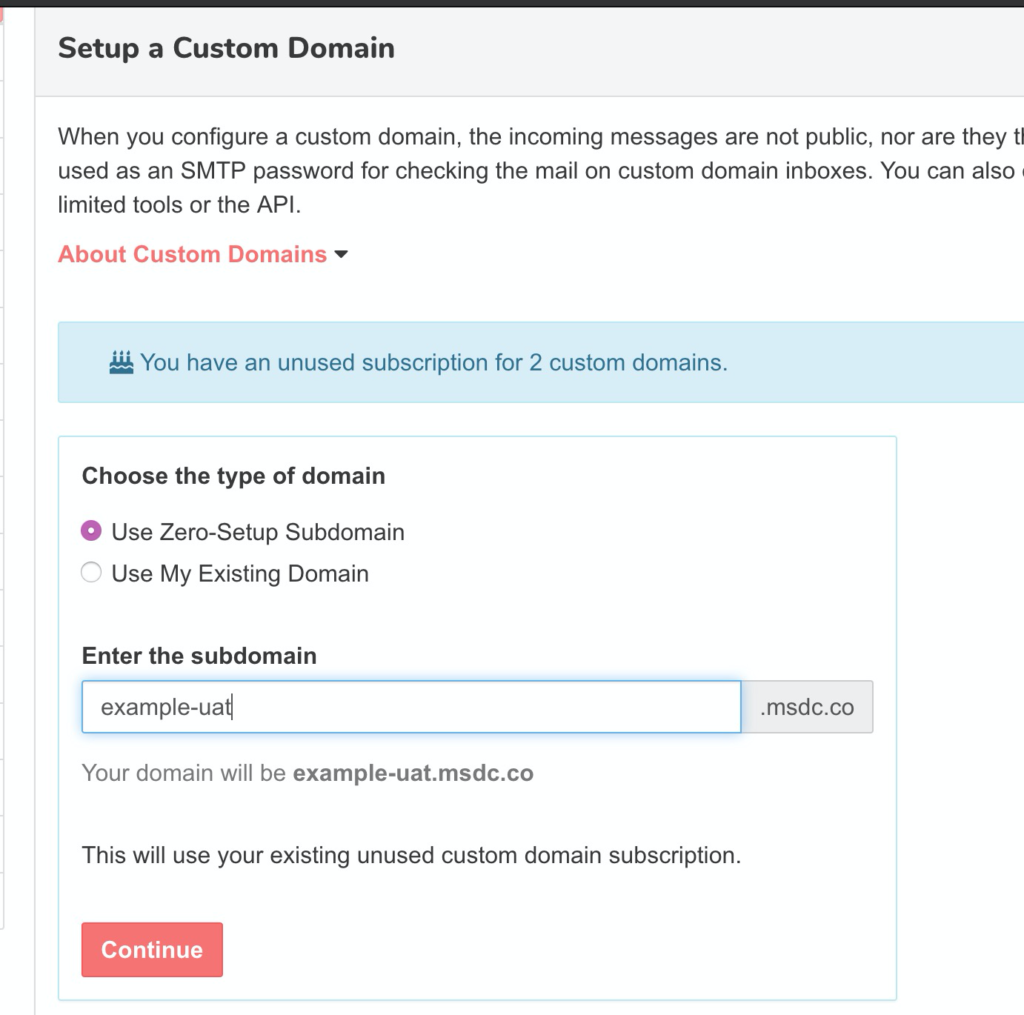
QA team sets up example-uat.msdc.co.

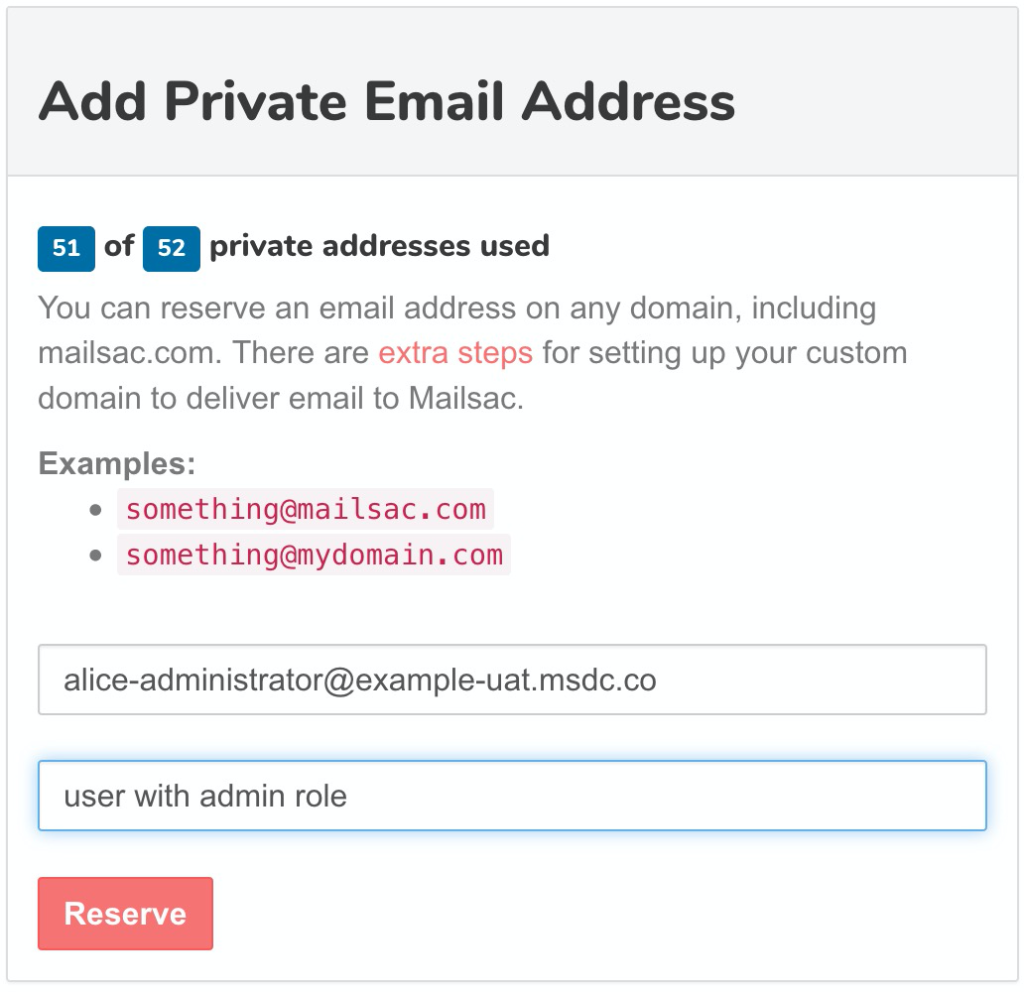
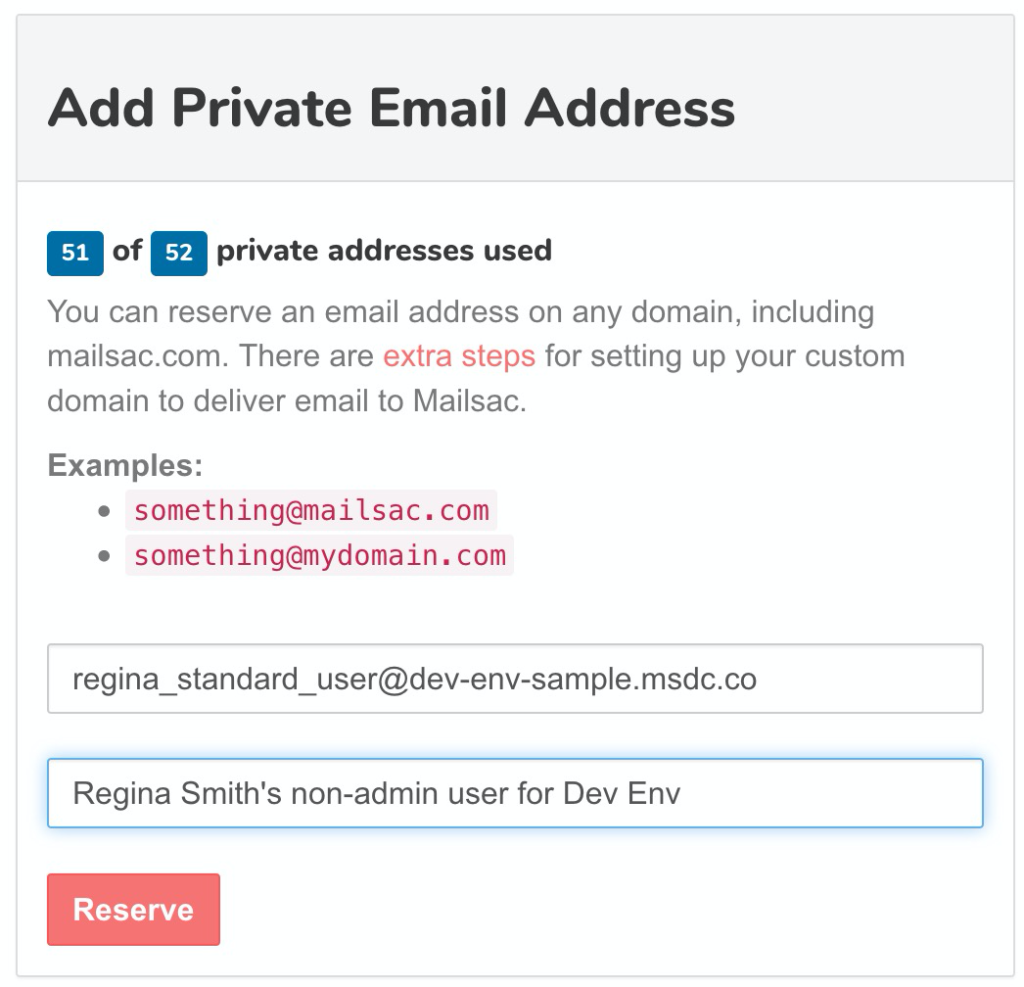
The QA team will create 10 private addresses with specific purposes such as a user they will configure in uat.example.com with elevated admin permissions:

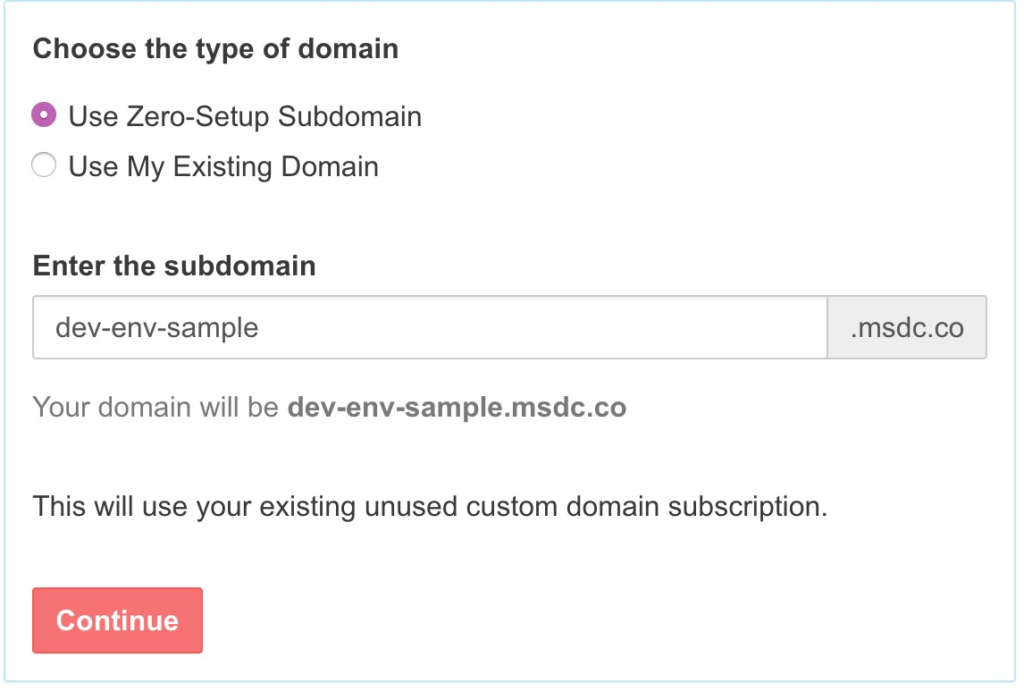
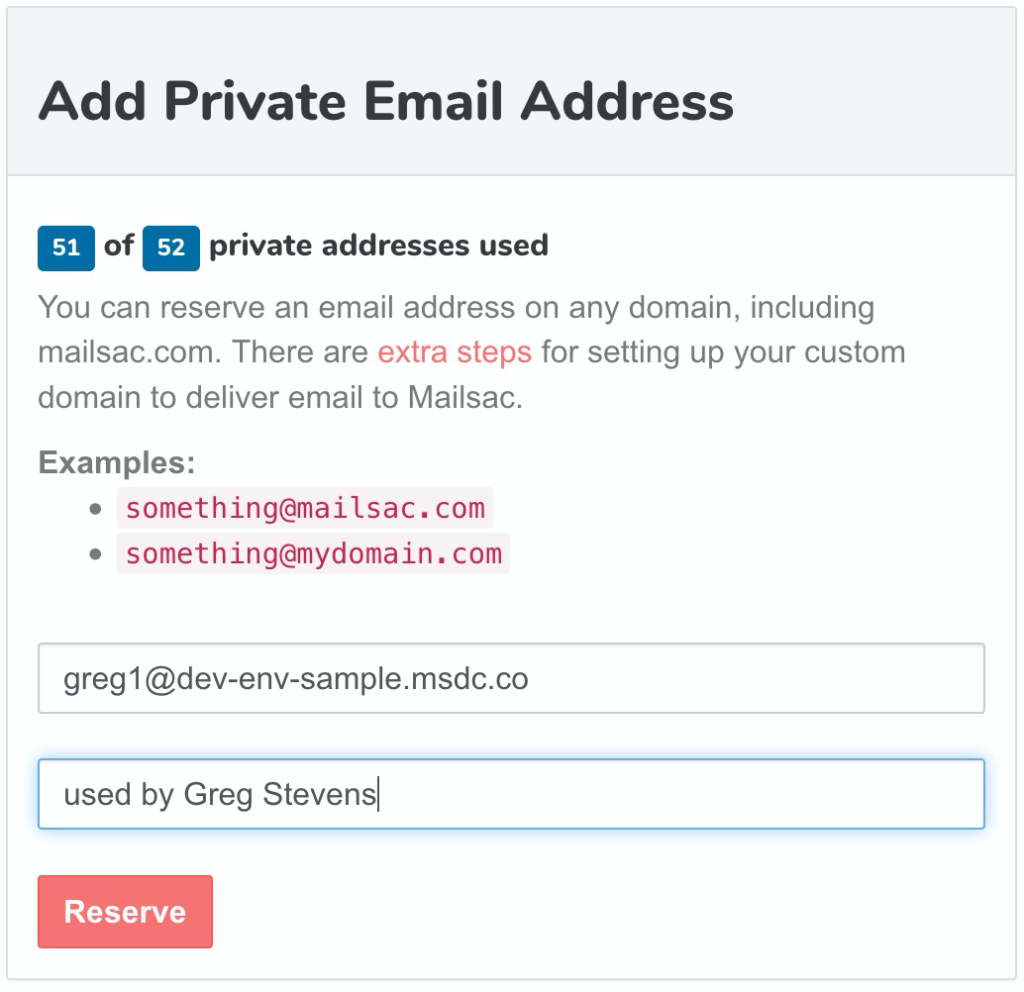
Next the Dev team, can do something similar but with a different custom domain, and different private email addresses.

Setting up a bunch of private addresses is simple and included with any paid plan. It can help prevent test credential collisions.

Random Inboxes and API Keys

It is not even necessary to setup private addresses, as done above, to receive email.

With a custom domain, any Developer or QA person can send email to any address in the domain without needing to create it first. Then they can check the mail with a personal API key.

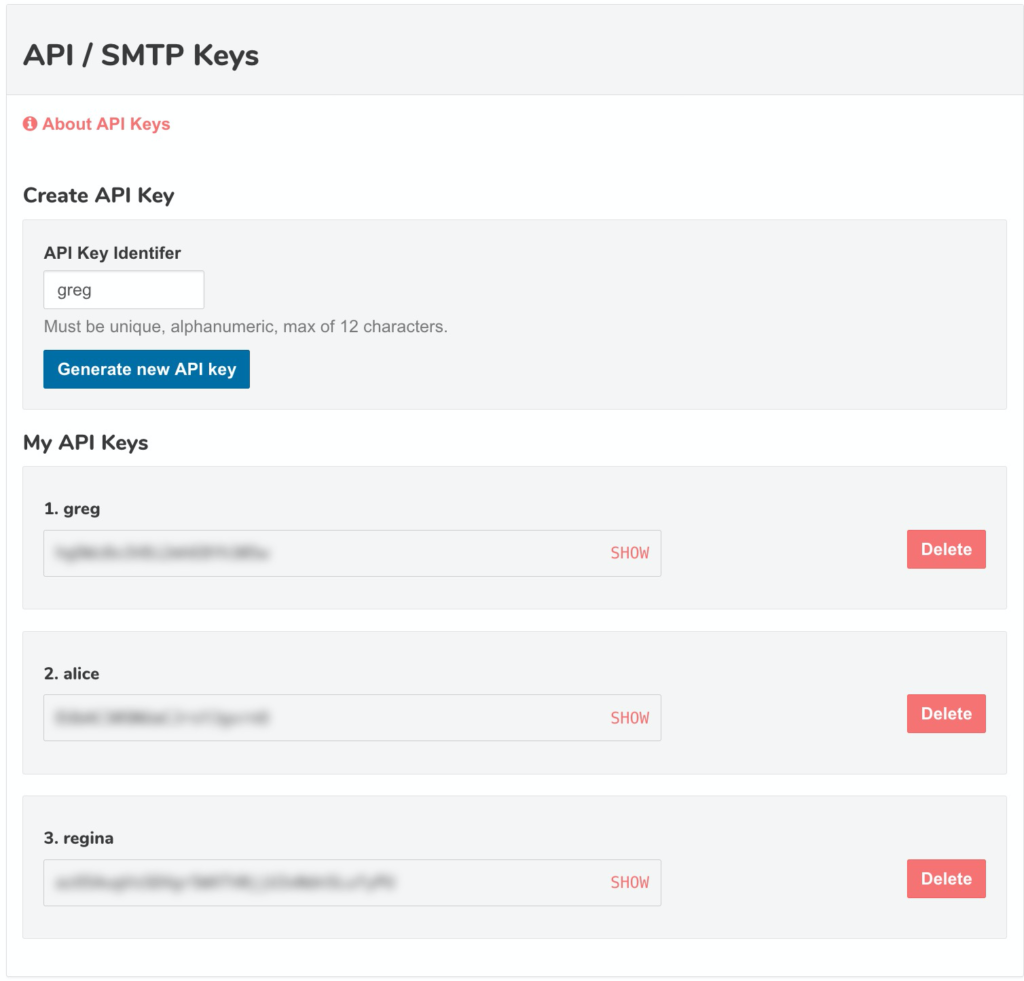
The Business Plan allows creating multiple custom API keys:

API Key management in Mailsac

To make a random address, generate a random string:

openssl rand -hex 4 yields de692e19 (for example)

and prefix it to your custom domain:

de692e19@dev-env-sample.msdc.co

Assume Greg’s API key is: wv6OCCXE4svjxuv7sOsCBA (note: never share these!)

He can easily check the inbox using the following URL scheme:
https://mailsac.com/inbox/de692e19@dev-env-sample.msdc.co?_mailsacKey=wv6OCCXE4svjxuv7sOsCBA

Or get messages as JSON:

curl --header 'Mailsac-Key: wv6OCCXE4svjxuv7sOsCBA' https://mailsac.com/api/de692e19@dev-env-sample.msdc.co/messages

which returns an array of messages including any links to be clicked.

[{
  "_id": "m77238f-0",
  "inbox": "de692e19@dev-env-sample.msdc.co",
  "subject": "Confirm your account or something",
  //.........
  "links": ["https://app.example.com/confirm-account/iOZifOYkLX5qFfEo"]
}]

Concluding remarks

We hope this guide provides an overview of how software teams are using Mailsac to simplify testing.

Thousands of enterprises and software project teams use Mailsac to test their environments and manage “known good” test accounts for their SaaS.

Start for free instantly