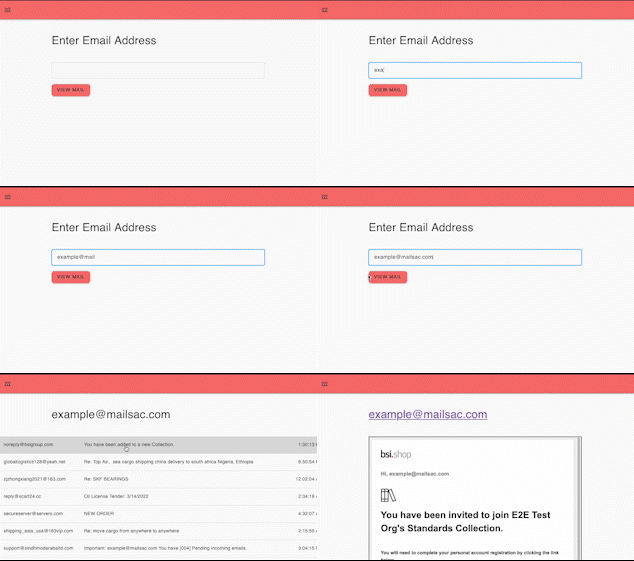
This tutorial references code published at https://github.com/mailsac/mailsac-self-hosted-ui
The Mailsac Self-Hosted Temporary Email User Interface is available in a GitHub repository. This project provides a self-hosted user interface for viewing disposable email. It uses mailsac.com as the backend email service.

Mailsac.com Limitations
Mailsac already offers disposable email without a need to sign up for an account. What need does this application meet that Mailsac doesn’t already provide?
Mailsac has limitations on what can be viewed without signing up for an account. Only the latest email in a public mailbox can be viewed without signing in. Mail in a private domain cannot be viewed without signing in with an account that has permissions to the private domain.
Use Cases
There are two use cases that customer’s have brought to our attention that Mailsac’s service doesn’t satisfy. Both stem from a requirement to allow users read-only access to an inbox without the requirement of creating a Mailsac account.
Class Room Use Case
An instructor may want students, who are young in age and don’t have an email address, to sign up for an account with a web service used in the class. The Mailsac Self-Hosted Temporary Email User Interface application provides a simplified interface for students to view email sent to a private mailsac hosted domain without the need to sign up for a mailsac account or email address.
Acceptance Tester Use Case
As part of the sofware development lifecycle there is a need to have software tested by users. Temporary email has long been beneficial to testing. The Mailsac Self-Hosted Temporary Email User Interface makes this easier. Users can test applications using email addresses in a Mailsac hosted private domain without the need to sign up for a Mailsac account. Furthermore, because the application is self-hosted companies can use a reverse proxy to enforce IP allow lists or put the application behind basic authentication.
Running the Mailsac Self-Hosted Email User Interface
Local
With NodeJS installed this application can be run with the following commands.
npm install && npm run build
MAILSAC_KEY=YOUR_MAILSAC_API_KEY npm run start
You will need to generate a Mailsac API key. To generate or manage API Keys use the API Keys page.
The application is now running and can be accessed via a web browser at http://localhost:3000 .
Any public or private Mailsac hosted address the API key has access to can be viewed by entering the email address in the text box and selecting “view mail”.

Domain Option
You can prepopulate the domain by using the NEXT_PUBLIC_MAILSAC_CUSTOM_DOMAIN environment variable.
NEXT_PUBLIC_MAILSAC_CUSTOM_DOMAIN=example.mailsac.com npm run build
MAILSAC_KEY=YOUR_MAILSAC_API_KEY npm run start

Vercel Hosted
Vercel is a platform as a service provider. Their service makes running your own Next.js application easy.
The Vercel Getting Started guide is easy to follow.
- Fork this repo.
- Sign up for a Vercel account
- Grant Vercel permissions to read all your repos or choose to grant permission on the forked repo
- Import forked repository into Vercel

- Configure
MAILSAC_KEYenvironment variable

- Deploy application

After a successful deployment you can click on the image of the application to be taken to the live application.
NOTE There is currently no authentication on this application. Anyone with the URL will be able to view emails and domains associated with the Mailsac API key that was used. Operations will be tracked in the Mailsac account in which the API key is associated with.
You are free to deploy this app however you like. Please keep the attribution to Mailsac.